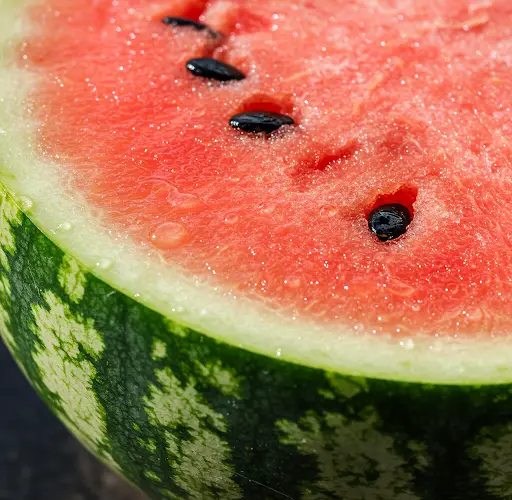
How to Grow Watermelon at Home – An Easy Guide for Beginners
Watermelon is a beloved summer fruit known for its juicy sweetness and refreshing crunch. The good news is—you don’t need a large farm to grow it. With a little planning, the right setup, and some care, you can successfully grow watermelons at home, even in a small backyard or large containers.
This guide walks you through each step of the process, from selecting seeds to harvesting ripe, delicious melons. It’s perfect for beginners who want to enjoy homegrown fruit with minimal fuss.
Why Grow Watermelon at Home?
Growing watermelon at home has several benefits. You’ll have full control over the growing environment, meaning fewer chemicals and fresher fruit. Plus, it’s a rewarding gardening experience—watching tiny vines transform into massive, juicy fruit is both satisfying and fun, especially for families with children.
Although watermelon vines can take up space, there are compact varieties and clever growing methods (like vertical trellising or using containers) that make it possible even for those with limited gardening areas.
Choosing the Right Variety
Before planting, choose a watermelon variety suitable for your space and climate. Here are a few options:
-
Sugar Baby – Small, round, and matures quickly. Ideal for containers.
-
Crimson Sweet – Medium-sized with excellent flavor.
-
Charleston Gray – A traditional, large melon for warm climates.
-
Mini Love – A compact hybrid variety perfect for patios and raised beds.
Choose disease-resistant varieties when possible, especially if you’re growing in a humid area prone to mildew or fungus.
What You’ll Need
-
Watermelon seeds or seedlings
-
Well-draining soil or potting mix
-
Large containers (minimum 18 inches deep), raised beds, or garden space
-
Compost or organic fertilizer
-
Trellis or support (optional)
-
Mulch
-
Watering can or hose with gentle nozzle
Step 1: Prepare the Soil or Containers
Watermelon thrives in well-draining, fertile soil with a slightly acidic to neutral pH (6.0–7.0). If planting in the ground, choose a sunny location that gets at least 6–8 hours of direct sunlight daily.
Enrich the soil by mixing in compost, aged manure, or organic fertilizer before planting. For containers, use a high-quality potting mix blended with compost. Make sure the container has drainage holes to avoid root rot.
Step 2: Planting Seeds or Seedlings
Watermelons can be planted directly from seed or started as seedlings indoors 2–4 weeks before the last frost date.
Direct planting:
-
Create small hills or mounds about 3 feet apart.
-
Sow 2–3 seeds per mound about 1 inch deep.
-
Water gently and keep the soil moist.
Transplanting seedlings:
-
Harden them off by placing outdoors for a few hours each day over a week.
-
Transplant to mounds or containers once all risk of frost has passed.
If you’re short on space, you can grow vertically. Place a sturdy trellis behind the planting area and train vines upward. Use slings (e.g., mesh or cloth) to support developing fruits.
Step 3: Watering and Fertilizing
Watermelons require consistent watering, especially during flowering and fruit development. Keep the soil evenly moist but avoid waterlogging.
Tips:
-
Water early in the morning to minimize evaporation.
-
Use mulch to retain moisture and suppress weeds.
-
Avoid overhead watering to reduce fungal risk—direct water at the base.
Feed plants every 2–3 weeks with an organic liquid fertilizer, compost tea, or a balanced slow-release fertilizer. Once fruits begin to form, switch to a fertilizer higher in potassium and phosphorus.
Step 4: Pollination and Fruit Development
Watermelon plants have both male and female flowers. Bees and other pollinators transfer pollen, so avoid using harsh pesticides that may harm them.
You can also hand-pollinate if pollinator activity is low:
-
Use a small brush or cotton swab to transfer pollen from the male flower (with no small fruit behind it) to the center of the female flower (which has a tiny melon beneath the petals).
As the fruits grow, place them on a soft surface (like straw or cardboard) to prevent rotting from ground contact.
Step 5: Harvesting Your Watermelons
Most watermelon varieties mature in 70 to 90 days from planting. Here’s how to tell when they’re ready:
-
The tendril closest to the fruit turns brown and dries up.
-
The underside of the melon develops a creamy yellow spot.
-
The fruit sounds hollow when tapped.
Cut the melon from the vine with a sharp knife or shears. Leave a small piece of the stem attached for better storage.
Additional Tips for Success
-
Avoid overwatering as fruits begin to mature—too much moisture can dilute flavor and split the rind.
-
Rotate crops each year to reduce the risk of soil-borne diseases.
-
Control pests like aphids or cucumber beetles with natural remedies such as neem oil or insecticidal soap.
Conclusion
Growing watermelon at home is easier than many gardeners think. With a bit of space, sunshine, and care, you can enjoy your very own juicy, homegrown melons. Whether you’re growing in the ground or in a container, this sweet and satisfying fruit is a wonderful addition to any home garden.
Try it this season—you might be surprised at how productive even one plant can be!


