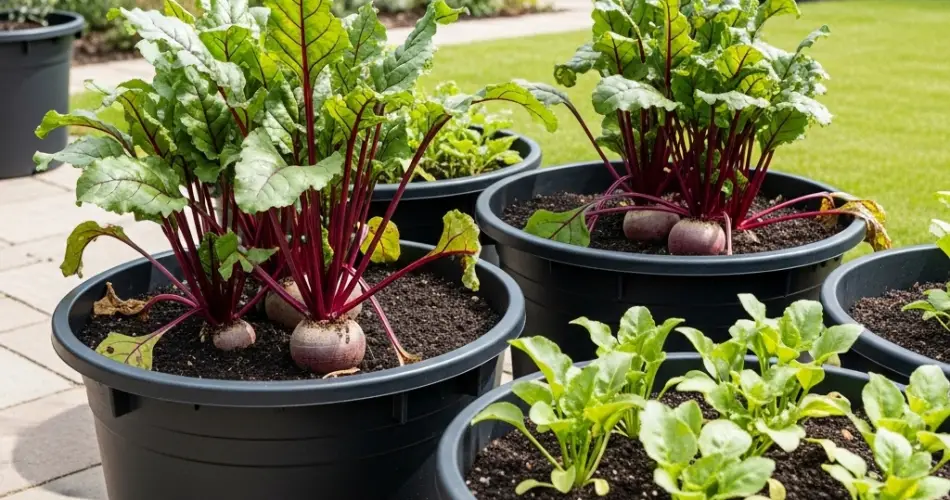
Beets are one of the most rewarding root crops to grow at home. Not only do they produce sweet, earthy roots, but their leafy green tops are also highly nutritious and delicious when cooked or eaten raw. While many people associate beets with large backyard plots, these colorful vegetables grow exceptionally well in containers—making them perfect for patios, balconies, and small-space gardens.
Container gardening allows you to manage soil quality, moisture, and sunlight more effectively while enjoying fresh, homegrown produce. With the right setup and a little care, you can harvest sweet beets in just a few weeks.
Why Grow Beets in Containers?
Beets are ideal for container growing because they don’t require a large footprint. Their roots grow downward and not outward, and they adapt well to confined environments as long as the soil is deep and loose.
Benefits of growing beets in containers include:
-
Space-saving – Ideal for urban gardeners and those with limited yard space
-
Soil control – You can tailor the soil to be just right for root development
-
Portability – Easily move containers to maximize sun exposure or avoid harsh weather
-
Pest reduction – Less prone to soil-borne pests compared to in-ground planting
What You’ll Need
Before planting, gather the following supplies:
-
Containers at least 10–12 inches deep and wide (with drainage holes)
-
Beet seeds (choose fast-growing or sweet varieties like ‘Detroit Dark Red’ or ‘Chioggia’)
-
High-quality potting mix enriched with compost
-
Watering can or hose with a gentle spray setting
-
Organic fertilizer (optional)
-
Mulch such as straw or dried leaves (optional)
Step 1: Choose the Right Container
Beets require depth for their roots to form properly. Select containers that are at least 10 inches deep and have a similar width. You can use plastic pots, wooden boxes, grow bags, or even repurposed buckets—as long as they have good drainage holes at the bottom.
If you’re growing multiple plants, wide containers can accommodate several beets spaced evenly.
Step 2: Prepare the Soil
Beets prefer loose, well-draining soil rich in organic matter. Mix standard potting soil with compost or aged manure to improve fertility. Avoid soil with too much clay or debris, which can obstruct root development.
The ideal soil pH for beets is between 6.0 and 7.0. Fill your container, leaving about an inch of space from the rim for easy watering.
Step 3: Sow the Seeds
Beet seeds are actually seed clusters, meaning each “seed” may produce multiple seedlings. Sow seeds ½ inch deep and about 2 inches apart. If using a large container, create rows spaced 3–4 inches apart.
After sowing, gently water the soil until it’s evenly moist. Keep the container in a warm location with full sun exposure.
Germination typically occurs in 5–10 days, depending on temperature and moisture.
Step 4: Thin the Seedlings
Once the seedlings reach about 2 inches tall, thin them out by snipping the weaker ones at the base. Leave only one healthy seedling per cluster. Proper spacing—around 3–4 inches between plants—ensures enough room for the beet roots to expand.
You can use the thinned greens in salads or sauté them for a tasty snack.
Step 5: Provide Sunlight and Water
Beets thrive in full sun, so make sure your containers are placed in an area that receives at least 6 hours of sunlight daily. In very hot climates, providing light afternoon shade can help prevent the leaves from wilting.
Water the container regularly to keep the soil evenly moist but not soggy. Consistent moisture is especially important as the roots begin to swell. Irregular watering can cause beets to crack or become woody.
Step 6: Fertilize and Mulch (Optional)
If your soil is not rich in compost, feed your beet plants every 2–3 weeks with a balanced organic fertilizer. Avoid high-nitrogen fertilizers, which can promote leaf growth at the expense of root development.
Mulching the soil surface with straw, grass clippings, or dried leaves helps retain moisture and suppress weeds, making container maintenance easier.
Step 7: Monitor for Pests and Diseases
Container-grown beets generally face fewer pest issues, but it’s still good to watch out for aphids, leaf miners, and fungal diseases. Remove affected leaves promptly and use organic pest control methods, such as neem oil or insecticidal soap, if needed.
Step 8: Harvesting
Beets are typically ready to harvest 50–70 days after planting. You can check their progress by gently brushing away some soil at the base to see how large the roots are. Most varieties are best harvested when the roots are 1.5 to 3 inches in diameter for optimal tenderness and sweetness.
Use a small garden fork or simply pull them up gently by the base of the stems. Avoid yanking the greens too hard, as this can break the beet or damage the plant.
Don’t forget to harvest the leaves as well—they’re packed with nutrients and delicious when cooked or used in salads.
Final Thoughts
Growing sweet beets in containers is a practical and satisfying way to enjoy fresh, homegrown vegetables even if you’re short on space. With the right container, soil, and care, you can produce a healthy crop of beets with vibrant greens and flavorful roots.
This method is great for beginners and experienced gardeners alike. Whether you’re working with a balcony, patio, or a sunny windowsill, container-grown beets are a low-maintenance crop that offers both beauty and nutrition throughout the growing season.


