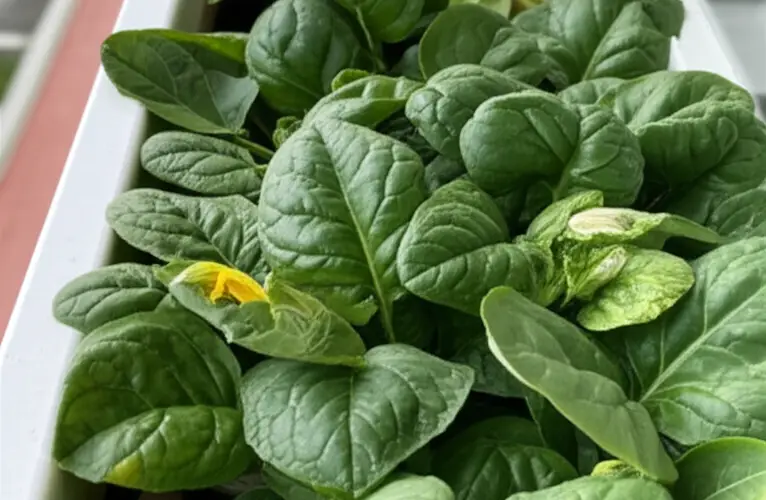
Spinach is a fast-growing, nutrient-rich leafy green that thrives even in small spaces—making it an ideal choice for urban gardening. Whether you have a tiny balcony or a narrow patio ledge, you can grow an impressive spinach crop with minimal effort. With its lush green foliage and quick harvest cycle, a pot of thriving spinach on your balcony will not only elevate your meals but might even spark curiosity (and envy) among your neighbors.
Here’s how to grow spinach on your balcony step-by-step for maximum results.
Why Grow Spinach on the Balcony?
Spinach doesn’t require much room or deep soil, and its shallow roots make it perfect for container gardening. It grows well in cooler temperatures, meaning you can enjoy fresh spinach in early spring and fall—or nearly year-round in mild climates.
Growing your own spinach also ensures that it’s free from pesticides and packed with flavor and nutrients. You get fresh, crispy leaves whenever you need them, whether it’s for salads, smoothies, or sautés.
Step 1: Choose the Right Container
Spinach doesn’t need deep containers, but it does need room to spread. Use a pot that’s at least 6–8 inches deep and 12–18 inches wide. Window boxes, trough planters, or rectangular balcony pots work especially well.
Make sure the container has drainage holes to prevent waterlogging. You can also line the bottom with a bit of gravel or broken pottery to aid drainage and reduce the risk of root rot.
Step 2: Select the Right Soil
Use loose, well-draining potting soil rich in organic matter. A mix that includes compost, peat moss or coconut coir, and perlite is ideal. Avoid garden soil, which can become compacted and restrict root development in containers.
Spinach prefers slightly acidic to neutral soil with a pH of 6.0 to 7.0.
Before planting, fill your container to just below the rim and lightly pat the surface to level it out.
Step 3: Pick the Best Spinach Variety
There are several spinach varieties to choose from. For balcony gardening, fast-growing and bolt-resistant types are ideal. Some popular choices include:
-
Bloomsdale: Heirloom variety with crinkled, flavorful leaves
-
Baby’s Leaf: Tender and ideal for cut-and-come-again harvesting
-
Space: Smooth-leafed and resistant to bolting
-
Matador: Tolerant to cold, perfect for early or late-season planting
Choose varieties based on your climate and how quickly you want to harvest.
Step 4: Planting the Seeds
Spinach grows well from seed. Sow seeds about ½ inch deep and 1–2 inches apart. Once seedlings grow their first true leaves, thin them out to give each plant around 4–6 inches of space.
You can also start new batches every couple of weeks for a continuous supply.
After sowing, water gently to moisten the soil. Keep the container in a semi-shaded spot until the seedlings emerge, then move it to a sunnier location.
Step 5: Light, Watering, and Temperature
Spinach prefers cooler temperatures (50–75°F / 10–24°C) and grows best with 4–6 hours of sunlight daily. Morning sun and afternoon shade work perfectly, especially in warmer climates. Too much heat can cause spinach to bolt (flower and go to seed), making the leaves bitter.
Water regularly to keep the soil evenly moist. Avoid letting the soil dry out completely. In containers, spinach can dry out quickly, so monitor the soil daily—especially on warm, windy balconies.
Adding a thin layer of mulch or straw helps retain moisture and keeps roots cool.
Step 6: Feeding and Maintenance
Spinach is a light feeder but appreciates a little help. Add compost or slow-release organic fertilizer when planting. Once plants are established, you can give them a diluted liquid fertilizer (like fish emulsion or compost tea) every two weeks for a nutrient boost.
Regularly remove any yellowing leaves and keep the area clean to prevent pests or disease.
Watch out for aphids or leaf miners. A gentle rinse or neem oil spray can help if needed.
Step 7: Harvesting Spinach
Spinach is ready to harvest within 30–45 days of planting. You can start harvesting baby leaves when they’re about 3 inches long, or wait for mature leaves.
Use the cut-and-come-again method: snip outer leaves first with scissors while leaving the inner leaves to keep growing. This allows for multiple harvests from the same plant.
If your plant starts to bolt (form a flower stalk), harvest all the leaves immediately—they’ll soon turn bitter.
Final Thoughts
Growing spinach on your balcony is a satisfying and efficient way to enjoy a continuous supply of fresh, organic greens at home. With the right container, a little sunlight, and consistent care, you can transform even the smallest outdoor space into a lush, edible oasis.
Your healthy, vibrant spinach plants won’t just nourish your kitchen—they’ll also add a splash of green beauty to your balcony. And don’t be surprised if your neighbors start asking for gardening tips!


