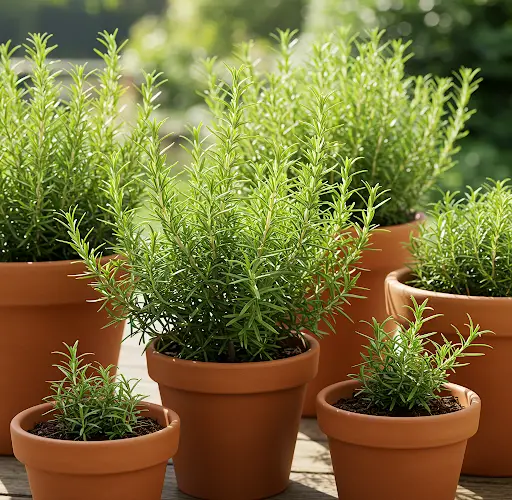
Rosemary is a beautiful, aromatic herb that adds flavor to a variety of dishes and brings a touch of greenery to any space. While it’s often grown from cuttings, growing rosemary from seed is a rewarding project for gardeners who are patient and love a challenge. With the right steps, you can successfully grow healthy rosemary plants in pots, whether you have a sunny kitchen windowsill, a balcony, or a patio.
Here’s a detailed guide to help you grow rosemary from seed in pots, from sowing to harvesting.
Why Grow Rosemary from Seed?
Growing rosemary from seed can take longer than propagating from cuttings, but it offers several benefits. You can cultivate many plants at once, which is ideal if you want to fill multiple pots or create a small herb garden. Growing from seed also gives you the opportunity to explore different rosemary varieties and enjoy the full growing experience from the very beginning.
What You’ll Need
-
Rosemary seeds
-
Seed-starting trays or small pots
-
Lightweight seed-starting mix
-
4–6 inch pots for transplanting
-
Large final pots (at least 12 inches wide)
-
Spray bottle or gentle watering can
-
Sunny window or grow lights
Step 1: Start Seeds Indoors
Rosemary seeds can be slow to germinate, sometimes taking 2–4 weeks, so it’s important to start early. Begin by filling seed-starting trays or small pots with a moist, lightweight seed-starting mix. Scatter a few rosemary seeds on the surface of the soil, then lightly press them down without covering them deeply—rosemary seeds need light to germinate.
Mist the soil gently with water to keep it moist but not soggy. Cover the trays or pots with a clear plastic dome or plastic wrap to create a humid environment.
Place the trays in a warm location with temperatures between 65–75°F (18–24°C). A heat mat can help maintain a consistent temperature and encourage faster germination.
Step 2: Care for Seedlings
Once seeds sprout, remove the plastic cover and place the seedlings in a bright, sunny location. Rosemary needs plenty of light to grow strong and healthy. If natural light is limited, supplement with a grow light for 12–14 hours a day.
Keep the soil lightly moist but avoid overwatering. Allow the surface of the soil to dry slightly between waterings to prevent damping-off disease, a common issue for young seedlings.
When the seedlings develop their first set of true leaves and are sturdy enough to handle, thin them out to leave only the strongest plant in each cell or pot.
Step 3: Transplant Seedlings
When seedlings are about 2–3 inches tall and have several sets of leaves, they are ready to move into larger pots. Choose pots that are 4–6 inches wide, with good drainage holes.
Fill the pots with a high-quality potting mix that drains well. A cactus or Mediterranean herb mix works well for rosemary. Carefully transplant the seedlings, being gentle with the roots.
Continue to keep the young rosemary plants in a sunny spot and water sparingly. Rosemary prefers to dry out between waterings rather than sitting in soggy soil.
Step 4: Move to Final Pots
As the plants grow larger and stronger, usually after a few months, transplant them into their final containers. Choose pots that are at least 12 inches wide to give the roots room to spread.
Use a well-draining soil mix, and consider adding a handful of sand or perlite to improve drainage if necessary. Rosemary thrives in slightly dry conditions, so make sure the pots are not sitting in saucers of water.
Position the pots in a location that receives at least 6–8 hours of sunlight daily. Outdoors, a sunny patio or balcony is ideal. Indoors, a bright south-facing window works best.
Step 5: Care and Maintenance
Water rosemary deeply but infrequently. Let the top inch of soil dry out between waterings. Overwatering is one of the most common causes of rosemary failure in pots.
Feed rosemary lightly during the growing season. An occasional dose of a balanced liquid fertilizer or organic herb feed will support healthy growth.
Prune regularly to encourage bushy, compact growth. Snipping a few sprigs for cooking not only provides fresh rosemary for your kitchen but also stimulates new shoots.
If growing outdoors, bring potted rosemary inside when temperatures drop below 30°F (-1°C), as rosemary can be sensitive to freezing weather.
Step 6: Harvesting Rosemary
You can begin harvesting once the plant is well-established and has plenty of healthy stems. Use sharp scissors or pruners to cut sprigs, selecting stems that are at least 6–8 inches long.
Harvest lightly at first to allow the plant to continue growing vigorously. Over time, regular light harvesting will keep the rosemary full and healthy.
Fresh rosemary can be used immediately or dried for long-term storage. Simply hang bunches upside down in a warm, dry, and well-ventilated area.
Final Tips
-
Be patient—rosemary can take a few months to mature from seed, but the results are worth it.
-
Provide as much light as possible, especially during the early growth stages.
-
Avoid heavy, water-retentive soils that can cause root rot.
-
Rotate the pots occasionally to encourage even growth if they are in a window.
Growing rosemary from seed in pots may take time and care, but it’s a rewarding process that can provide you with fragrant, flavorful herbs for years to come. With the right conditions and a little patience, you’ll be enjoying homegrown rosemary right at your fingertips.