Potatoes are a staple food in many households, and the satisfaction of harvesting your own is hard to beat. Fortunately, you don’t need a large field or expansive garden to grow them successfully. Rustic wooden containers provide an excellent, space-saving way to produce fresh, homegrown potatoes right on your balcony, patio, or backyard. With the right setup and care, you can enjoy an abundant harvest in a surprisingly small space.
This guide will walk you step by step through the process of growing potatoes in wooden containers, from choosing the right box to harvesting your crop.
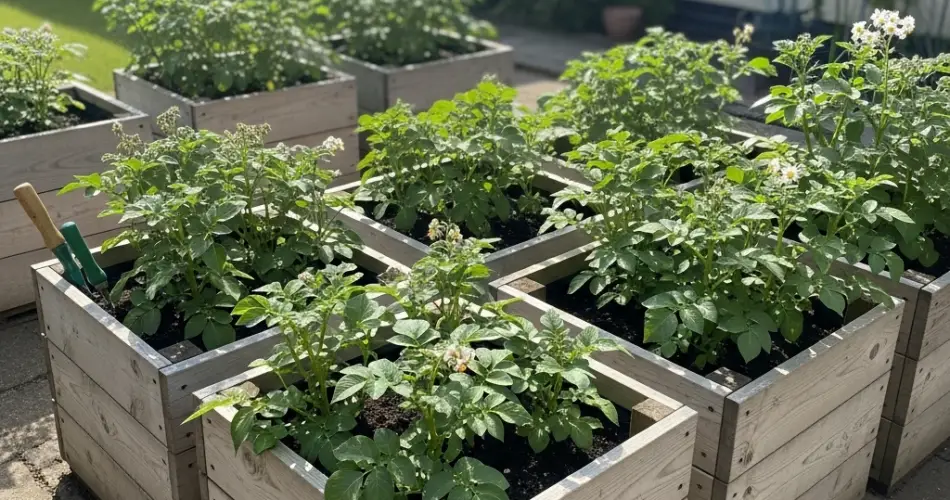
Step 1: Choose the Right Container
Potatoes need depth and space to develop their underground tubers. A rustic wooden container should be at least 16–18 inches deep and 14–16 inches wide. Larger boxes will yield more potatoes, but even a small box can produce a satisfying harvest.
Make sure your container has drainage holes in the bottom to prevent waterlogging. Untreated wood is the best choice, as it avoids chemical leaching into the soil. Cedar and pine are both durable and suitable for outdoor use. If you prefer a rustic look, repurpose an old wooden crate or box—just ensure it’s sturdy enough to hold soil and water.
Step 2: Select and Prepare Seed Potatoes
Potatoes are grown from seed potatoes, which are simply small potatoes or potato pieces with at least one “eye” or sprouting bud. Purchase certified disease-free seed potatoes from a garden supplier for best results, rather than using grocery store potatoes, which may carry diseases or have been treated with sprout inhibitors.
If your seed potatoes are large, cut them into pieces, each with two or three eyes. Allow the cut pieces to dry for a day or two before planting. This helps form a protective skin that prevents rotting once they are placed in the soil.
Step 3: Prepare the Soil
Potatoes prefer light, well-draining soil that is rich in organic matter. A good mix for container planting includes potting soil, compost, and a bit of sand or perlite for aeration. Avoid soil that is too heavy or compact, as it will hinder tuber growth.
Maintain a slightly acidic pH between 5.8 and 6.5. Adding compost improves fertility, while avoiding too much nitrogen ensures that the plant puts its energy into tuber production rather than excessive leafy growth.
Step 4: Planting the Potatoes
Begin by filling the bottom of your wooden container with 4–6 inches of soil. Place your seed potatoes on top with the eyes facing upward. Space them about 6 inches apart if planting more than one in the same container. Cover them with another 3–4 inches of soil.
As the potato plants begin to grow, you will add more soil in a process called “hilling.” This encourages the plant to produce more tubers along the buried stems, increasing your harvest.
Step 5: Hill the Plants as They Grow
Once the green shoots reach about 6 inches in height, add another 3–4 inches of soil around the base of the stems, leaving the top few inches exposed. Continue this process every time the plant grows another 6 inches until the container is nearly full. Hilling keeps the developing tubers covered, preventing them from turning green and becoming inedible due to exposure to sunlight.
Step 6: Provide Water and Sunlight
Potatoes thrive with consistent moisture but dislike waterlogged soil. Wooden containers can dry out quickly, so check the soil regularly and water whenever the top inch feels dry. Water deeply to reach the roots and tubers, but avoid overwatering, which may lead to rot.
Place your container in a sunny location where the plants will receive at least 6–8 hours of direct sunlight daily. Without adequate light, the plants may produce lush foliage but fewer potatoes.
Step 7: Fertilizing Potatoes
Potatoes benefit from balanced fertilization, especially during their growth phase. Use a low-nitrogen, high-potassium fertilizer to promote healthy tuber development. Too much nitrogen encourages leafy growth at the expense of potatoes underground. Compost or well-rotted organic matter mixed into the soil before planting usually provides sufficient nutrition.
Step 8: Monitor and Care for the Plants
Potatoes are generally low-maintenance, but watch for pests like aphids, Colorado potato beetles, or fungal diseases such as blight. Regularly inspect the plants, remove pests by hand if necessary, and ensure good air circulation around your containers to reduce disease risks.
Mulching with straw or shredded leaves can help retain moisture and keep the soil cool, which is beneficial for tuber formation.
Step 9: Harvesting Potatoes
Potatoes are ready for harvest when the plants begin to yellow and die back, typically 10–12 weeks for early varieties and 16–20 weeks for main-season types. To harvest, gently dump out the soil from the wooden container or carefully dig with your hands.
Early potatoes can be harvested when the plants flower, producing small, tender tubers. For larger, mature potatoes, wait until the foliage has completely died back. Cure your harvested potatoes by laying them in a cool, dark, well-ventilated area for about a week. This allows their skins to toughen for longer storage.
Step 10: Reuse Your Wooden Box
After harvesting, empty the container and refresh the soil with new compost if you plan to replant. Avoid reusing the same soil for potatoes season after season, as it may harbor pests or diseases. Instead, rotate crops and use the soil for other vegetables like beans or leafy greens.
Final Thoughts
Growing potatoes in rustic wooden containers is both practical and rewarding. With the right preparation, consistent care, and proper harvesting techniques, you can enjoy fresh, homegrown potatoes without needing a traditional garden. Whether you live in an urban apartment or simply want to maximize space in your backyard, this method brings the joy of potato gardening within reach for everyone.


