Peas are among the most rewarding vegetables to grow at home. They’re sweet, nutritious, and a favorite for many gardeners because of their relatively quick growth and charming green vines. Even if you don’t have a backyard or large garden, you can successfully grow peas in small buckets on a balcony, patio, or windowsill. Container growing makes peas accessible to anyone, and with the right setup, they can thrive in limited spaces.
This step-by-step guide will walk you through everything you need to know to grow healthy, productive pea plants in small buckets.
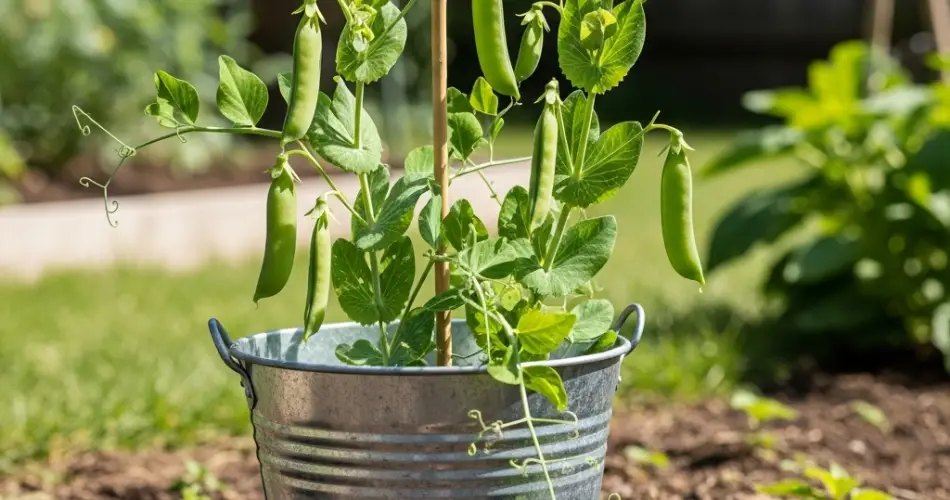
Step 1: Choose the Right Bucket
Peas have shallow root systems compared to some vegetables, so they don’t need extra-deep containers. However, the bucket must be wide enough to give them room to spread. Here’s what to look for:
-
Size: A 3–5 gallon bucket works well for peas. If you’re short on space, even a smaller bucket can support a few plants, but a wider one will allow more growth.
-
Drainage: Make sure your bucket has drainage holes at the bottom to prevent waterlogging, which can lead to root rot. If it doesn’t, drill 4–6 holes.
-
Material: Plastic buckets are lightweight and easy to move, but metal or ceramic containers work too as long as drainage is adequate.
Step 2: Prepare the Soil
Peas prefer light, fertile soil with good drainage. For container planting, a quality potting mix is better than garden soil because it’s lighter and retains the right amount of moisture.
-
Mix: Combine potting soil with compost for added nutrients. You can also add a little perlite or sand to improve drainage.
-
pH level: Aim for slightly acidic to neutral soil (pH 6.0–7.0).
Filling the bucket almost to the top—leaving about 2 inches of space—ensures good root depth and easier watering.
Step 3: Select Pea Varieties
Not all peas are the same, and some varieties are better suited for buckets than others.
-
Dwarf or bush peas: Compact varieties like ‘Little Marvel’ or ‘Sugar Ann’ are perfect for small containers.
-
Climbing peas: Taller varieties such as ‘Sugar Snap’ or ‘Snow Peas’ produce heavily but need trellises or stakes for support.
If space is very limited, bush types are the easiest choice, but if you can add vertical support, climbing peas maximize yields.
Step 4: Planting the Seeds
Peas are best grown directly from seed rather than transplanting. They don’t like root disturbance, so sowing directly in the bucket is the simplest method.
-
Plant seeds about 1–2 inches deep in the soil.
-
Space them 2 inches apart in rows or a circular pattern around the bucket edges.
-
Cover with soil, pat down lightly, and water gently.
For continuous harvests, sow a few new seeds every two weeks during the growing season.
Step 5: Provide Support
Even compact pea plants benefit from a little support, while climbing peas absolutely require it. In buckets, lightweight trellises, bamboo sticks, or wire frames work well.
-
Insert stakes or a small trellis into the soil right after planting seeds. This prevents damage to roots later.
-
For climbing varieties, tie strings from the bucket to a railing, wall, or small frame to guide vines upward.
This vertical growth saves space, improves airflow, and makes harvesting easier.
Step 6: Watering and Feeding
Peas like consistent moisture, especially while germinating and forming pods. However, overwatering can quickly cause root problems in containers.
-
Watering: Keep the soil evenly moist but not soggy. Check daily, especially in hot weather.
-
Feeding: Peas are light feeders because they fix nitrogen in the soil. Too much fertilizer can lead to leafy growth without pods. A diluted compost tea or organic liquid feed once a month is usually sufficient.
Step 7: Sunlight and Temperature
Peas grow best in cool weather and need around 6 hours of sunlight per day. If you live in a hot climate, place the bucket where it gets morning sun and some afternoon shade to protect plants from excessive heat.
Ideal growing temperatures are between 55–70°F (13–21°C). In warmer regions, peas do better when planted in early spring or fall rather than mid-summer.
Step 8: Maintenance and Care
-
Mulching: Adding a thin layer of mulch (like straw or shredded leaves) helps retain moisture and keeps the soil cool.
-
Pruning: Pinch off dead or yellowing leaves to encourage healthy growth.
-
Pest control: Watch for aphids, pea weevils, and powdery mildew. Spraying with a mild soapy water solution or using neem oil can help manage pests organically.
Step 9: Harvesting Peas
Peas are usually ready to harvest within 60–70 days, depending on the variety. Signs that it’s time to pick include:
-
Snap peas: Pods are plump but still tender.
-
Snow peas: Pods are flat with tiny, undeveloped peas inside.
-
Shelling peas: Pods are swollen, and the peas inside are round and firm.
Harvest often to encourage plants to produce more pods. Gently pick by holding the vine with one hand and pulling the pod with the other to avoid damaging the plant.
Step 10: Extending the Season
Since peas prefer cooler temperatures, you can extend your growing season by:
-
Starting seeds indoors before the last frost.
-
Using shade cloth during hot weather.
-
Planting again in late summer for a fall harvest.
Conclusion
Growing peas in small buckets is a practical and enjoyable way to bring fresh, sweet pods right to your doorstep, even if you only have a balcony or patio. With the right container, soil, and support system, peas thrive in limited space and reward you with abundant harvests. By following these step-by-step instructions—choosing the right variety, watering consistently, and harvesting regularly—you can enjoy homegrown peas season after season.


