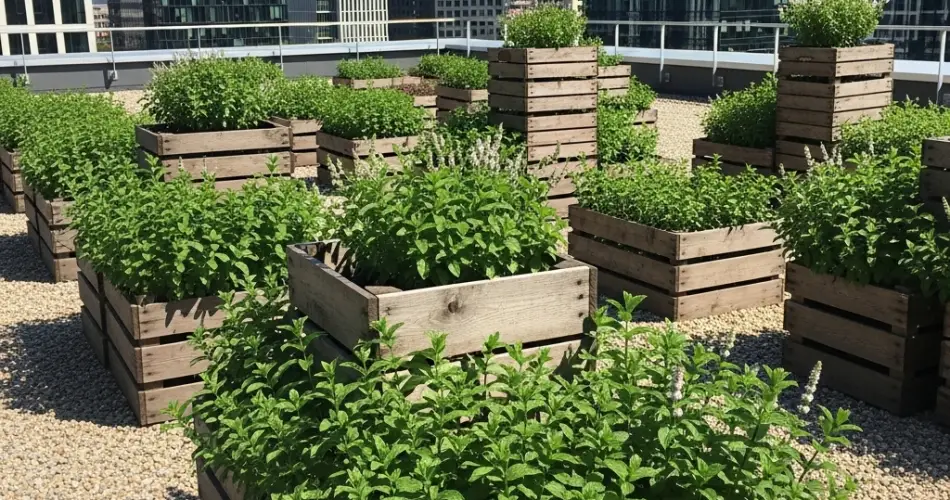
Mint is one of the most versatile herbs you can grow. Its refreshing flavor complements everything from drinks to salads and desserts. However, anyone who has grown mint directly in the ground knows how quickly it can take over a garden. Its underground runners spread aggressively, often choking out other plants. The solution? Growing mint in crates, which allows you to enjoy its benefits without letting it run wild.
Why Choose Crates for Mint?
Crates provide a controlled environment for mint, containing its roots and preventing unwanted spread. This method works well for:
-
Small spaces – Perfect for balconies, patios, and small backyards.
-
Root control – Crates stop mint’s invasive runners from invading other plants.
-
Mobility – You can easily move crates for better sunlight or to protect plants during extreme weather.
-
Aesthetic appeal – Rustic wooden crates or colorful plastic ones add charm to your herb garden.
Selecting the Right Crate
Mint has shallow but fast-spreading roots, so you’ll need a crate that’s at least 20–25 cm deep and wide enough for the plant to spread comfortably. You can use:
-
Wooden crates – Offer a natural look but need lining to protect from moisture.
-
Plastic crates – Lightweight and weather-resistant, though less rustic.
Ensure your crate is sturdy and has adequate drainage holes. Without proper drainage, mint roots can rot in overly wet soil.
Materials Needed
-
Wooden or plastic crate
-
Gardening liner, landscape fabric, or perforated plastic
-
High-quality potting soil
-
Compost or organic fertilizer
-
Mint seedlings or cuttings
-
Trowel and gloves
-
Watering can or spray bottle
Step 1: Preparing the Crate
-
Clean thoroughly – Remove dust, old soil, or any chemical residues.
-
Add a liner – For wooden crates, line the interior with landscape fabric or thick plastic with drainage holes to prevent soil from spilling out and to extend the life of the wood.
-
Check drainage – Ensure water can escape easily. If needed, drill extra holes at the bottom.
Step 2: Choosing the Right Mint Variety
Mint comes in many flavors, each with unique uses:
-
Spearmint – Mild and great for salads and savory dishes.
-
Peppermint – Stronger flavor, ideal for teas and desserts.
-
Chocolate mint – Subtle chocolate aroma, perfect for sweet treats.
-
Apple mint – Fruity and fresh, good for drinks and garnishes.
You can plant multiple varieties in separate crates for a diverse mint collection.
Step 3: Soil Preparation
Mint thrives in fertile, moist, but well-draining soil. A good mix is:
-
2 parts potting mix
-
1 part compost for nutrients
-
A small amount of perlite or coarse sand to improve drainage
Fill the crate almost to the top, leaving about 3 cm of space to prevent overflow when watering.
Step 4: Planting Mint
-
From seedlings: Dig a hole slightly larger than the root ball, place the plant inside, and cover with soil.
-
From cuttings: Place mint stems in water until roots form, then plant them directly in the crate.
Space plants about 15–20 cm apart so they have room to spread within the crate.
Step 5: Positioning the Crate
Mint prefers partial to full sunlight. Aim for 4–6 hours of direct sunlight per day. In very hot climates, some afternoon shade helps prevent leaf scorch. Position the crate in a spot that’s easy to access for frequent harvesting.
Step 6: Watering and Feeding
-
Watering: Mint enjoys consistently moist soil but not soggy conditions. Water whenever the top layer feels dry to the touch.
-
Fertilizing: Feed with diluted liquid organic fertilizer every 4–6 weeks during the growing season. Avoid over-fertilizing, as it can reduce the intensity of flavor.
Step 7: Pruning and Harvesting
Regular harvesting is key to keeping mint healthy and bushy. Pinch off the top leaves regularly to encourage new growth. If the plant starts flowering, snip off the flower buds to maintain leaf quality, as flowering can make leaves taste bitter.
Step 8: Maintaining Healthy Plants
-
Winter care: In cooler climates, move crates indoors or to a sheltered spot when temperatures drop below freezing.
-
Pest control: Mint is generally resistant to pests, but occasionally aphids or spider mites may appear. Treat with neem oil or a mild soapy water spray.
-
Rejuvenation: Every two years, replace the soil and divide the plant to keep it vigorous.
Step 9: Enjoying Your Mint
Once you have a steady supply, use your fresh mint in a variety of ways:
-
Brew refreshing herbal teas.
-
Add to fruit salads or yogurt.
-
Garnish cocktails and mocktails.
-
Incorporate into sauces, chutneys, and marinades.
Final Thoughts
Growing mint in crates gives you all the benefits of this fragrant, flavorful herb without the worry of it taking over your garden. By containing its roots and providing the right conditions, you can enjoy a constant supply for your kitchen while keeping your outdoor space tidy and manageable. Whether you have a sprawling backyard or just a small balcony, this method is practical, attractive, and easy to maintain.


