Leeks are a delicious and versatile allium, closely related to onions and garlic. Their mild, sweet flavor makes them a wonderful addition to soups, stews, stir-fries, and roasts. While they’re traditionally grown in garden beds, leeks also grow exceptionally well in containers—perfect for gardeners with limited space or no access to soil.
This step-by-step guide shows how to grow leeks from seed in containers, ensuring a successful harvest even on balconies, patios, or windowsills.
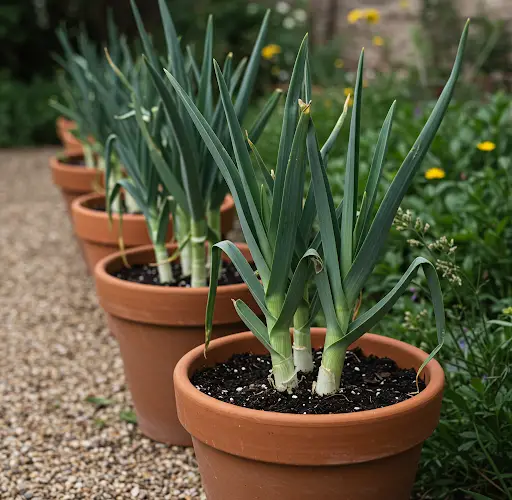
Why Grow Leeks in Containers?
Leeks have a long growing season and can tolerate cool weather, making them ideal for spring or fall container gardening. They don’t need deep soil like carrots or potatoes but benefit from consistent moisture, good drainage, and a rich growing medium—all of which can be easily controlled in containers.
Container-growing also reduces the risk of pests and diseases, and you can move the plants around to catch the best light or protect them from extreme conditions.
What You’ll Need
-
Leek seeds (look for reliable varieties like ‘King Richard’, ‘American Flag’, or ‘Bandit’)
-
Seed-starting trays or small pots
-
Large container (at least 12 inches deep and wide)
-
High-quality potting mix with compost
-
Liquid organic fertilizer or slow-release fertilizer
-
Watering can or spray nozzle
-
A sunny spot (or grow lights for indoor starts)
Step 1: Start Seeds Indoors
Start leek seeds indoors 8–10 weeks before your last expected frost date. Leeks take time to mature, so getting a head start is important. Fill seed-starting trays or small pots with moist seed-starting mix. Sow seeds about ¼ inch (0.6 cm) deep and lightly cover with soil.
Keep the soil moist and place the trays in a warm area (65–75°F or 18–24°C). Germination typically takes 7–14 days. Once the seedlings are 2–3 inches tall, thin them out so each has room to grow—about 1 inch apart in the tray.
Leeks are slow growers, so keep them under grow lights or near a sunny window until they are pencil-thick and ready to transplant.
Step 2: Prepare Containers
Choose a container that is at least 12 inches (30 cm) deep and wide enough to space the leeks 3–4 inches apart. Leeks don’t need deep roots, but they do need room to form their signature thick white stalks.
Fill the container with a mix of high-quality potting soil and compost. Leeks prefer fertile, well-draining soil with plenty of organic matter. Avoid using heavy garden soil, which can compact and reduce airflow.
Mix in a slow-release organic fertilizer according to package instructions, or plan to supplement with liquid feed throughout the growing season.
Step 3: Transplant Seedlings
Once outdoor temperatures are consistently above 50°F (10°C), and your leek seedlings are at least 6–8 inches tall and pencil-thick, it’s time to transplant them.
To encourage long, blanched stalks, create holes about 4 inches deep and 3–4 inches apart in your container. A dibber, pencil, or even your finger works fine. Drop one seedling into each hole, and don’t fill the hole with soil—watering will naturally settle the soil around the base over time, encouraging the shaft to grow longer and whiter.
Water thoroughly after transplanting.
Step 4: Provide the Right Growing Conditions
Place your container in a sunny location with at least 6 hours of direct sunlight each day. If you’re growing leeks indoors, use a full-spectrum grow light for 12–14 hours daily.
Water consistently to keep the soil evenly moist but not soggy. Leeks like a steady supply of water, especially during dry spells. Avoid letting the soil dry out completely.
Fertilize every 2–3 weeks with a balanced liquid fertilizer, especially if you’re not using a slow-release type. Feeding regularly helps the plants bulk up and produce tender, flavorful stalks.
Step 5: Blanching for Tender Stalks
To get long, white, tender leeks, you’ll need to blanch them by limiting sunlight exposure to the lower stalks. As the plants grow taller, gradually mound soil or mulch (like straw or compost) around the base of each plant. Do this carefully to avoid burying the leaves, which can cause rot.
You can also use paper collars or cardboard tubes to help blanch the stalks if soil mounding isn’t practical in a container.
Step 6: Harvesting
Leeks are ready to harvest when they are about 1 inch thick or larger. Depending on the variety, this may take 100–130 days from transplanting. You can harvest early for smaller, more tender leeks, or leave them to mature fully.
To harvest, gently loosen the soil around the leek and pull it out by the base. Rinse thoroughly to remove soil hidden between the leaves.
Final Tips
-
Space out plantings for a steady harvest throughout the season.
-
Avoid overwatering; soggy soil can lead to rot.
-
Leeks are frost-tolerant and can stay in containers into late fall or early winter with some protection.
Growing leeks in containers from seed may take a bit of patience, but the reward is a steady supply of sweet, homegrown leeks perfect for your kitchen. With good soil, proper spacing, and regular care, your container-grown leeks will thrive and provide flavor for months.


