Growing cantaloupe at home is not only a fun and rewarding gardening project but also a way to enjoy fresh, sweet, and juicy melons. With the right care and attention, you can grow high-yield cantaloupes that are big, flavorful, and perfect for summer. Whether you’re a beginner or an experienced gardener, following these simple steps will help you successfully grow cantaloupe from start to finish.
Step 1: Choose the Right Variety
Before you begin, it’s important to select the right variety of cantaloupe. There are many different types of cantaloupe, each with unique characteristics. Some varieties are known for being especially sweet or large. A few popular types to consider include:
-
Hales Best Jumbo: Known for its large size and sweetness.
-
Sugar Cube: A smaller variety that’s incredibly sweet and perfect for small gardens.
-
Athena: A hybrid variety that yields large melons with a high sugar content.
Choose a variety that is suited to your climate and space. Cantaloupes need a warm environment to thrive, so ensure you select a variety that will grow well in your local conditions.
Step 2: Prepare the Planting Site
Cantaloupes need full sun to grow successfully. Choose a spot in your garden or on your balcony that receives at least 6-8 hours of sunlight per day. Melons also require well-draining soil, as they do not tolerate standing water.
To prepare the soil, start by loosening the top 6-8 inches of soil. Add organic matter, such as compost or well-rotted manure, to enrich the soil and provide essential nutrients. Cantaloupes prefer slightly acidic to neutral soil with a pH of 6.0 to 6.5. Test the soil pH and amend it if necessary by adding lime to raise the pH or sulfur to lower it.
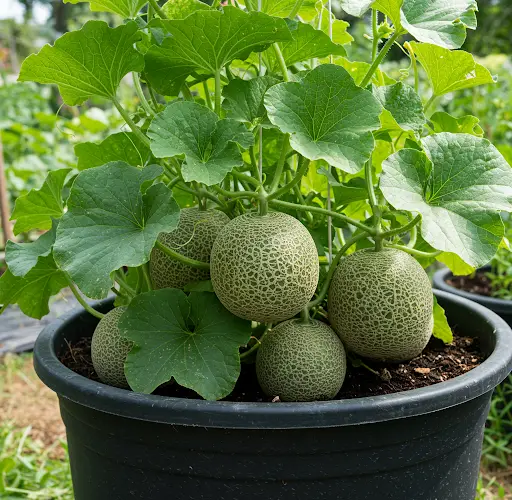
If you have limited garden space, cantaloupes can also be grown in large containers or raised beds, as long as the soil is deep enough (at least 12 inches) to accommodate the roots.
Step 3: Start Seeds Indoors or Directly Outdoors
Cantaloupe is typically grown from seeds. You can start the seeds indoors 3-4 weeks before the last expected frost date or sow them directly outdoors when the soil temperature reaches at least 70°F (21°C).
To start seeds indoors:
-
Fill small pots with seed-starting mix.
-
Plant the seeds 1 inch deep in the soil.
-
Place the pots in a warm, sunny location or under grow lights.
-
Keep the soil moist but not waterlogged.
Once the seedlings are large enough and the outdoor temperature is consistently warm, you can transplant them into the garden. Make sure the danger of frost has passed before planting them outdoors.
If you prefer to sow directly outdoors, plant the seeds in mounds or hills. Make sure the mounds are spaced about 3-4 feet apart to give the vines plenty of room to spread out. You can plant 2-3 seeds per mound and thin them to one strong plant after they’ve sprouted.
Step 4: Watering and Fertilizing
Cantaloupes need a consistent supply of water to grow large, juicy fruit. However, it’s important not to overwater, as this can lead to root rot. Water the plants deeply and regularly, especially during dry periods, but allow the soil to dry out slightly between waterings. Watering at the base of the plant is important to avoid wetting the foliage, which can lead to disease.
Fertilizing cantaloupes is essential for strong growth and high yields. Start by adding a balanced fertilizer or compost to the soil before planting. Once the plants begin to flower, switch to a fertilizer higher in phosphorus and potassium to promote fruit development. Feed the plants every 2-3 weeks during the growing season. Be cautious not to over-fertilize, as this can lead to excessive vine growth with fewer melons.
Step 5: Provide Support for the Vines
Cantaloupe vines grow long and spread out, so it’s important to provide support to keep the plants off the ground. This not only helps save space but also keeps the fruit cleaner and reduces the risk of rot. You can train the vines to grow on a trellis, fence, or other structure. Be sure to secure the vines gently to the support as they grow.
If you’re growing cantaloupes in containers, ensure that your container is large enough to support the plant’s growth and provide adequate support for the vines.
Step 6: Prune and Manage Growth
Pruning cantaloupes can help promote better airflow, reduce disease, and focus the plant’s energy on producing fruit. Once the plants start to vine, trim off any excess growth, particularly side shoots and leaves that are crowding the center of the plant.
If your cantaloupe plants produce too many fruiting stems, it may be a good idea to thin them out, leaving just 2-3 of the healthiest melons per vine. This allows the plant to focus its energy on developing the remaining fruits into larger, sweeter melons.
Step 7: Pollination
Cantaloupe plants have both male and female flowers, and proper pollination is crucial for fruit production. Pollinators such as bees play a key role in transferring pollen from male flowers to female flowers. If pollination is insufficient, you can hand-pollinate by gently transferring pollen using a small brush from the male flower to the female flower.
To encourage pollinators, consider planting flowering plants nearby, such as sunflowers, zinnias, or marigolds, to attract bees and other beneficial insects.
Step 8: Harvesting
Cantaloupes are ready to harvest when they have developed their full color (usually a golden yellow or greenish-gold, depending on the variety) and produce a sweet aroma. To test for ripeness, gently press your thumb against the stem where it connects to the melon. If it gives slightly, it’s a sign that the fruit is ripe and ready to be picked.
You can also tap the melon gently; if it produces a hollow sound, it’s likely ripe. Cut the melon from the vine using a sharp knife, leaving a short stem attached.
Step 9: Enjoy the Harvest
Once harvested, cantaloupes are best enjoyed fresh. Cut them into slices and serve them chilled for a refreshing treat. Cantaloupes are packed with vitamins, including vitamin C, vitamin A, and potassium, making them a healthy and delicious addition to your diet.
You can also store cantaloupe in the refrigerator for up to a week. If you have extra melons, consider preserving them by freezing or canning for later use.
Final Thoughts
Growing cantaloupe at home is a satisfying and enjoyable process, especially when you’re able to taste the sweet, juicy fruits of your labor. By choosing the right variety, providing the right care, and harvesting at the right time, you can enjoy a bountiful crop of delicious cantaloupes all season long. Whether you have a large garden or just a small space, cantaloupes are a great addition to your home garden, offering both beauty and nourishment.
With the tips above, you’re ready to grow your own cantaloupe and enjoy the taste of summer in every bite!


