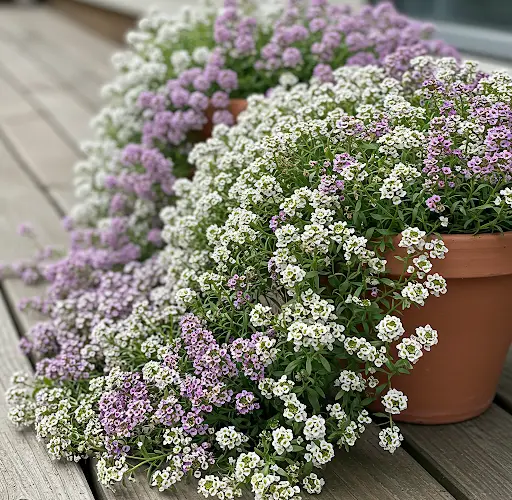
Alyssum (Lobularia maritima) is a charming, low-growing annual that produces a blanket of tiny, fragrant flowers, typically in shades of white, pink, purple, or lavender. Known for its sweet scent and ability to attract pollinators, alyssum is a wonderful addition to gardens, borders, hanging baskets, and containers. Growing alyssum from seed is simple and cost-effective, and it rewards gardeners with beautiful blooms throughout the growing season.
This guide will walk you through everything you need to know about growing alyssum from seed, including planting, care, and tips for a successful harvest.
1. Choosing the Right Variety of Alyssum
Alyssum comes in several varieties, from compact ground covers to trailing plants perfect for containers. ‘Snow Princess’ is one of the most popular varieties, known for its white flowers, while others may have shades of pink, purple, or even bi-colored blooms.
When selecting your alyssum seeds, consider your growing space:
-
Compact varieties are ideal for flower beds, borders, and containers.
-
Trailing varieties work well in hanging baskets or as ground cover.
2. When to Start Alyssum Seeds
Alyssum can be started indoors or directly sowed outdoors.
-
Indoor sowing: If you have a shorter growing season or want to get a jump-start, start seeds indoors about 6-8 weeks before the last expected frost.
-
Outdoor sowing: If the weather is warm enough (after the last frost date), alyssum seeds can be directly sown into the soil.
Starting indoors gives your plants a head start, and once the seedlings are strong enough, they can be transplanted outside after the threat of frost has passed.
3. Preparing the Planting Area
Alyssum thrives in well-drained, fertile soil with good airflow. Whether you’re planting in containers, raised beds, or garden soil, proper preparation will encourage healthy growth.
Soil preparation:
-
Soil type: Alyssum prefers slightly acidic to neutral soil with a pH of around 6.0-7.0.
-
Sunlight: Choose a location that receives full sun to partial shade. While alyssum can tolerate some shade, it will bloom best in full sunlight.
-
Drainage: Ensure the soil drains well; alyssum does not like soggy conditions.
For containers, use a light, well-draining potting mix, and make sure the container has drainage holes.
4. Sowing Alyssum Seeds
Alyssum seeds are tiny, so they need to be handled carefully.
Indoor planting:
-
Fill seed trays with seed-starting mix and moisten the soil lightly.
-
Scatter the alyssum seeds on top of the soil surface, as they need light to germinate.
-
Gently press the seeds into the soil using a flat tool or by lightly patting the surface with your hand.
-
Cover the tray with a clear plastic cover or plastic wrap to retain moisture.
-
Place the tray in a warm, sunny spot (around 65–70°F or 18–21°C) to encourage germination.
-
Keep the soil consistently moist, but not waterlogged.
Alyssum seeds typically germinate within 7-14 days. Once seedlings appear, remove the plastic cover and place the tray in a bright spot to ensure strong growth.
Outdoor sowing:
-
Directly scatter the seeds on the soil surface, then lightly press them down.
-
Keep the soil moist until germination occurs.
5. Thinning and Transplanting
Once the alyssum seedlings have grown large enough to handle (usually when they have two sets of true leaves), thin them out to ensure good airflow and prevent overcrowding.
-
Spacing: For compact varieties, space the plants about 6-8 inches apart. For trailing varieties, space them about 8-12 inches apart.
-
If you started indoors, transplant the seedlings into your prepared garden bed or containers after the risk of frost has passed, ensuring they are spaced according to their variety.
6. Watering and Fertilizing Alyssum
Alyssum prefers moderate watering. It’s essential to keep the soil consistently moist, but not soggy, as too much water can lead to root rot. Water the plants at the base to avoid wetting the foliage, which can lead to fungal diseases.
Watering tips:
-
Water when the top inch of soil feels dry, but avoid overwatering.
-
For containers, ensure there is proper drainage, and never let the pot sit in water.
Alyssum is not a heavy feeder, but it will benefit from occasional feeding.
Fertilizing:
-
Apply a balanced, water-soluble fertilizer once every 4-6 weeks during the growing season.
-
Avoid excessive fertilization, as this can lead to lush foliage growth but fewer flowers.
7. Caring for Alyssum During the Growing Season
Alyssum is a low-maintenance plant, but a few care practices will help ensure it remains healthy and blooming throughout the season.
-
Deadheading: To encourage continuous blooms, pinch off spent flowers regularly. This will prevent the plant from going to seed prematurely and encourage more flower production.
-
Mulching: Apply a light layer of mulch around the base of the plants to retain moisture and suppress weeds.
8. Pests and Problems
Alyssum is generally pest-resistant, but it may attract aphids, slugs, or snails. If you notice these pests, use an insecticidal soap or natural remedies to keep them in check.
Common issues to watch out for:
-
Powdery mildew: Ensure good air circulation and avoid overhead watering to prevent fungal diseases.
-
Yellowing leaves: This can be a sign of overwatering or poor drainage. Adjust watering accordingly.
9. Harvesting Alyssum Seeds
If you wish to save alyssum seeds for next year, allow some of the flowers to mature into seed pods. Once the pods have dried and turned brown, you can collect and store the seeds in a cool, dry place.
Final Thoughts
Growing alyssum from seed is a simple and rewarding process that can add beauty, color, and fragrance to any garden. Whether in containers, hanging baskets, or garden beds, alyssum will bloom profusely with minimal care, attracting pollinators and brightening your space.


