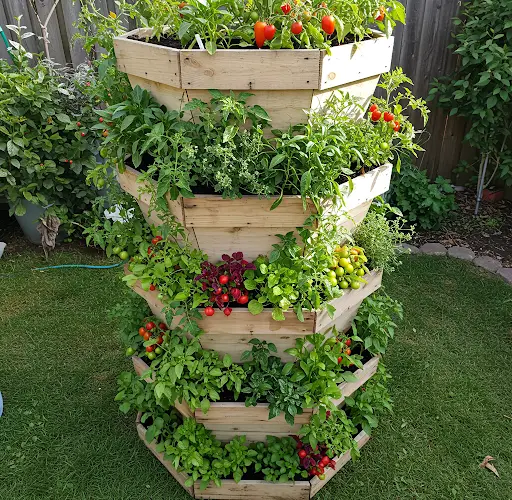
How to Build a DIY Vegetable Growing Tower to Save Space and Money at Home
Growing your own vegetables doesn’t have to require a large plot of land. In fact, with a little creativity, you can cultivate a productive garden in even the smallest of spaces. One of the most effective solutions is a vertical vegetable growing tower, which not only saves space but also helps you grow more with less.
A vegetable tower is perfect for urban gardeners, balcony growers, or anyone looking to cut down on grocery costs while enjoying fresh, organic produce. Plus, it’s a great way to recycle plastic containers and other materials you may already have at home.
This guide will walk you through how to build your own DIY vegetable growing tower and get started growing herbs, greens, and other compact crops right from your home.
Benefits of a Vegetable Growing Tower
-
Saves space: Perfect for small yards, patios, or balconies.
-
Increases yield: Utilize vertical space to grow more plants.
-
Eco-friendly: Reuse plastic bottles or containers to reduce waste.
-
Budget-friendly: Build it with materials you already have.
-
Convenient harvesting: No need to bend or kneel to pick your vegetables.
Materials You’ll Need
To build a basic vertical growing tower, you’ll need:
-
5 to 7 large plastic bottles (1.5–2 liters) or buckets
-
A sharp knife or box cutter
-
Scissors
-
Nail or screwdriver (for poking holes)
-
Potting soil or a mix of garden soil, compost, and cocopeat
-
Vegetable seeds or seedlings (lettuce, basil, cilantro, spinach, etc.)
-
A wooden or PVC pole for central support (optional)
-
String, wire, or glue gun for securing layers
If you want a more permanent structure, you can substitute bottles with stackable pots or even small paint buckets.
Step 1: Prepare the Bottles
Clean all your plastic bottles and remove the labels. Using a knife or box cutter, carefully cut the bottoms off of all the bottles. These will serve as planting layers, stacked one on top of another.
For each bottle, poke small holes at the bottom for water drainage. You can also cut side holes near the top for airflow and easier watering.
If you’re using buckets, drill holes in the bottom and around the sides for drainage and ventilation.
Step 2: Create the Base
Choose a wide and stable container for the base—this could be a bucket filled with stones or a sturdy pot. If you’re using a vertical pole for stability, place it securely in the center of the base before stacking.
You can also attach the tower to a wall or balcony railing for added support.
Step 3: Stack the Planters
Start stacking the prepared bottles or containers from largest to smallest, aligning them vertically. You can secure them in place using wire, glue, or by inserting them tightly over the pole.
As you stack, fill each layer with nutrient-rich soil mix. Make sure each section is packed but not overly tight so the roots can spread easily.
Leave at least 2–3 inches of soil space per container and consider staggering the plant positions for better light exposure and airflow.
Step 4: Plant Your Vegetables
Choose compact, shallow-rooted vegetables or herbs that do well in containers. Great options for towers include:
-
Lettuce
-
Spinach
-
Arugula
-
Kale
-
Basil
-
Cilantro
-
Mint
-
Green onions
Make a small hole in the soil with your finger, place the seed or seedling in, and gently cover. Water lightly to settle the soil.
If planting seeds, be sure to check the germination depth and spacing on the packet. For seedlings, space them based on their mature size.
Step 5: Watering and Maintenance
Since the tower has multiple levels, water from the top and let gravity pull moisture down to the lower layers. You may need to water more frequently in hot weather as towers can dry out quickly.
Consider adding mulch or shredded coconut husk to retain moisture. You can also mix compost or slow-release organic fertilizer into the soil every few weeks to keep your plants well-fed.
Keep the tower in a location that receives at least 5–6 hours of sunlight daily. Rotate the tower every few days to ensure all plants get adequate light exposure.
Step 6: Harvest and Replant
Depending on what you plant, you can begin harvesting in as little as 3 to 4 weeks. Use the “cut-and-come-again” method for leafy greens by trimming outer leaves and allowing the center to continue producing.
After harvesting, remove old or spent plants, fluff the soil, and replant to keep your tower producing throughout the growing season.
Final Tips
-
Avoid overcrowding plants to reduce the risk of pests and disease.
-
Use companion planting to naturally deter insects—basil with lettuce or marigolds nearby can help.
-
If pests appear, try neem oil or soapy water as a natural deterrent.
Conclusion
A DIY vegetable growing tower is a smart, sustainable way to grow your own food at home—without needing a big garden. It’s easy to build, fun to maintain, and offers a steady supply of fresh greens right at your fingertips.
Whether you’re gardening to save money, reduce food waste, or eat healthier, this compact and efficient tower garden is a perfect solution for modern homes.


