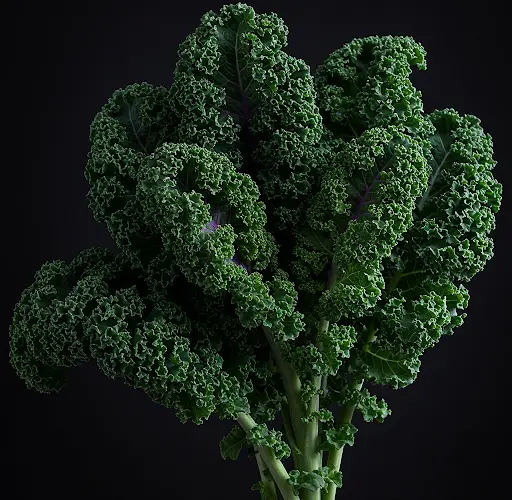
Growing the King of Vegetables at Home: Easy and Fast Kale Harvest for the Whole Family
Kale has earned its reputation as the “king of vegetables” for a reason. Loaded with vitamins A, C, and K, iron, calcium, and antioxidants, kale is one of the most nutrient-dense leafy greens you can grow. The good news? You don’t need a large garden to enjoy fresh, homegrown kale. Whether you live in an apartment with a balcony or a house with a small backyard, you can easily grow kale at home to nourish your entire family.
This guide will show you how to grow kale quickly and efficiently, from seed to harvest, using containers or garden beds. It’s a beginner-friendly method that ensures a steady supply of this powerhouse vegetable with minimal effort.
Why Grow Kale at Home?
Kale is a hardy, low-maintenance crop that thrives in various conditions. Here’s why it’s a great choice for home gardening:
-
High nutritional value – A single serving of kale delivers a significant amount of vitamins and minerals.
-
Fast-growing – Many kale varieties can be harvested within 25–30 days as baby greens, or 50–60 days for mature leaves.
-
Cool-weather tolerant – Perfect for growing in spring, fall, or even mild winters.
-
Continuous harvest – Cut-and-come-again harvesting encourages ongoing growth for weeks or months.
Materials You’ll Need
To grow kale at home, gather these basic materials:
-
Kale seeds (any variety – curly, lacinato, red Russian, etc.)
-
Containers or pots (at least 8–12 inches deep)
-
Potting mix or compost-rich garden soil
-
Watering can or spray bottle
-
Sunlight or partial shade location
-
Organic fertilizer (optional)
Step-by-Step Guide to Growing Kale
1. Choose the Right Location
Kale thrives in full sun but can also tolerate partial shade, especially in warmer climates. Place your pots or containers in a spot that gets at least 4–6 hours of sunlight daily.
If growing indoors, use a sunny windowsill or a grow light setup for best results.
2. Prepare the Soil
Kale prefers well-drained, nutrient-rich soil. If using containers, fill them with a quality potting mix blended with compost. For ground planting, mix in organic compost or aged manure to enrich the soil and improve drainage.
Ideal soil pH for kale is between 6.0 and 7.5.
3. Sow the Seeds
Sprinkle kale seeds about ¼ inch deep and 2 inches apart in rows or evenly across the container. Lightly cover them with soil and water gently to moisten.
If planting in a garden bed, leave at least 12 inches between rows for airflow and easy access.
4. Watering and Germination
Keep the soil consistently moist (but not soggy) during germination. Kale seeds usually sprout within 5–10 days.
Once seedlings appear, thin them out to leave about 8–12 inches between plants. This spacing allows for optimal growth and prevents overcrowding.
5. Care and Maintenance
-
Water regularly: Kale likes moist soil. Water deeply every few days, especially during dry weather.
-
Mulch: Add a layer of mulch around the base of the plants to retain moisture and suppress weeds.
-
Fertilize occasionally: Use a balanced organic fertilizer every 2–3 weeks to encourage lush leaf production, especially in poor soil.
Pest Management Tips
Kale can attract pests like aphids, cabbage worms, and flea beetles. Keep plants healthy with these strategies:
-
Inspect regularly for pests and remove them by hand or with a gentle spray of water.
-
Neem oil or garlic spray can be applied as a natural repellent.
-
Companion planting with herbs like basil or mint may deter pests and improve kale flavor.
Harvesting Your Kale
Kale can be harvested as baby greens once the leaves reach 3–4 inches long—usually within 3–4 weeks after planting. For mature plants, wait until the leaves are full-sized (about 8–10 inches), typically around 6–8 weeks.
Harvest by picking the outermost leaves first, allowing the inner leaves to continue growing. This “cut-and-come-again” method allows for multiple harvests over time.
Try not to remove more than one-third of the plant at a time to ensure ongoing production.
Tips for a Healthy, Productive Kale Garden
-
Rotate your crops: Don’t plant kale in the same spot each season to reduce soil-borne disease.
-
Grow in succession: Start new seeds every few weeks for a continuous harvest.
-
Cold boosts flavor: Kale becomes sweeter and more tender after a light frost, making it an excellent fall or winter crop in cooler regions.
-
Use what you grow: Add kale to smoothies, stir-fries, soups, or bake into chips for a healthy snack.
Final Thoughts
Kale is an easy, fast-growing crop that delivers a high yield with very little space or experience required. Whether you have a tiny balcony, sunny kitchen window, or small patch of soil, you can grow this nutrient-packed vegetable at home with ease.
By following these simple steps, you’ll soon have a steady supply of fresh kale to feed your family while enjoying the satisfaction of homegrown food. It’s a rewarding way to live healthier and more sustainably—one leafy green at a time.


