Garlic is a flavorful and indispensable ingredient in countless recipes around the world, and growing it at home can be both rewarding and surprisingly simple. Even if you don’t have access to a garden, garlic thrives in containers, making it a perfect candidate for balconies, patios, and small urban spaces. With proper care, you can harvest fresh, aromatic garlic right from your own pots.
This guide will walk you through the step-by-step process of growing garlic in containers, from choosing the right variety to harvesting the bulbs. Whether you’re a beginner or a seasoned gardener looking for a compact growing solution, this method ensures a satisfying and practical gardening experience.
Why Grow Garlic in Pots?
Container gardening has many advantages, especially for garlic:
-
Space-efficient: Perfect for those with limited outdoor space.
-
Portable: Easily move pots to optimize sun exposure or protect from frost.
-
Controlled conditions: Manage soil quality and moisture more precisely.
-
Pest prevention: Containers reduce risks of soil-borne diseases and underground pests.
Garlic also adds visual interest with its tall, green stalks and can be companion-planted with herbs or greens in decorative containers.
Best Garlic Types for Pots
Garlic comes in two main types:
-
Softneck Garlic: Adaptable to warmer climates, stores longer, and produces more cloves per bulb. Common varieties include ‘Silverskin’ and ‘Artichoke’.
-
Hardneck Garlic: Prefers colder climates and has a stronger flavor. It produces fewer but larger cloves and grows a flowering stalk called a scape. Varieties include ‘Rocambole’ and ‘Purple Stripe’.
Choose the type that matches your local climate and available container space. Softneck is generally easier for container growing in mild regions.
Materials You’ll Need
To get started, gather the following:
-
Garlic bulbs (organic or seed garlic, not treated grocery store garlic)
-
A pot or container at least 8–10 inches deep and 12 inches wide (or larger)
-
Well-draining potting soil rich in organic matter
-
Compost or balanced organic fertilizer
-
Trowel or hand spade
-
Watering can
-
A sunny location (6–8 hours of direct sunlight daily)
Preparing the Pot
-
Choose the Right Container: Use pots with drainage holes to avoid waterlogging. Clay, plastic, or fabric grow bags all work well.
-
Fill with Soil: Use a well-draining potting mix amended with compost or slow-release organic fertilizer. Garlic hates soggy conditions, so make sure the soil is loose and not compacted.
-
Level and Moisten: Lightly moisten the soil before planting to create a welcoming environment for cloves.
Planting Garlic
-
Separate the Cloves: Gently break the garlic bulb into individual cloves. Leave the papery skin on each clove and select the largest, healthiest ones for planting.
-
Plant the Cloves:
-
Position the cloves with the pointed side up and the flat root end down.
-
Plant each clove about 2 inches deep and 4–6 inches apart.
-
If using a wide container, you can plant several cloves in rows or a circle.
-
-
Cover and Water: Lightly cover with soil and water gently to settle the soil around the cloves.
Growing Conditions
-
Sunlight: Garlic requires full sun for best growth. Place your pots where they can get 6–8 hours of light daily.
-
Watering: Keep the soil consistently moist but not soggy. Reduce watering slightly in the final weeks before harvest to avoid rot.
-
Feeding: Apply a balanced liquid fertilizer or compost tea every 3–4 weeks during the growing season.
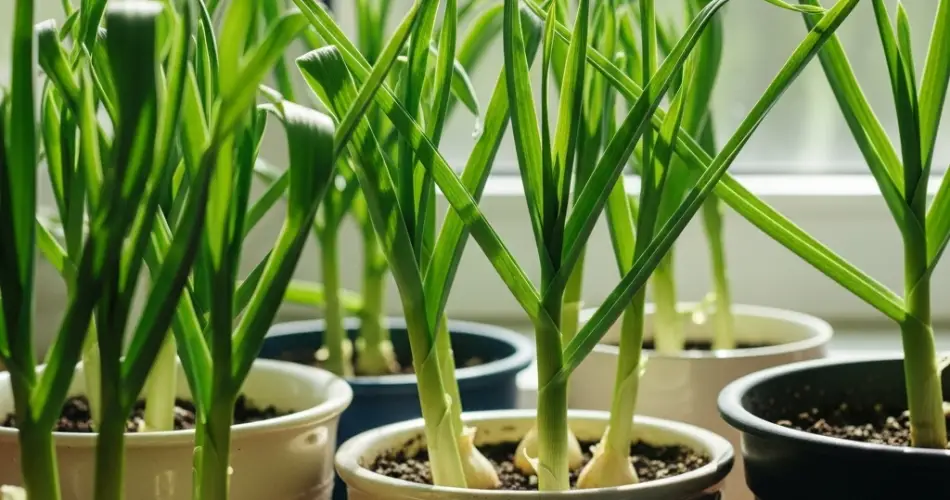
Garlic Growth Timeline
Garlic takes about 6–9 months to mature, depending on the variety and growing conditions. You’ll see green shoots appear within a few weeks of planting. These shoots will grow into tall stalks, and in the case of hardneck varieties, they will produce scapes (flowering stems) in late spring or early summer.
-
Scape Removal (for hardneck garlic): Cut the scapes when they curl to redirect energy back to bulb development. You can eat the scapes—they have a mild garlic flavor and are great in stir-fries and pesto.
Harvesting Garlic
Garlic is ready to harvest when the lower leaves start to turn brown but the upper leaves remain green—usually in mid to late summer.
-
Loosen the Soil: Use your hands or a small tool to gently loosen the soil around the bulb.
-
Lift, Don’t Pull: Carefully lift the garlic from the pot rather than pulling it by the stem to avoid damaging the bulb.
-
Cure the Garlic: Allow bulbs to dry in a warm, well-ventilated place for 2–3 weeks. Hang them in bunches or lay them on a mesh surface out of direct sunlight.
Once cured, trim the roots and cut back the stems if you plan to store them. Softneck varieties can be braided for easy hanging storage.
Tips for Success
-
Use quality seed garlic from a trusted supplier for disease-free bulbs.
-
Avoid overwatering, especially in cooler months, to prevent rot.
-
Mulch lightly if temperatures drop to protect the cloves.
-
Replant from your harvest next season to build a continuous garlic supply.
Final Thoughts
Growing garlic in pots is an easy and rewarding gardening project for both beginners and experienced growers. With just a little effort and patience, you can enjoy a supply of fresh, homegrown garlic that’s far more flavorful than store-bought varieties. Whether you’re working with a sunny balcony, a compact patio, or even a bright windowsill, this container-growing approach brings the joy—and taste—of garden-fresh garlic within reach.


