Transforming a balcony into a functional and fragrant green space is a dream for many urban dwellers. One plant that brings both beauty and utility to compact outdoor spaces is the evergreen bay, also known as bay laurel. With its glossy green leaves and distinctive aroma, this herb has been valued in kitchens and gardens for centuries. When cultivated in crates, evergreen bay becomes a versatile addition to a balcony herb wall, combining rustic style with culinary practicality.
Why Choose Evergreen Bay for Balconies?
Evergreen bay is more than just a cooking herb. Its year-round foliage adds life and vibrancy to small spaces, while its upright growth habit makes it easy to incorporate into vertical gardening setups like a balcony herb wall. Unlike some herbs that fade with the seasons, bay laurel maintains its dense, dark green leaves throughout the year, ensuring your balcony stays green and inviting.
In addition, bay leaves are indispensable in the kitchen. They enrich soups, stews, casseroles, and marinades with subtle flavor. Having a fresh supply within arm’s reach means you can elevate everyday meals without relying on store-bought dried leaves.
The Benefits of Using Crates
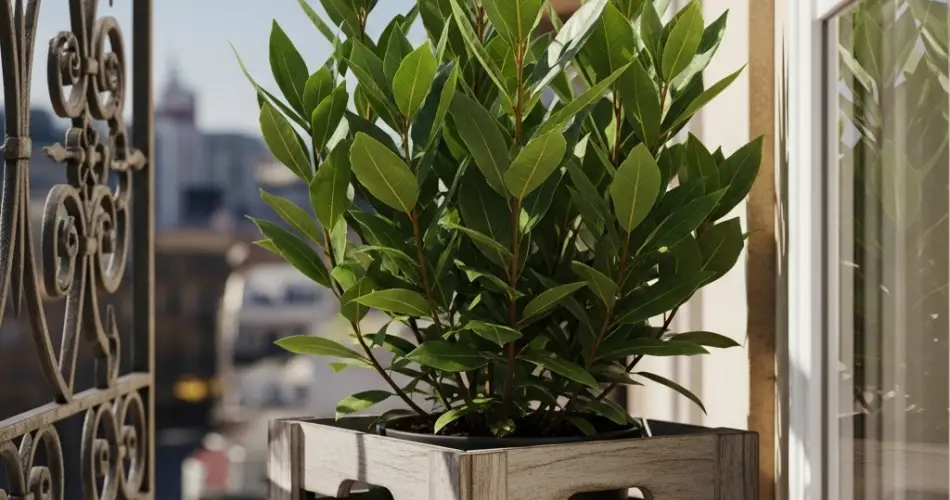
Wooden crates are an excellent choice for cultivating evergreen bay in balcony gardens. Their rectangular shape fits neatly against walls, railings, or stacked shelves, making them perfect for forming part of a vertical herb wall. Crates also offer better soil volume compared to small pots, which supports healthy root growth and reduces the frequency of watering.
From a design perspective, crates bring rustic charm to modern apartments. Their natural wood blends seamlessly with greenery, creating a warm and organic look that softens the edges of concrete balconies. If maintained properly, wooden crates can last for several years and provide a reliable home for your bay plant.
Preparing the Crates
Before planting, ensure your crate is well-prepared to support the evergreen bay. Select one that is at least 16–20 inches deep and wide, giving roots plenty of space to spread. Drill multiple drainage holes at the bottom to prevent water from pooling, which can lead to root rot. Lining the crate with landscape fabric will keep soil in place while allowing excess water to escape.
To prolong the lifespan of your wooden crate, treat the exterior with a non-toxic wood sealant and elevate it slightly using pot feet or bricks. This protects the wood from rotting when exposed to moisture.
Best Soil Mix for Bay Laurel
Evergreen bay thrives in a well-draining, nutrient-rich soil mix. For crate planting, aim for the following blend:
-
40% high-quality potting soil for structure
-
30% compost or aged manure to feed the plant
-
20% coarse sand or perlite for improved drainage
-
10% coco coir or peat moss to maintain balanced moisture
The soil pH should ideally be between 6.0 and 7.5. Mix in a slow-release organic fertilizer at planting time to provide steady nourishment over the first few months.
Planting and Placement
Planting a young bay tree or nursery-grown cutting is the most practical option for crate gardens. Place the root ball in the center of the crate, fill with soil mix, and water thoroughly to settle the roots.
Position the crate in the sunniest spot on your balcony. Evergreen bay requires at least 6 hours of direct sunlight daily to thrive. If your balcony receives partial sunlight, position the crate near reflective surfaces like walls or glass panels to maximize light exposure.
Watering and Feeding
Bay laurel prefers evenly moist soil but does not tolerate waterlogging. Check the top inch of soil—if it feels dry, water until moisture begins to drain from the bottom of the crate. During summer, watering may be needed more frequently, while in winter it should be reduced.
For feeding, apply a balanced organic fertilizer once in spring and again in midsummer. Liquid seaweed or compost tea can also be used for a gentle nutrient boost.
Pruning and Maintenance
Pruning is key to keeping evergreen bay manageable in a crate and suitable for a herb wall display. Trim back long shoots in spring or early summer to encourage compact, bushy growth. Harvesting leaves regularly also doubles as natural pruning.
Refresh the soil every two to three years by root pruning if necessary and repotting the plant into fresh soil. This keeps your bay plant vigorous and prevents it from becoming root-bound.
Pest and Disease Management
Bay leaf plants are generally hardy but may attract pests such as scale insects, aphids, or spider mites. Inspect leaves frequently, and if infestations occur, treat them with neem oil or insecticidal soap. Adequate spacing between crates in your herb wall will ensure good airflow and reduce the risk of fungal problems like powdery mildew.
Harvesting and Using Bay Leaves
Leaves can be harvested year-round, though older, more mature leaves tend to have the best flavor. Fresh leaves can be added directly to dishes, while dried leaves are stronger in flavor and store well in airtight jars. Simply pluck leaves as needed, ensuring you never remove too many at once so the plant can continue producing new growth.
Final Thoughts
Creating a balcony herb wall with evergreen bay grown in crates is both practical and stylish. The plant’s year-round greenery, aromatic leaves, and adaptability to confined spaces make it an ideal choice for urban gardeners. With the right soil, crate preparation, sunlight, and pruning, bay laurel thrives in a balcony setting while providing a steady supply of flavorful leaves for your kitchen.
By dedicating a crate or two to evergreen bay, you not only enrich your cooking but also create a lush, fragrant green wall that transforms your balcony into a relaxing, Mediterranean-inspired retreat.


