Good Ideas From Plastic Bottles – Have a Beautiful Vegetable Garden Right at Home
Who says you need a big backyard to enjoy a lush vegetable garden? With a bit of creativity and a few recycled plastic bottles, you can turn even the smallest space—like a balcony, patio, or a sunny corner of your home—into a productive and beautiful vegetable garden.
Plastic bottles are often thrown away after use, but with the right technique, they can be transformed into useful containers for growing vegetables, herbs, and even small fruits. This not only helps reduce plastic waste but also offers a budget-friendly way to cultivate fresh produce right where you live.
Why Use Plastic Bottles for Gardening?
Plastic bottles are readily available, lightweight, and easy to work with. They can be cut, hung, stacked, or arranged in various ways to suit your space. Here are some of the benefits of using them in your garden:
-
Affordable and accessible – No need to buy expensive planters
-
Eco-friendly – Reduce waste by recycling bottles
-
Space-saving – Ideal for vertical or hanging gardens
-
Customizable – Easily adapted to different plant sizes and growing conditions
What You’ll Need
To get started with your plastic bottle garden, gather these materials:
-
Used plastic bottles (1.5-liter or 2-liter bottles work best)
-
Scissors or a utility knife
-
Nail or screwdriver (for poking drainage holes)
-
Twine, wire, or zip ties (for hanging)
-
Potting soil or compost
-
Seeds or seedlings (vegetables, herbs, or flowers)
-
Optional: paint, markers, or stickers for decoration
Steps to Create a Bottle Garden
1. Prepare the Bottles
Clean each plastic bottle thoroughly to remove any residue. Then, using scissors or a knife, cut a large opening on one side of the bottle (for laying flat) or cut the top off (for standing upright). Poke several small holes at the bottom for drainage.
2. Add Soil and Plants
Fill each bottle about two-thirds full with potting mix or compost. Choose fast-growing, compact plants that do well in small containers. Great options include:
-
Leafy greens (lettuce, spinach, mustard)
-
Herbs (basil, parsley, cilantro)
-
Small root vegetables (radishes, carrots)
-
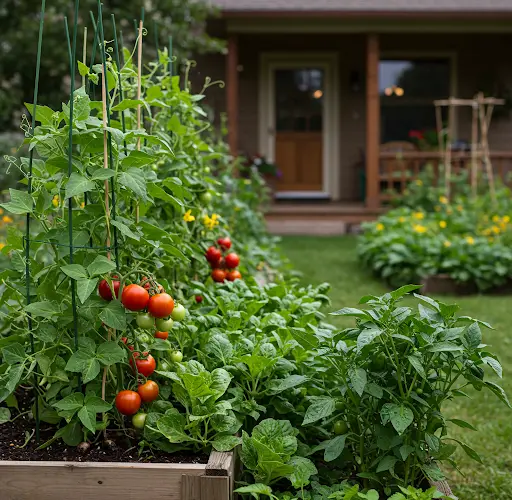
Peppers or cherry tomatoes (in larger bottles)
Gently press the seeds or seedlings into the soil and water lightly.
3. Create Your Garden Layout
There are several creative ways to display your bottle garden:
-
Vertical wall garden: Hang bottles in rows on a wooden board, fence, or wall using string or wire.
-
Hanging garden: Suspend bottles from balcony railings, tree branches, or hooks.
-
Bottle towers: Stack bottles vertically by inserting the neck of one into the bottom of another, allowing water to trickle down.
-
Window garden: Attach bottles to a sunny windowsill using brackets or suction cups for natural light exposure.
Each layout can be tailored to the amount of space and sunlight available.
Tips for a Productive and Attractive Garden
-
Label your bottles – Keep track of what’s growing in each one.
-
Water regularly – Plastic bottles dry out faster, so check the soil moisture daily.
-
Rotate plants – Turn hanging or vertical setups to ensure even sunlight exposure.
-
Use mulch – A thin layer of dried leaves or straw on top of the soil helps retain moisture.
-
Fertilize lightly – Small containers may need a diluted liquid fertilizer every two weeks.
Decorating your bottles can also add personality and charm to your garden. Involve kids in the process for a fun, eco-friendly family project.
Advantages Beyond Gardening
This plastic bottle gardening method doesn’t just yield fresh food—it also encourages sustainability and creativity. It reduces single-use plastic waste and promotes a greener lifestyle. Plus, it’s an excellent introduction to gardening for those who may not have access to traditional outdoor growing space.
Maintenance and Harvesting
Check plants regularly for pests, overgrowth, and soil dryness. Most leafy greens and herbs will be ready for harvesting within a few weeks. Simply snip what you need, and the plants will often continue to grow and produce more. For root vegetables, wait until they reach mature size before gently pulling them out of the bottle.
Because the containers are small and mobile, you can easily rearrange them, bring them indoors during bad weather, or switch out crops with the seasons.
Final Thoughts
Creating a vegetable garden with plastic bottles is a brilliant way to enjoy homegrown produce while minimizing waste. It’s easy to set up, simple to maintain, and brings greenery into your life—no matter where you live.
Whether you’re looking to grow a few herbs for the kitchen or build a full vertical veggie wall, this method is both fun and functional. With a few bottles and a little imagination, you can cultivate a thriving garden that’s as beautiful as it is practical.