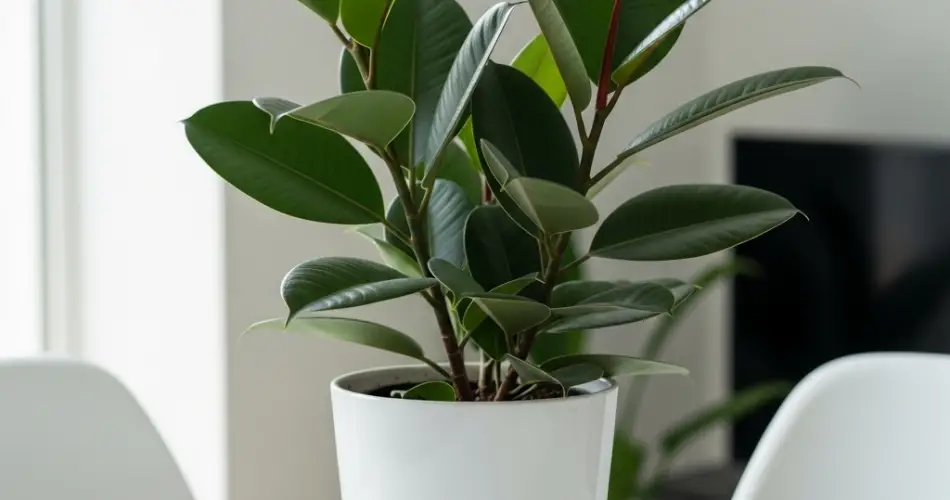
The rubber plant (Ficus elastica) is a timeless favorite for indoor gardeners, thanks to its broad, glossy leaves and elegant vertical growth. Whether you’ve just brought home a young rubber plant in a nursery pot or you’ve had one for a while, repotting it into a proper container is the first step in turning this plant into a true decorative centerpiece.
Repotting not only gives the rubber plant room to grow but also helps refresh the soil, improve drainage, and prevent root-bound issues. Here’s a complete guide to repotting your rubber plant and making it thrive in your indoor space.
Why You Should Repot a Rubber Plant
Most rubber plants are sold in lightweight plastic nursery pots with compact soil that often drains poorly over time. While these pots are fine temporarily, repotting allows:
-
Better root development
-
Improved soil quality
-
Aesthetic upgrade
-
Healthier, more vigorous growth
If your plant’s roots are circling the inside of the container, poking out of drainage holes, or the plant seems to dry out quickly, it’s time to move it to a larger pot.
Best Time to Repot
The ideal time to repot a rubber plant is during the growing season—spring to early summer. This is when the plant is actively producing new leaves and can recover quickly from transplant shock. Avoid repotting in winter unless absolutely necessary.
Selecting the Right Pot
Choose a container that’s 2–4 inches wider in diameter than the current pot. Avoid pots that are too large, as they can hold excessive moisture and lead to root rot.
Key features to look for:
-
Good drainage holes at the bottom
-
Material options: Terracotta pots help regulate moisture and prevent overwatering, while plastic pots are lighter and easier to move
-
Stylish choices: Decorative ceramic pots can double as home accents, but ensure proper drainage or use a plastic insert
Soil Mix for Rubber Plants
Rubber plants prefer well-draining, nutrient-rich soil. Avoid using dense garden soil that retains water. Instead, opt for:
-
2 parts high-quality potting mix
-
1 part perlite or pumice for drainage
-
1 part coconut coir or peat moss for moisture retention
This blend supports strong roots and prevents soggy soil conditions.
Step-by-Step Repotting Process
Follow these simple steps to successfully repot your rubber plant:
-
Water the plant the day before: This softens the root ball, making it easier to remove and reduces stress.
-
Prepare the new pot: Add a layer of fresh soil at the base.
-
Gently remove the plant: Turn the pot sideways and slide the plant out while supporting the base. Avoid pulling it by the stem.
-
Loosen the roots: Gently tease the roots apart, especially if they’re tightly wound. Trim away any dead or mushy roots with clean scissors.
-
Position in the new pot: Set the plant upright in the center, keeping it at the same depth as before.
-
Backfill with soil: Add fresh soil around the root ball, pressing lightly to eliminate air pockets.
-
Water thoroughly: Let excess water drain out to settle the soil.
-
Place in a bright spot: Choose a location with bright, indirect sunlight while the plant adjusts to its new home.
Aftercare Tips
Rubber plants are resilient but benefit from gentle care after repotting:
-
Avoid fertilizing for 4–6 weeks post-repotting to prevent root burn.
-
Keep humidity moderate, especially if indoor air is dry.
-
Wipe the leaves occasionally with a damp cloth to remove dust and support healthy photosynthesis.
-
Rotate the plant every couple of weeks to encourage even growth.
Expect some leaves to droop slightly right after repotting—this is normal and temporary.
Common Repotting Concerns
-
Yellowing leaves: This may result from overwatering or transplant shock. Allow the soil to dry out before watering again.
-
Drooping leaves: Rubber plants may wilt temporarily after being moved. Give it time to recover in stable light and temperature conditions.
-
No new growth: If the plant seems stagnant, check that the pot isn’t too large and that drainage is adequate.
Most rubber plants bounce back quickly when placed in the right environment and given proper care.
Styling Your Repotted Rubber Plant
Now that your plant is in its new container, consider its decorative potential:
-
Use it as a statement piece near large windows or empty corners.
-
Group it with smaller plants of varying textures and leaf shapes.
-
Place it in plant stands or baskets to elevate its presence in the room.
Its striking foliage and upright habit make it ideal for minimalist, boho, or modern interiors.
Conclusion
Repotting a rubber plant is a simple yet rewarding way to support its long-term health while enhancing your interior décor. With the right pot, soil, and gentle handling, your Ficus elastica will thrive and continue to add green charm to your living space for years to come.


