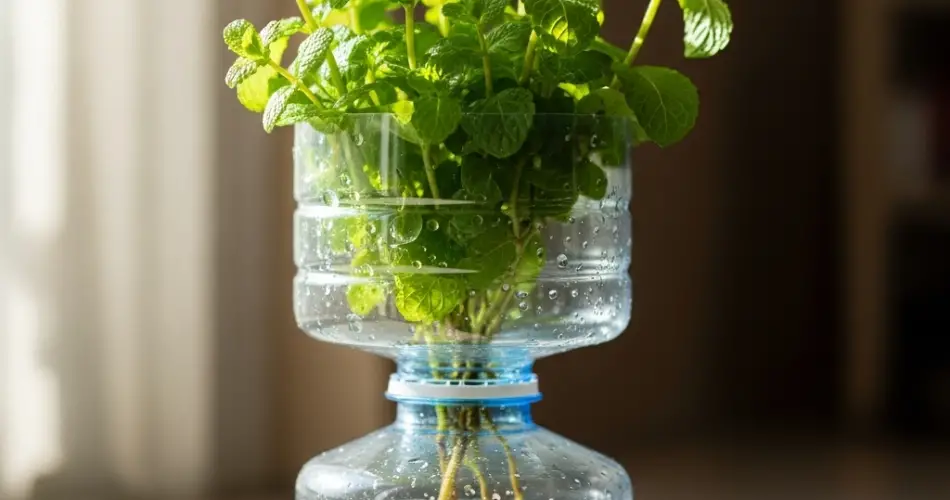
Mint is one of the most versatile and refreshing herbs you can grow at home. Known for its cool flavor and fragrant leaves, mint adds a fresh touch to teas, cocktails, sauces, desserts, and even savory dishes. Beyond its culinary uses, it is valued for its soothing aroma and medicinal qualities, making it a must-have for every kitchen. The best part is that mint is not only easy to grow but also simple to propagate. With just a few cuttings and some recycled plastic bottles, you can create an ongoing supply of fresh mint in a sustainable and budget-friendly way.
Why Propagate Mint in Plastic Bottles?
Mint is a vigorous grower, spreading rapidly if planted directly in garden beds. To control its growth while still enjoying its abundance, many gardeners prefer to grow it in containers. Using plastic bottles as mini planters is an excellent option because it helps reduce plastic waste while providing the perfect environment for mint cuttings to root and thrive.
Instead of discarding used bottles, you can give them a second life by turning them into functional herb containers. This not only saves money but also contributes to sustainable gardening practices. Plus, bottle containers are lightweight, portable, and ideal for small spaces such as balconies, windowsills, and patios.
Preparing Your Mint Cuttings
Propagation begins with selecting strong, healthy stems from your existing mint plant. Choose shoots that are about 4–6 inches long and cut just below a node, where the leaves meet the stem. Nodes are important because they are the points from which new roots will develop. Remove the lower leaves, leaving only a few pairs at the top, to allow the cutting to focus on root formation.
The beauty of mint propagation lies in its simplicity. Even beginners find success quickly, as mint roots easily in both soil and water.
Setting Up Plastic Bottle Containers
Transforming plastic bottles into planters is simple and requires only basic tools. Here’s how you can do it:
-
Select a bottle: Choose a clean plastic bottle, ideally 1–2 liters in size.
-
Cut the bottle: Slice the bottle in half. The bottom half can be used as a pot, while the top half can serve as a funnel for watering if inverted.
-
Add drainage holes: Poke small holes in the bottom to prevent waterlogging. Drainage is essential for mint’s health.
-
Prepare soil: Fill the bottle with a nutrient-rich potting mix. A blend of garden soil, compost, and a little sand works well, ensuring good drainage and aeration.
-
Plant the cuttings: Insert the prepared mint stems into the soil, covering the nodes but leaving the leaves above the surface.
This simple method transforms waste into a functional growing container while creating the perfect environment for young mint plants.
The Water Propagation Step
If you’d like to boost the success rate before planting, start your cuttings in water. Place them in a jar or even the top half of a plastic bottle filled with water. Ensure the nodes are submerged, but keep the leaves above the waterline. Change the water every few days to keep it fresh and free of bacteria.
Within a week, roots will begin to emerge. Once they reach about two inches long, the cuttings can be transferred into the soil-filled bottle containers. This step makes transplantation easier and increases survival rates.
Caring for Mint in Bottle Containers
Mint thrives with consistent moisture but dislikes waterlogged soil. Water your plants whenever the top inch of soil feels dry. Because bottles are smaller than traditional pots, they may dry out more quickly, so check them regularly.
Place the containers where they receive bright, indirect light for about 4–6 hours daily. A windowsill, balcony, or shaded outdoor area works perfectly.
To encourage bushy growth, pinch back the tips of your mint regularly. This not only keeps the plant from becoming too leggy but also provides a steady harvest of fresh leaves. If flower buds appear, remove them to preserve the strong flavor of the leaves.
Harvesting and Enjoying Fresh Mint
Once your plants are well-established, you can begin harvesting. Snip leaves or stems as needed, but avoid removing more than one-third of the plant at a time to allow it to keep producing. The more you harvest responsibly, the more the plant will branch out and thrive.
Fresh mint can be enjoyed immediately in teas, salads, smoothies, or desserts. You can also dry the leaves for later use or freeze them in ice cubes to preserve their flavor. Having bottle-grown mint ensures you always have a supply at your fingertips.
The Sustainable Benefits
Propagating mint in plastic bottles combines practicality with sustainability. Instead of purchasing new pots or letting bottles go to waste, you’re creating functional, eco-friendly planters. This practice is especially useful for urban gardeners who want to grow herbs without investing in expensive containers or taking up too much space.
By using recycled materials, you also reduce your environmental footprint while enjoying fresh herbs year-round. It’s a small but meaningful step toward greener living and mindful consumption.
Final Thoughts
Growing mint from cuttings in plastic bottles is an easy, cost-effective, and sustainable gardening project that anyone can try. With minimal effort, you can turn leftover containers into productive planters and multiply your mint supply endlessly.
Whether you live in a city apartment or have a small patio, this method allows you to enjoy the freshness of mint without requiring much space or expense. By combining resourcefulness with gardening, you’ll not only savor the rewards of homegrown herbs but also contribute to a more sustainable lifestyle.


