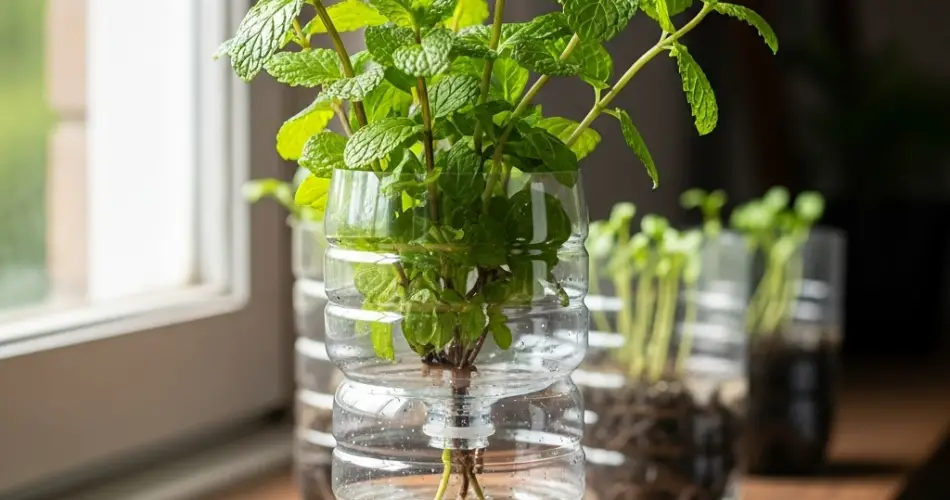
Mint is one of the easiest herbs to grow, making it a favorite for both beginner and experienced gardeners. Its refreshing flavor enhances teas, salads, sauces, and desserts, while its aroma adds freshness to any kitchen. The good news is you don’t need fancy gardening tools or a lot of space to grow mint successfully. With a few leftover household bottles, you can propagate mint easily and sustainably, turning kitchen scraps into thriving plants.
This method not only provides a steady supply of mint but also helps reduce waste by repurposing plastic bottles that might otherwise be thrown away. Let’s explore how you can start propagating mint in an eco-friendly way, using simple items found around the home.
Why Propagate Mint in Bottles?
Using bottles as propagation containers comes with several advantages:
-
Eco-friendly practice: Repurposes waste material, giving bottles a second life.
-
Cost savings: No need to buy specialized pots or propagation kits.
-
Transparency: Clear bottles allow you to see roots forming, making it a great learning tool.
-
Space efficiency: Perfect for small kitchens, balconies, or windowsills.
Mint also lends itself perfectly to propagation since it grows quickly from cuttings. This makes it an ideal herb to multiply with little effort.
What You’ll Need
Before you begin, gather these materials:
-
Fresh mint cuttings (4–6 inches long with healthy stems)
-
A clean plastic bottle (1.5 to 2 liters works best)
-
A sharp knife or scissors
-
Fresh water or potting soil (depending on the method)
-
Optional: a rubber band or tape to secure the setup
Step 1: Prepare the Bottle
Wash and dry your bottle thoroughly to remove any residue. Cut it in half across the middle. You’ll now have two parts: the bottom half can hold water or soil, while the top half can act as a cover to create a humid environment.
For water propagation, the base will hold the cuttings submerged in water.
For soil propagation, the base will hold soil and the top half will serve as a mini greenhouse dome.
Step 2: Prepare the Mint Cuttings
Take healthy stems from a bunch of mint. Trim them to about 4–6 inches, making sure each cutting has at least two sets of leaves. Remove the bottom leaves so that the nodes—the points where leaves were attached—are exposed. These nodes are where new roots will develop.
Step 3: Start the Propagation
-
Water method: Fill the bottom half of the bottle with water and place the cuttings inside, ensuring the nodes are submerged but the leaves stay above the waterline.
-
Soil method: Fill the bottle base with damp potting soil. Insert the cuttings gently into the soil and press lightly to secure them in place. Cover with the top half of the bottle to trap humidity.
In both methods, ensure good airflow by leaving the bottle cap loose or poking small holes for ventilation.
Step 4: Place in the Right Spot
Position your bottle propagator in a bright area with indirect sunlight. Avoid placing it in direct midday sun, as the enclosed bottle can overheat quickly. A windowsill with gentle morning or late afternoon light works best.
If propagating in water, change the water every two to three days to prevent stagnation. For soil propagation, keep the soil moist but not soggy.
Step 5: Monitor Root Growth
One of the best parts of this process is watching new roots form. In water, you’ll see tiny white roots sprouting within 7–10 days. In soil, look for new leaf growth or resistance when you gently tug on the cutting, which indicates roots are forming.
After two to three weeks, the roots should be strong enough for transplanting.
Step 6: Transplant the Mint
Once your cuttings have roots about 2 inches long, it’s time to move them to a permanent pot. Choose a container with good drainage and fill it with nutrient-rich soil. Carefully transfer the rooted cuttings and water thoroughly.
Place the pot in a sunny spot and continue to water regularly, keeping the soil slightly moist. Mint thrives in partial to full sunlight and will quickly establish itself with minimal care.
Step 7: Maintain and Harvest
Mint grows vigorously, so regular pruning is essential to prevent it from becoming unruly. Pinch back the tips to encourage bushy growth, and harvest sprigs just above a leaf node to promote continuous growth.
To keep your plant healthy, avoid letting the soil dry out completely, but don’t let it sit in waterlogged conditions either. A consistent watering schedule and occasional feeding with organic fertilizer will keep your mint lush and flavorful.
Final Thoughts
Eco-friendly mint propagation using household bottles is a simple, sustainable, and rewarding gardening practice. It reduces waste, saves money, and ensures you always have fresh mint within reach. Whether you choose the water method or soil method, the process is easy enough for anyone to try, even in small spaces.
By reusing bottles and growing your own herbs, you not only enjoy the satisfaction of fresh mint but also take a small step toward a greener lifestyle. With just a few cuttings and a recycled container, you can transform kitchen scraps into a thriving herb garden.


