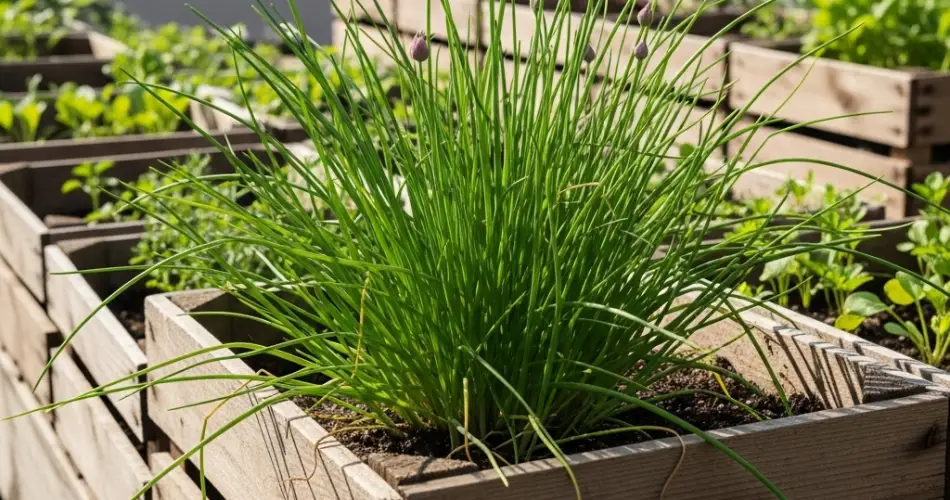
Few herbs are as versatile and easy to grow as chives. With their mild onion flavor and vibrant green stalks, they can elevate salads, soups, omelets, and countless other dishes. Growing chives in crates is a smart solution for city dwellers who want fresh herbs within reach, even if space is limited. Whether your “garden” is a sunny balcony, rooftop, or a small corner near a window, a crate of chives brings flavor and freshness straight from the planter to your plate.
Why Chives Are Perfect for Crate Gardening
Chives are hardy perennials, meaning they can return year after year with the right care. They’re tolerant of a range of conditions, easy to grow from seed or clumps, and don’t require much space. This makes them ideal for planting in crates, which offer portability and a rustic, decorative appeal.
Crates also allow you to control the growing medium, drainage, and placement—important factors for healthy chives. Plus, the raised structure of a crate makes harvesting easier and helps keep plants safe from pests like snails and slugs.
Selecting the Right Crate
Material matters
Choose untreated wooden crates to avoid chemicals that could leach into the soil. Old fruit boxes, wine crates, or sturdy shipping boxes are great options.
Depth and drainage
Chives have shallow roots, so a crate at least 8–10 inches deep works well. Ensure there are drainage holes in the bottom to prevent waterlogging. If your crate has a solid base, drill several holes and cover them with mesh or broken pottery to keep soil from spilling out.
Lining
Line the inside with breathable material like burlap, hessian, or landscape fabric. This will hold the soil in place while letting water pass through.
Preparing the Soil
Chives thrive in well-draining, fertile soil. A balanced potting mix enriched with compost is ideal. To improve drainage, you can mix in a small amount of sand or perlite.
For best flavor and growth, chives prefer a slightly acidic to neutral pH (around 6.0–7.0). Adding organic matter like composted kitchen scraps or aged manure will keep the plants well-fed.
Planting Your Chives
From seed
Sow chive seeds about 1/4 inch deep, covering lightly with soil. Keep the surface moist until germination, which usually takes 10–14 days.
From clumps
If you’re starting with established chives, divide a mature plant into smaller clumps and plant them about 6 inches apart. This method produces quicker harvests than seeds.
Sunlight needs
Chives prefer full sun—at least 6 hours a day. If your balcony or crate garden gets less direct light, they will still grow, but more slowly.
Caring for Chives in Crates
Watering
Chives like consistent moisture but not soggy soil. Water when the top inch feels dry, and ensure excess water can drain away.
Feeding
Light feeding every 4–6 weeks during the growing season will keep chives lush. A diluted liquid fertilizer or compost tea works well.
Pruning and harvesting
Regular harvesting encourages fresh growth. Cut leaves down to about 2 inches above the soil, taking care not to remove all at once. Flower buds are edible and have a mild onion-garlic flavor—perfect for garnishes.
Managing Pests and Problems
Chives are generally pest-resistant, but they can occasionally attract aphids or thrips. These can be managed with a gentle spray of water or an application of insecticidal soap. Ensure your crate garden has good airflow to prevent fungal issues.
If leaves start yellowing, it may be a sign of overwatering or depleted nutrients—adjust care accordingly.
Harvesting and Using Chives
You can start harvesting when plants are about 6 inches tall, usually 8–10 weeks after sowing. Use clean scissors to snip the leaves, and they will quickly regrow.
Chives add a mild onion flavor to dishes without overpowering them. They’re best used fresh, but you can also dry or freeze them for later. To freeze, chop and place in an airtight container or freeze in ice cube trays with a little water.
Seasonal Care
Chives can survive winter in many climates. In colder regions, they may die back but will return in spring. If you want year-round growth, move your crate indoors near a sunny window during winter.
Every 3–4 years, divide and replant clumps to maintain healthy growth and prevent overcrowding.
Styling Your Chive Crate Garden
A chive-filled crate is both functional and decorative. You can:
-
Paint the crate with chalkboard paint and label it for easy identification.
-
Combine chives with other herbs like parsley, basil, or oregano for a mixed planter.
-
Stack crates vertically for a layered herb display.
Final Thoughts
Crate gardening is a practical and attractive way to grow fresh herbs in even the smallest spaces. With minimal effort, you can have a steady supply of flavorful chives ready to snip and sprinkle over your favorite dishes.
From crate to cutting board, this approach brings gardening and cooking closer together, ensuring that your meals are always enhanced with the bright, fresh taste of homegrown chives.


