Scallions, also known as green onions or spring onions, are one of the easiest and most versatile crops to grow at home. Their crisp stalks and mild onion flavor make them a kitchen staple for salads, stir-fries, soups, and garnishes. Best of all, scallions don’t require a large garden plot to thrive—just a bucket and a bit of care will provide you with a steady supply of fresh greens.
If you’ve been wanting to try container gardening, scallions are an ideal choice for beginners. They grow quickly, don’t need much space, and can even be regrown from kitchen scraps. Here’s a step-by-step guide to growing healthy scallions in buckets right at home.
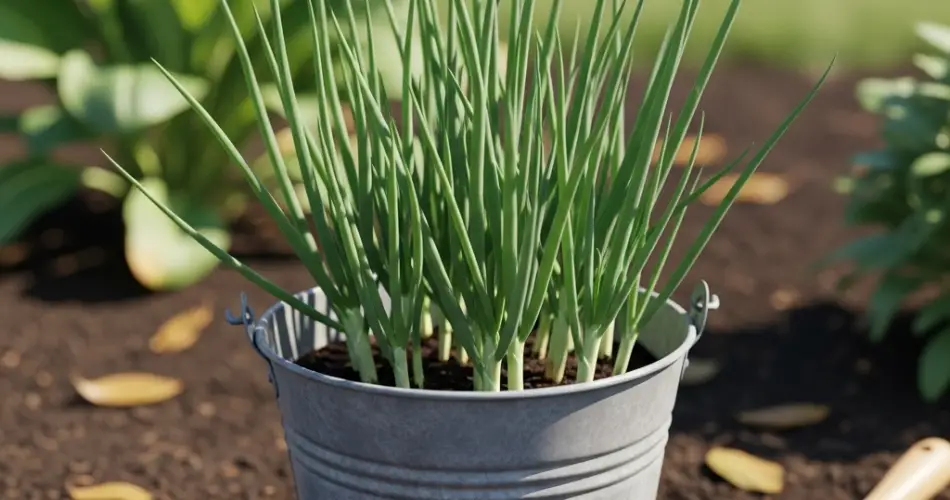
Step 1: Choosing the Right Bucket
When planting scallions, you don’t need a deep or oversized container. Their roots are shallow, so a bucket with about 10–12 inches of depth works perfectly.
-
Size: A 2–3 gallon bucket is enough for a small batch, but a 5-gallon bucket can grow a larger supply.
-
Drainage: Ensure there are drainage holes at the bottom to prevent water from pooling. If the bucket doesn’t have holes, drill at least 4–6 evenly spaced ones.
-
Material: Plastic buckets are lightweight and easy to move, while ceramic or wooden containers can also work if they have proper drainage.
Step 2: Preparing the Soil
Scallions thrive in loose, well-draining soil that’s rich in organic matter. Garden soil is often too heavy for buckets, so use a high-quality potting mix for better results.
-
Soil mix: Combine potting soil with compost for added nutrients. A little sand or perlite helps improve drainage.
-
pH level: Aim for neutral to slightly acidic soil, around pH 6.0–7.0.
Filling the bucket almost to the rim (leaving about 2 inches at the top) allows room for watering without overflow.
Step 3: Planting Scallions
There are two easy methods for growing scallions in buckets: planting seeds or re-growing from store-bought scallions.
-
From seeds:
-
Sow seeds about ¼ inch deep and 1 inch apart.
-
Cover lightly with soil and water gently.
-
Within 7–14 days, seedlings will start to emerge.
-
-
From cuttings:
-
Save the white root ends from scallions you buy.
-
Place them in water for a few days until new green shoots appear.
-
Transplant into your bucket, spacing each root cutting about 2 inches apart.
-
Both methods are effective, though starting with cuttings often produces quicker results.
Step 4: Watering and Fertilizing
Scallions prefer consistently moist soil but not waterlogged conditions. Buckets dry out more quickly than garden beds, so regular watering is essential.
-
Watering schedule: Check the soil daily. If the top inch feels dry, it’s time to water.
-
Fertilizing: Since scallions grow quickly, they don’t require heavy feeding. A balanced liquid fertilizer or compost tea every 2–3 weeks will keep them healthy.
Step 5: Sunlight and Temperature
Scallions need about 6 hours of sunlight per day, making them well-suited for balconies, patios, or sunny windowsills.
-
Cool-season crop: They thrive in cooler weather, between 55–75°F (13–24°C).
-
Heat protection: In very hot climates, place buckets where they get morning sun and afternoon shade to prevent wilting.
Step 6: Caring for Your Plants
Scallions are relatively low-maintenance, but a few small steps ensure they keep growing strong:
-
Thinning: If seedlings grow too close together, thin them out to allow at least 1–2 inches of space per plant.
-
Mulching: Add a thin layer of straw or shredded leaves on top of the soil to help retain moisture.
-
Pest control: Watch for onion maggots or aphids. Neem oil or a mild soapy water spray can help manage these naturally.
Step 7: Harvesting Scallions
One of the best things about scallions is how quickly they can be harvested. Depending on the growing method:
-
From seed: Scallions are usually ready to harvest in 8–10 weeks.
-
From cuttings: You may be able to start harvesting greens in as little as 3–4 weeks.
To harvest, use scissors to snip off the green tops, leaving the white base and roots in the soil. This allows the plant to regrow for multiple harvests. If you prefer, you can also pull the entire plant once it reaches full size.
Step 8: Continuous Supply
For a steady harvest, plant scallion seeds in stages. Every 2–3 weeks, sow a new batch in the same or a separate bucket. This staggered planting ensures you’ll always have fresh scallions ready to pick.
Another trick is to keep re-growing scallions from store-bought ones, continuously replanting the root bases after each harvest. This simple cycle can keep your supply going for months.
Conclusion
Growing scallions in buckets is a simple and rewarding way to enjoy fresh, homegrown flavor all year round. Whether you start from seeds or kitchen scraps, scallions adapt easily to container life, making them ideal for small spaces and urban gardens. With just a bucket, some soil, and a sunny spot, you can have a steady supply of crisp, flavorful greens right at your fingertips.
Bucket gardening not only saves space but also makes growing your own food accessible to anyone, no matter where you live. If you’re new to container gardening, scallions are the perfect crop to get started with—and once you see how easy and productive they are, you’ll never want to be without them.


