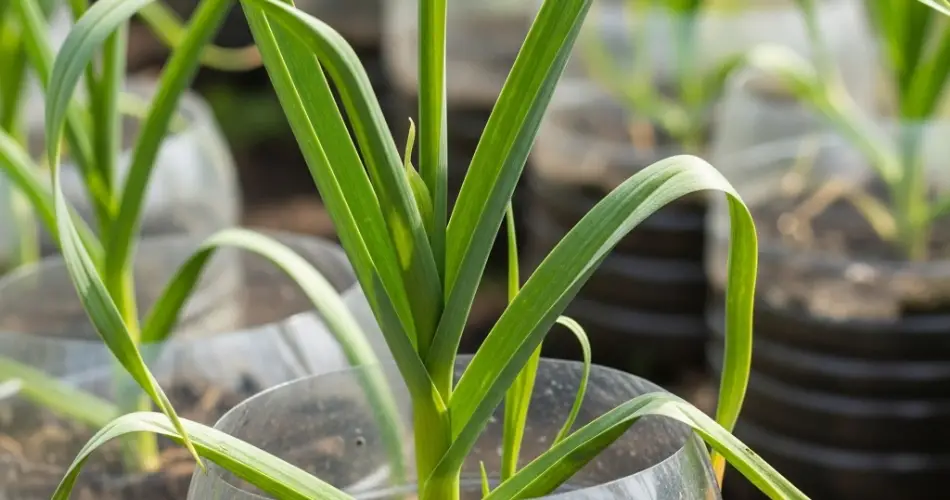
Growing your own garlic at home is not only rewarding but also surprisingly simple. Even if you don’t have access to a garden, you can still cultivate fresh garlic using reused plastic containers. This eco-friendly method not only helps reduce household waste but also allows you to grow one of the most essential and health-boosting kitchen staples right in your backyard, balcony, or windowsill.
Garlic is a low-maintenance crop that adapts well to container growing. With a few basic materials and the right technique, you can produce plump, flavorful garlic bulbs and enjoy the benefits of homegrown herbs year-round.
Why Grow Garlic in Plastic Containers?
Plastic containers are easy to find, cost nothing if reused, and make excellent planters when prepared correctly. They offer portability, making it easier to control growing conditions like light and temperature. Reusing them also gives a second life to what would otherwise be discarded plastic, contributing to a more sustainable lifestyle.
Container-grown garlic is less exposed to soil-borne diseases and pests, and you can easily move the containers to follow the sun or protect the plants during extreme weather conditions.
What You’ll Need
To grow garlic successfully in reused plastic containers, gather the following:
-
1.5- to 5-liter plastic containers (food-grade preferred)
-
A sharp knife or scissors
-
Heated nail or drill for drainage holes
-
Quality potting soil or DIY soil mix
-
Garlic bulbs (organic or untreated store-bought cloves)
-
Watering can or spray bottle
-
Sunny location (balcony, patio, or windowsill)
Preparing the Containers
-
Clean Thoroughly: Wash your plastic containers with soap and water to remove any residue. Remove labels and ensure there are no lingering odors.
-
Add Drainage Holes: Using a drill or heated nail, make several holes at the bottom of each container to allow excess water to escape. Proper drainage is crucial to avoid root rot.
-
Size and Depth: Choose containers that are at least 8–10 inches deep. Garlic roots need space to grow downward, and the bulbs need soil depth to develop properly.
-
Optional Enhancement: Cut small slits along the sides of the container to improve aeration, especially in humid climates.
Selecting and Preparing Garlic Cloves
Choose large, healthy garlic bulbs. Avoid any that are soft, moldy, or sprouting excessively. Separate the cloves gently from the bulb, leaving the papery skins intact. Don’t peel the individual cloves.
Note: Use garlic varieties suited to your climate. Softneck varieties are better for warmer regions, while hardneck types perform well in cooler climates.
Planting Garlic
-
Fill your containers with a well-draining soil mix. A good blend includes:
-
1 part compost
-
1 part cocopeat or peat moss
-
1 part perlite or sand
-
-
Make holes about 2 inches deep and 4 inches apart.
-
Insert each clove with the pointed end facing up and the flat root end down.
-
Cover with soil and gently press down to secure the cloves.
-
Water lightly until the soil is evenly moist but not soggy.
Growing Conditions and Maintenance
-
Sunlight: Garlic needs at least 6–8 hours of sunlight daily. Place the container in a sunny spot such as a windowsill, balcony, or patio.
-
Watering: Water when the top inch of soil feels dry. Avoid overwatering; garlic prefers moist but not wet soil.
-
Fertilization: Feed every 3–4 weeks with compost tea or a diluted organic liquid fertilizer. Avoid nitrogen-heavy fertilizers later in the season, as they may lead to excessive leafy growth and smaller bulbs.
-
Temperature: Garlic prefers cooler conditions early in its growth but will tolerate warm temperatures as long as the soil remains moist.
-
Mulching (Optional): Add a layer of straw, dried leaves, or shredded newspaper to help retain moisture and reduce weed growth.
Growth Timeline
-
Sprouting: Green shoots usually appear within 7–14 days after planting.
-
Bulb Formation: Bulbs begin developing underground in the final months of growth.
-
Growing Period: Garlic typically takes 6–8 months to mature fully, depending on the variety and climate.
When and How to Harvest
You’ll know garlic is ready to harvest when the lower leaves begin to yellow and dry while the upper leaves remain green. This usually happens in late spring or early summer, depending on your planting time.
-
Stop watering about a week before harvesting.
-
Loosen the soil gently and pull out the bulbs.
-
Brush off excess soil (do not wash them yet).
-
Let the bulbs cure in a dry, shaded, and well-ventilated area for 2–3 weeks.
-
Once cured, trim the roots and leaves, and store the garlic in a cool, dry place.
Final Thoughts
Growing garlic in reused plastic containers is an excellent way to enjoy fresh, flavorful cloves without needing a large garden. It’s a sustainable practice that makes use of everyday household waste and brings you closer to self-sufficiency. With minimal effort, you can grow a crop that stores well, enhances countless dishes, and supports your health—all from a few humble containers.
Give it a try and transform your plastic waste into a productive, green-growing solution right at home.


