Garlic is a must-have in every kitchen, known for its strong flavor and numerous health benefits. Growing garlic at home is easier than many people think—and it doesn’t require a large garden. With just a few empty plastic bottles and a sunny corner, even beginners can start a productive garlic garden indoors or outdoors. This simple DIY project is ideal for small spaces and helps repurpose plastic waste into something truly useful.
Whether you’re new to gardening or just looking for a compact way to grow your own garlic, this bottle garden method is budget-friendly, space-saving, and surprisingly rewarding.
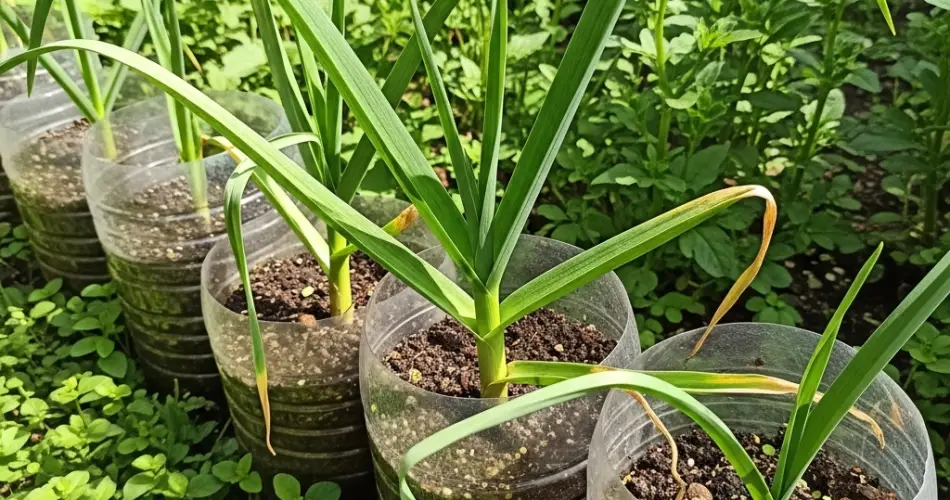
Why Grow Garlic in Plastic Bottles?
Plastic bottles are readily available and easy to convert into compact planters. Using them not only reduces plastic waste but also helps you grow garlic without the need for traditional pots or raised beds. Garlic’s low-maintenance nature makes it a great crop for bottles, whether you’re growing for full bulbs or for tasty green shoots.
Benefits include:
-
Ideal for windowsills, balconies, or patios
-
Low-cost and sustainable
-
Suitable for indoor or outdoor cultivation
-
Encourages recycling and upcycling
What You’ll Need
-
Clean 1.5- to 2-liter plastic bottles
-
A sharp knife or scissors
-
A screwdriver or heated nail (for drainage holes)
-
Potting mix (preferably with compost or organic matter)
-
Garlic cloves (organic or untreated preferred)
-
A sunny location (or a grow light for indoor setups)
-
Twine or string (optional, for hanging bottles)
Step-by-Step Guide to Making a Garlic Bottle Garden
1. Prepare the Bottles
Wash and dry each bottle thoroughly. Remove labels if possible. You can design your bottle planter in one of two ways:
-
Standing Pot: Cut off the top third of the bottle, leaving the bottom portion as a pot.
-
Horizontal Planter: Lay the bottle on its side and cut a rectangular window out of the top surface.
2. Add Drainage
Poke 4–6 small holes in the bottom of each bottle using a screwdriver or heated nail. Proper drainage is essential to prevent water from pooling and causing root rot.
If you’re creating a vertical hanging garden, punch two additional holes near the top edge for hanging with string or twine.
3. Choose and Prepare Garlic Cloves
Use firm, healthy garlic cloves. Avoid using any that are moldy or soft. If possible, choose organic garlic from a store or seed garlic from a nursery. Non-organic garlic is often treated to prevent sprouting.
Do not peel the cloves. Simply separate them from the bulb and select the larger ones for planting.
Planting the Garlic
-
Fill the Bottle with Soil
Use a light, well-draining potting mix. Mix in some compost or worm castings for added nutrients. Fill the bottle up to an inch below the rim. -
Plant the Cloves
Push the garlic clove into the soil with the pointed end facing up and the flat root end down. Bury each clove about 1.5–2 inches deep. If using small bottles, plant only one clove per container for best results. -
Water Gently
Moisten the soil with a watering can or spray bottle. Keep the soil damp but not soggy during the early stages of growth.
Light and Placement
Garlic needs at least 4–6 hours of sunlight daily. Place your bottles in a sunny window, on a balcony, or outdoors on a ledge. If natural sunlight is limited, use a full-spectrum LED grow light placed 6–12 inches above the plants.
Ongoing Care
-
Watering: Check the soil every few days and water when the top inch feels dry. Avoid overwatering.
-
Fertilizing: Garlic benefits from light feeding every 2–3 weeks. Use a diluted organic liquid fertilizer or compost tea.
-
Pest Management: Garlic naturally repels most pests, but if you see aphids or gnats, use neem oil or soapy water spray as a gentle remedy.
-
Airflow: Make sure there’s good air circulation around your bottles, especially indoors.
Harvesting
There are two types of harvest you can enjoy:
-
Garlic Greens (Shoots): Within 2–3 weeks, you’ll see green shoots. These can be cut like scallions and used in cooking. Always leave a portion of the plant to allow regrowth.
-
Garlic Bulbs: If you’re growing for full bulbs, allow the plant to grow for 4–6 months. When the leaves begin to yellow and fall over, it’s time to harvest the bulbs. Remove them gently, clean off the soil, and cure them in a dry, shaded spot for a couple of weeks before storing.
Note: Bulbs grown in small containers may be smaller than those in garden beds, but they’ll still offer great flavor and freshness.
Replant and Reuse
After harvesting, clean out your bottles, refresh the soil, and replant new cloves. You can repeat the process several times a year, especially if you’re focusing on garlic greens. This makes your bottle garden a continual source of fresh flavor for your kitchen.
Final Thoughts
Starting a garlic bottle garden is a beginner-friendly project that combines sustainability with the joy of growing your own food. It’s easy, budget-friendly, and doesn’t require much space or experience. Whether you’re looking to add greenery to your apartment or simply want fresh garlic on hand, plastic bottles offer a surprisingly effective solution for small-space gardening.


