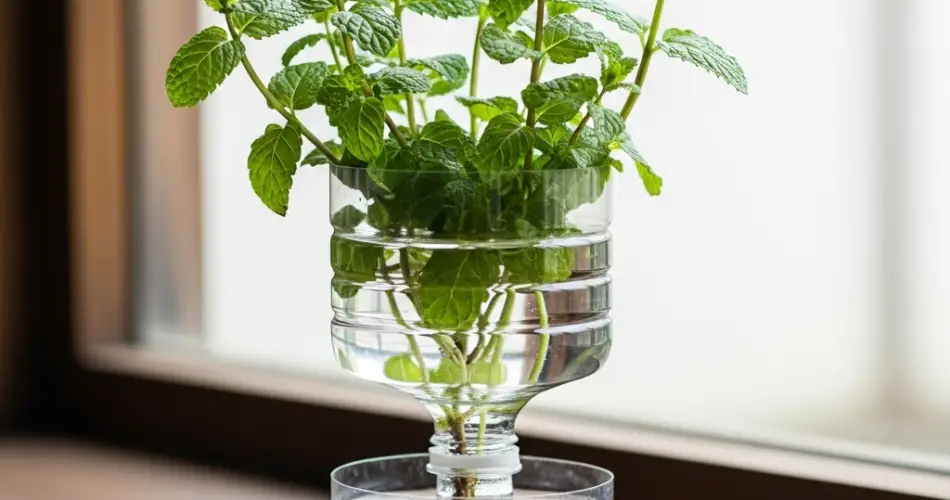
Mint is one of the easiest and most rewarding herbs to grow at home. Its refreshing aroma and cooling flavor make it a favorite addition to teas, desserts, salads, and even savory dishes. While you can start mint from seeds, propagation through cuttings is a quicker and more reliable method. Even better, you can use clear bottles to not only root the cuttings but also observe the fascinating process of root development up close.
This method combines practical gardening with a bit of science experiment fun, making it perfect for beginners, hobby gardeners, or anyone curious about how plants grow. Here’s a step-by-step guide to cloning mint using clear bottles, ensuring you always have fresh sprigs at your fingertips.
Why Clone Mint Instead of Growing from Seed?
Mint grown from seed often produces inconsistent results, as seeds may not always yield plants true to their parent variety. Propagation through cuttings, however, ensures that the new plant is an exact genetic copy of the original. Here are the key benefits:
-
Consistency – The cloned mint will have the same flavor, aroma, and growth habit as the parent plant.
-
Speed – Cuttings establish much faster than seeds, giving you usable mint sooner.
-
Simplicity – It requires no special tools or equipment—just a healthy parent plant and a clear bottle.
-
Observation – Using transparent containers lets you watch root growth in real time, which is both educational and rewarding.
Materials You’ll Need
Before starting, gather these simple supplies:
-
A healthy mint plant
-
Clean scissors or garden shears
-
A clear glass or plastic bottle
-
Fresh water
-
Potting soil and a container for transplanting
Optional but useful: a small stick or straw to support the cutting as it grows.
Step 1: Take a Cutting
Select a strong, healthy stem from your mint plant that is about 4–6 inches long. Avoid stems that look woody, yellowed, or weak. Using clean scissors or shears, cut just below a leaf node—the small bump where leaves meet the stem.
Strip off the leaves from the lower half of the cutting. This prevents them from sitting in the water, where they could rot, and focuses the plant’s energy on root production. Keep a few leaves at the top to support photosynthesis.
Step 2: Prepare the Bottle
Choose a clear bottle so you can easily monitor root development. Glass jars, clear plastic bottles, or even repurposed drink containers work perfectly. Wash the container thoroughly to ensure it’s free from dirt or residues.
Fill the bottle with fresh water until it covers the lower nodes of your mint cutting. Place the cutting inside, ensuring that no leaves are submerged.
Step 3: Position for Growth
Place the bottle in a spot with bright, indirect sunlight. A windowsill that receives morning light is often ideal. Avoid strong direct midday sun, which can overheat the water and stress the cutting.
Change the water every two to three days to keep it fresh and oxygenated. Clean water helps prevent bacteria growth, which could otherwise harm your cutting.
Step 4: Watch the Roots Develop
One of the most rewarding aspects of this method is being able to observe root development through the clear bottle. Within a week, you may notice small white roots beginning to emerge from the submerged nodes.
Over the next two to three weeks, these roots will lengthen and branch out. Watching this process not only confirms that your cutting is thriving but also provides a deeper understanding of how plants adapt and grow.
Step 5: Transplant into Soil
Once the roots reach about 2 inches long, your mint cutting is ready for transplanting. Choose a container with good drainage holes and fill it with nutrient-rich potting soil.
Make a small hole in the soil and gently place the rooted cutting inside, covering the roots carefully. Press the soil lightly around the base for stability and water thoroughly.
Step 6: Care for Your New Mint Plant
After transplanting, place your mint in a spot with partial to full sunlight. Indoors, a bright windowsill or balcony space works well. Outdoors, mint thrives in containers where its spreading roots can be controlled.
Maintain consistently moist soil but avoid waterlogging. Mint prefers slightly damp soil, and regular watering helps keep the leaves lush and fragrant.
Pinch back the tips regularly to encourage bushier growth and prevent the plant from flowering, which can reduce leaf flavor.
Sustainability Bonus: Reusing Clear Bottles
By using clear bottles, you give new life to containers that might otherwise be discarded. This practice reduces waste while adding a fun visual element to your gardening. It’s an eco-friendly way to expand your herb collection while also creating an engaging activity for kids and adults alike.
Enjoy Your Harvest
Within a few weeks, your cloned mint will be strong enough to harvest. Snip off leaves as needed for cooking, beverages, or garnishes. With regular pruning, your plant will continue producing fresh leaves, ensuring a steady supply right from your kitchen or balcony.
Final Thoughts
Cloning mint with clear bottles is a simple, sustainable, and fascinating way to expand your herb garden. It allows you to create new plants without seeds, enjoy consistent flavor, and watch the magical process of root formation up close. With just a cutting, a recycled container, and a little care, you can turn a single mint sprig into a thriving plant that provides fresh flavor for months to come.


