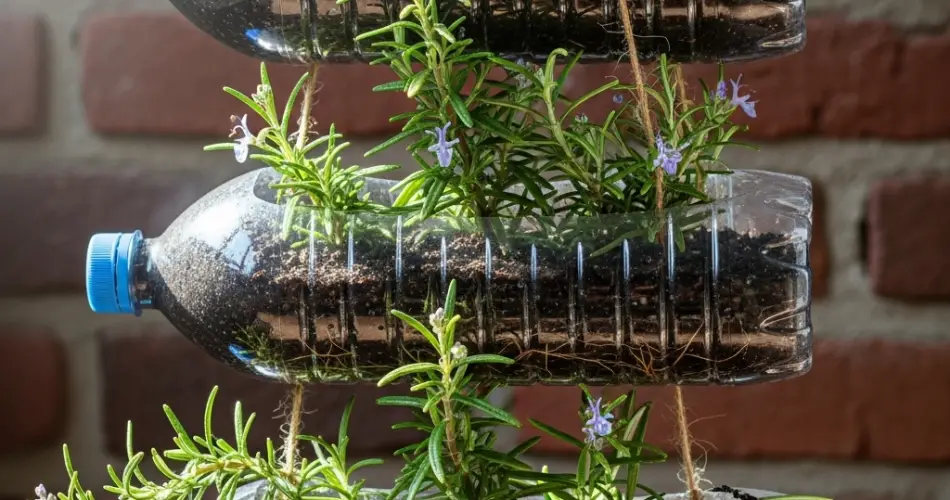
Rosemary is a versatile, fragrant herb celebrated for its culinary uses, aromatic qualities, and ornamental appeal. From seasoning meats and roasted vegetables to infusing oils and teas, rosemary is a valuable addition to any kitchen garden. Propagating rosemary from cuttings is faster and more reliable than growing from seeds, especially for gardeners who want to expand their plants efficiently. A sustainable and practical way to do this is by using a DIY bottle propagator.
A bottle propagator provides an ideal environment for rosemary cuttings, maintaining consistent moisture and protecting developing roots. This method is especially useful for small-space gardeners, urban dwellers, and anyone looking to repurpose plastic bottles into functional planters. By using bottles, you can reduce waste while growing healthy, productive rosemary plants.
Why Use a Bottle Propagator for Rosemary
Bottle propagation offers several advantages for rosemary cultivation:
-
Faster Root Development: Cuttings typically form roots more quickly in a controlled water environment than in soil.
-
Easy Monitoring: Transparent bottles allow you to observe root growth and detect any issues early.
-
Space-Efficient: Compact bottles fit on windowsills, balconies, or small garden spaces.
-
Eco-Friendly: Upcycling plastic bottles transforms waste into useful gardening tools.
This method is simple, cost-effective, and suitable for gardeners of all experience levels.
Choosing the Right Bottle
Selecting an appropriate bottle is crucial for successful propagation.
Size and Shape
Bottles of 1–2 liters provide sufficient water volume and space for roots to develop. Narrow-neck bottles help support upright cuttings, while larger bottles allow roots to spread freely.
Cleanliness
Wash the bottle thoroughly with warm water and mild soap to remove residues. Rinse well to ensure no chemicals remain that could harm the cuttings.
Optional Modifications
Cut the bottle in half to create an open container for easier access. Alternatively, make a small slit to insert the cutting while keeping the top portion as a cover to reduce evaporation and maintain humidity.
Preparing Rosemary Cuttings
Select healthy, non-woody stems from an established rosemary plant. Avoid flowering stems, as they root more slowly.
Steps for Preparing Cuttings
-
Choose a stem 4–6 inches long with several leaf nodes.
-
Make a clean cut just below a leaf node using sharp scissors or pruning shears.
-
Remove lower leaves to prevent them from sitting in water and rotting.
-
Optional: Dip the cut end in rooting hormone to encourage faster root development.
Rooting Rosemary in Bottles
Place the prepared cuttings in the bottle filled with fresh, room-temperature water.
Tips for Successful Rooting
-
Submerge at least one leaf node, as this is where roots will emerge.
-
Place the bottle in bright, indirect sunlight; avoid direct sunlight, which can overheat the water.
-
Change the water every 2–3 days to keep it fresh and oxygenated.
Roots typically begin to form within 2–4 weeks. Longer, healthy roots indicate that the cuttings are ready for soil transplanting.
Transplanting Rosemary Cuttings
Once roots reach 2–3 inches in length, rosemary cuttings can be moved to soil.
Steps for Transplanting
-
Fill a pot or crate planter with well-draining soil. A mixture of potting soil and sand or perlite works well.
-
Make a small hole and gently place the rooted cutting, covering the roots with soil.
-
Water lightly and maintain consistent moisture for the first few weeks.
-
Gradually acclimate the plant to full sunlight to strengthen growth.
Rosemary thrives in sunny locations with at least 6 hours of light per day. Once established, it tolerates dry conditions and occasional neglect, making it a resilient herb for kitchens and gardens alike.
Maintaining Healthy Rosemary
Proper care ensures bushy, flavorful growth:
-
Pinch back tips regularly to promote branching and prevent legginess.
-
Remove flowers if the goal is leaf production, as flowering diverts energy from foliage.
-
Monitor for pests such as spider mites or aphids and address them promptly.
Routine care keeps rosemary aromatic, attractive, and productive.
Harvesting Rosemary
You can begin harvesting once the plant reaches 6–8 inches in height:
-
Snip outer stems, leaving inner growth intact for continued development.
-
Harvest regularly to encourage new growth and prevent woody stems.
-
Fresh leaves can be used immediately or preserved by drying, freezing, or infusing in oils and vinegars.
Rosemary flowers are also edible and can enhance both dishes and beverages.
Styling Your Rosemary Bottle Garden
Rosemary’s fragrant foliage makes it both functional and decorative:
-
Display bottles on windowsills, shelves, or balconies for easy access.
-
Group multiple bottle propagators in a rustic crate for a compact herb station.
-
Label or decorate bottles to enhance the visual appeal of your garden setup.
This method combines sustainability, convenience, and aesthetics, creating a charming mini herb garden.
Final Thoughts
Using a DIY bottle propagator for rosemary is a simple, effective, and eco-friendly method to multiply plants. With proper preparation, regular water changes, and sufficient light, cuttings develop into healthy, robust plants ready for soil or continued growth in bottles.
This approach is ideal for small-space gardeners, urban dwellers, or anyone seeking a continuous supply of fresh, aromatic rosemary. By combining upcycling with practical gardening techniques, you can create an attractive, productive, and environmentally conscious herb-growing system.


