Growing sweet and hot peppers at home can be a rewarding experience, especially when you start your plants early indoors. Using recycled plastic bottles as DIY planters is an affordable, eco-friendly, and space-saving way to propagate healthy pepper seedlings before transplanting them outdoors or into larger pots. This method allows gardeners to control growing conditions while reducing waste by repurposing everyday materials.
Here’s a detailed guide on how to make and use plastic bottle planters to start your sweet and hot pepper plants successfully.
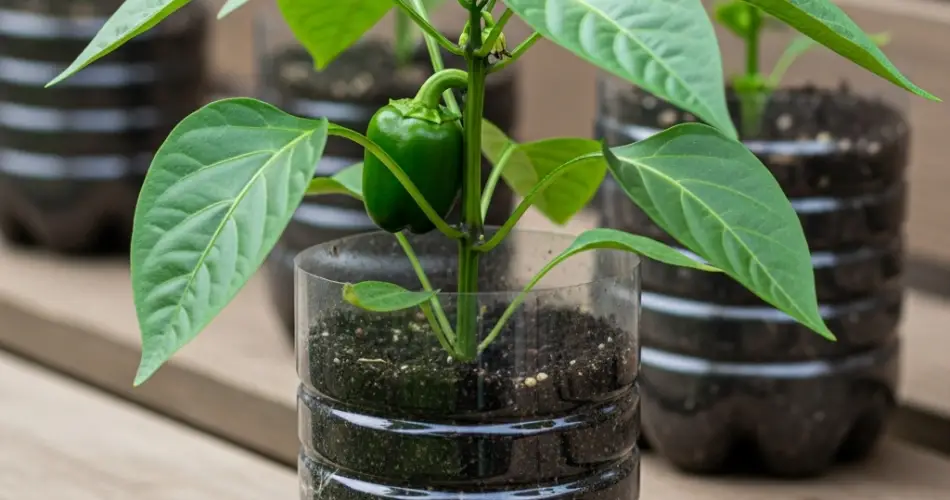
Why Use Plastic Bottles as Planters?
Plastic bottles are widely available and versatile for gardening projects. Their transparent nature allows you to monitor soil moisture and root development easily. Bottle planters are lightweight, portable, and perfect for small spaces like windowsills or balconies. Additionally, reusing bottles helps reduce plastic waste, making this a sustainable gardening choice.
Materials Needed
-
Clean, empty plastic bottles (1- or 2-liter soda bottles work well)
-
Sharp scissors or a utility knife
-
Potting mix suitable for seed starting
-
Sweet or hot pepper seeds
-
Water spray bottle or watering can
-
Optional: markers for labeling, small stakes for support
Step 1: Preparing the Bottles
Start by washing the bottles thoroughly to remove any residue. Remove the labels so you can see inside the planter. Cut the bottle about one-third from the top, creating two parts: a bottom container to hold soil and seedlings, and a top part that can be used as a lid or mini-greenhouse.
Make several small drainage holes at the base of the bottom part. Good drainage prevents waterlogging, which can harm delicate seedlings. You may also punch a few small holes around the sides for airflow.
Step 2: Filling the Planters
Fill the bottom part of the bottle with a high-quality potting mix designed for seedlings. Avoid garden soil, which can be too dense and may carry diseases. The soil should be loose, well-draining, and nutrient-rich to support early plant growth.
Leave about an inch of space at the top of the soil for watering and seed placement.
Step 3: Sowing Pepper Seeds
Plant your sweet or hot pepper seeds about 0.5 to 1 centimeter (¼ to ½ inch) deep in the soil. Space the seeds evenly if planting more than one per bottle, but it’s often best to start with one seedling per planter to avoid overcrowding.
Lightly cover the seeds with soil and gently press down to ensure good seed-to-soil contact.
Step 4: Watering and Creating a Greenhouse Effect
Moisten the soil using a spray bottle or watering can with a fine spout to avoid disturbing the seeds. Avoid overwatering; the soil should be damp but not soggy.
Place the top part of the bottle back on the bottom, upside down, creating a mini-greenhouse. This helps retain humidity and warmth, both critical for seed germination.
Step 5: Providing Optimal Growing Conditions
Pepper seeds germinate best in warm temperatures between 24°C to 30°C (75°F to 85°F). Place the bottle planters in a bright location with indirect sunlight or under grow lights.
Keep the soil consistently moist by checking daily and misting as needed. Avoid letting the soil dry out completely or become waterlogged.
Step 6: Seedling Care and Transplanting
Within 7 to 14 days, pepper seeds should begin to sprout. Once seedlings develop their first true leaves and look sturdy, it’s time to gradually acclimate them to less humid conditions.
Remove the bottle tops for a few hours daily over several days to toughen up the seedlings. When seedlings reach 7 to 10 centimeters (3 to 4 inches) tall and have a strong root system, transplant them into larger pots or outdoor garden beds.
Before transplanting outdoors, harden off your pepper plants by gradually exposing them to outdoor conditions over 7 to 10 days, reducing watering slightly to prepare them for the transition.
Advantages of Using Bottle Planters for Peppers
-
Cost-effective: Uses readily available recycled materials.
-
Space-saving: Ideal for urban gardeners with limited space.
-
Transparent: Allows monitoring of moisture and root growth.
-
Portable: Easy to move to optimal light and temperature spots.
-
Environmentally friendly: Reduces plastic waste by repurposing bottles.
Additional Tips for Success
-
Label each bottle planter with the pepper variety and sowing date for easy identification.
-
Use a seed starting mix or a light potting soil to encourage healthy root development.
-
Maintain consistent warmth and humidity during germination to improve success rates.
-
Avoid direct hot sunlight, which can cause overheating inside the bottle greenhouse.
-
Once transplanted, feed your pepper plants with balanced fertilizer to promote flowering and fruiting.
Conclusion
DIY bottle planters are an excellent way to start sweet and hot pepper seeds indoors, combining sustainability with practicality. This method simplifies seed starting by providing a controlled environment that encourages healthy growth, while repurposing plastic bottles helps reduce waste.
By following these steps—preparing bottles, sowing seeds, maintaining moisture and temperature, and gradually transplanting seedlings—you can enjoy a successful pepper growing season from seed to harvest. Whether you’re growing mild sweet peppers or fiery hot varieties, starting them in bottle planters gives your plants the best chance to thrive.


