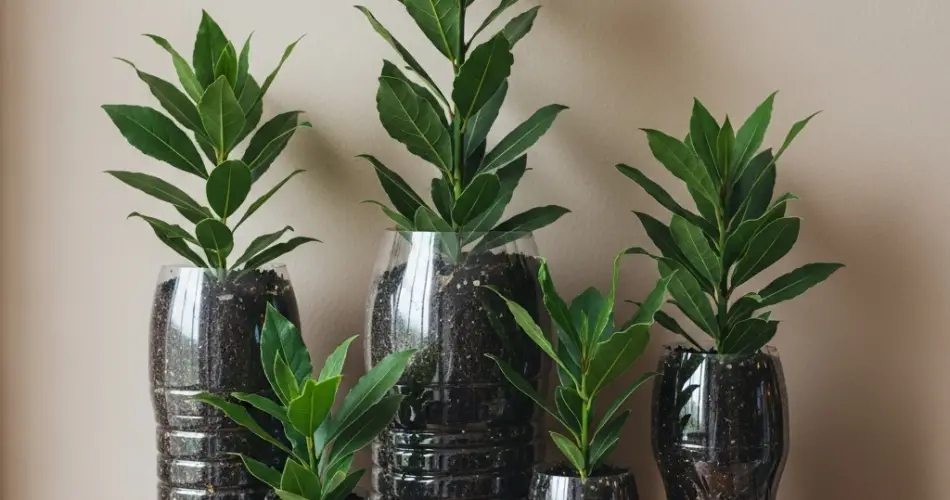
Bay leaves, harvested from the bay laurel tree (Laurus nobilis), are a kitchen essential known for their aromatic qualities and subtle flavor. Often used to season soups, stews, sauces, and roasts, bay leaves are indispensable to many cuisines. While the bay laurel is typically grown outdoors, it’s entirely possible to cultivate this fragrant evergreen shrub in containers—even upcycled plastic ones.
With a bit of creativity and care, you can grow a productive bay leaf plant at home using recycled plastic containers. This eco-friendly gardening method helps reduce plastic waste while providing a sustainable source of fresh, flavorful bay leaves right from your balcony, windowsill, or patio.
Why Grow Bay Leaf Plants in Upcycled Plastic Containers?
Growing bay leaf plants in recycled plastic containers is not only practical but also environmentally responsible. Here are some of the key benefits:
-
Eco-Friendly: Reduces waste by giving plastic containers a second life.
-
Space-Saving: Ideal for apartment dwellers and small-space gardeners.
-
Cost-Effective: Avoids the need for expensive pots or planter boxes.
-
Mobile: Lightweight containers make it easy to move plants for optimal sun exposure.
-
Bay-Friendly: Bay laurel grows well in containers with proper drainage and room for root development.
Bay leaf plants are slow growers but long-lived. With the right conditions, your upcycled container can host a bay tree for years.
Materials You’ll Need
To start your own DIY bay leaf garden, gather the following supplies:
-
1 large plastic container (reused water jug, oil container, or food-grade bucket—at least 12–14 inches deep)
-
Scissors or utility knife
-
Marker (for cutting guides)
-
Drill, nail, or skewer (for drainage holes)
-
High-quality potting mix (preferably with good drainage)
-
Perlite or coarse sand (optional for improving soil texture)
-
Bay laurel seedling or cutting
-
Coffee filter or mesh (to line the bottom)
-
Decorative fabric, paint, or twine (optional)
Step-by-Step Guide
Step 1: Prepare the Plastic Container
Start by thoroughly washing the container and removing any residue or labels. Choose a container that is deep and wide enough to support the root system of a bay plant.
Mark a cutting line if needed to shorten or shape the container. Use a utility knife or scissors to cut carefully along the line.
Step 2: Add Drainage
Use a drill, nail, or skewer to poke several holes in the bottom of the container to allow excess water to drain. Drainage is crucial, as bay plants do not tolerate soggy roots.
Place a coffee filter, mesh, or a scrap of breathable fabric inside the bottom of the container to prevent soil from washing out while still allowing water to escape.
Step 3: Mix and Fill the Soil
Bay laurel prefers well-draining, slightly acidic to neutral soil. A good DIY mix includes:
-
2 parts potting soil
-
1 part perlite or coarse sand
-
1 part compost (optional for nutrients)
Fill the container with the soil mixture, leaving a couple of inches of space at the top for watering.
Step 4: Plant the Bay Laurel
If starting with a seedling or young plant, gently remove it from its nursery pot and loosen the root ball slightly. Dig a hole in the center of your container, place the plant inside, and firm the soil around the base.
If starting with a cutting, make sure it has rooted in water or soil first. Once roots are at least a few inches long, plant it as described above.
Water thoroughly after planting.
Growing Conditions for Bay Laurel
Sunlight: Bay leaf plants love bright light and thrive with at least 6 hours of sun daily. Place your container in a sunny spot like a south-facing balcony, patio, or windowsill.
Watering: Water deeply when the top inch of soil feels dry. Avoid overwatering, especially in cooler months. Let excess water drain freely.
Humidity: Bay plants prefer moderate humidity. If indoors, mist the leaves occasionally or place a tray of water nearby to maintain moisture in the air.
Temperature: Bay laurel prefers mild to warm temperatures but can tolerate cooler conditions if protected from frost. If you live in a colder climate, bring the plant indoors in winter.
Ongoing Care and Maintenance
-
Pruning: Prune lightly to shape the plant and encourage bushier growth. Remove any yellowing or dead leaves regularly.
-
Fertilizing: Feed every 4–6 weeks during the growing season with a balanced liquid fertilizer diluted to half strength.
-
Repotting: As the plant grows, it may need to be transferred to a larger container every 2–3 years. Choose a container with adequate depth and refresh the soil.
Harvesting Bay Leaves
You can begin harvesting once the plant is well established—typically after it reaches 1–2 feet tall. Pick the older, darker green leaves, which are more flavorful. Use fresh or allow the leaves to dry naturally in a cool, airy place for future use.
Dried bay leaves can be stored in airtight containers and retain their flavor for up to a year.
Decorating Your Upcycled Container
Transform your plastic container into a stylish planter with a few simple ideas:
-
Paint the outside using water-resistant, non-toxic paints.
-
Wrap the container in burlap, jute, or fabric for a natural look.
-
Add a label or chalkboard tag for easy plant identification.
-
Use twine to create a hanging or suspended planter.
Final Thoughts
With just a plastic container, some soil, and a little care, you can grow your own fragrant bay leaves at home—fresh for every recipe. Upcycling gives new life to waste while making herb gardening accessible, affordable, and sustainable.
Whether placed on a sunny windowsill or displayed on a patio, a bay leaf plant grown in an upcycled container proves that elegance and functionality can come from the simplest materials. Let your DIY bay garden bring both flavor and freshness to your home year-round.


