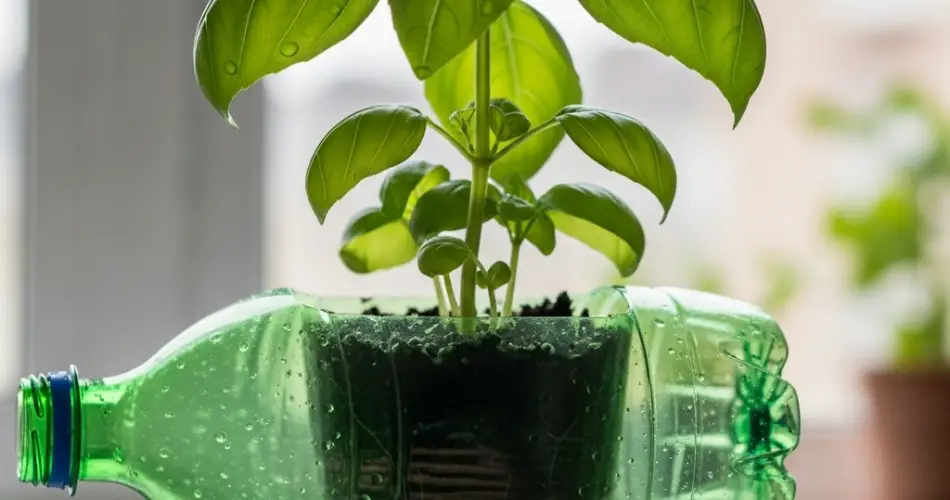
Basil is one of the most popular herbs in home gardening, loved for its fragrant leaves and versatility in the kitchen. Whether you enjoy it in pasta sauces, salads, or as the star of a homemade pesto, having fresh basil on hand is a treat. If you want to grow more basil plants without spending money on seeds or nursery starts, propagation through cuttings is an easy and effective method.
With a few recycled plastic bottles, you can create a simple and sustainable basil propagation station that works indoors or outdoors. This approach saves space, reduces waste, and ensures a steady supply of healthy basil plants.
Why Propagate Basil from Cuttings?
Starting basil from cuttings offers several benefits:
-
Faster Growth: Cuttings root more quickly than seeds germinate, allowing for an earlier harvest.
-
Cost-Effective: You can grow multiple plants from one healthy mother plant.
-
Genetic Consistency: The new plants are clones, so they will have the same flavor and growth habits as the original.
-
Sustainable Gardening: By using recycled materials, you reduce plastic waste while producing food at home.
Choosing the Right Basil Plant
For successful propagation, start with a strong, mature basil plant that’s free from pests and diseases. Look for stems that are green, sturdy, and about 10–15 cm long. Avoid stems that have begun flowering, as they tend to put more energy into seed production than root development.
Preparing the Plastic Bottles
You’ll need one clean, clear plastic bottle for each cutting. Two common bottle designs work well:
-
Straight Water Bottles: Easy to cut and great for holding water.
-
Soda Bottles with Curved Tops: Can be inverted to create a self-watering system.
Steps to Prepare the Bottle:
-
Remove labels and wash thoroughly.
-
Cut the bottle about one-third from the top.
-
For a simple rooting jar, keep only the bottom part and fill it with water.
-
For a self-watering setup, invert the top portion like a funnel into the base, threading a cotton wick through the bottle cap to draw up water from below.
Taking and Preparing Basil Cuttings
-
Select a healthy stem and cut it just below a leaf node (the point where leaves attach to the stem). This is where roots will emerge.
-
The cutting should be 10–12 cm long, with at least two sets of leaves.
-
Remove the lower leaves, leaving only the top pair to reduce water loss.
-
If desired, dip the cut end in rooting hormone to encourage faster root growth, though basil often roots well without it.
Rooting Basil Cuttings in Bottles
Place each cutting in its prepared plastic bottle with enough water to submerge the leaf node but not the leaves. Position the bottles in a warm spot with indirect sunlight. Basil prefers temperatures between 20–25°C for optimal root development.
Change the water every two to three days to prevent bacterial buildup. Within 7–10 days, you should see small white roots emerging from the submerged nodes.
Transplanting the Rooted Cuttings
Once roots are 5–7 cm long, the basil cuttings are ready for planting in soil.
Steps:
-
Prepare a small pot or container with well-draining potting mix enriched with compost.
-
Make a hole in the soil and gently place the rooted cutting in it, covering the roots completely.
-
Water thoroughly and place in a sunny location. Basil thrives with at least 6 hours of direct sunlight daily.
If you prefer, you can transplant the basil directly into your garden bed or larger container after acclimating it to outdoor conditions for a few days.
Maintaining Your Basil Propagation Station
Once your first batch of cuttings has been transplanted, you can reuse the bottles for more cuttings. This continuous cycle ensures you always have young basil plants growing. Keep your mother plant pruned regularly to encourage fresh stems suitable for propagation.
If space is limited, consider creating a vertical rack for your bottles. This keeps them organized, allows for better light exposure, and saves valuable counter or balcony space.
Tips for Healthier Basil Plants
-
Avoid Overcrowding: Give each plant enough space for air circulation to prevent fungal issues.
-
Pinch Flower Buds Early: This encourages bushier growth and prolongs the harvest period.
-
Fertilize Lightly: A diluted liquid fertilizer every 3–4 weeks helps maintain leaf production.
-
Harvest Often: Regular harvesting promotes new leaf growth and keeps the plant from becoming woody.
Advantages of the Bottle Method
Using plastic bottles for basil propagation is a practical way to upcycle waste while keeping the process simple. The transparent walls allow you to monitor root growth easily, and the contained water environment minimizes the risk of cuttings drying out.
For gardeners with minimal space, such as apartment dwellers or those with small patios, bottle propagation offers a compact, portable, and low-cost solution for producing a steady stream of fresh basil.
Final Thoughts
A DIY basil propagation station using plastic bottles is an excellent project for gardeners of all skill levels. With just a few cuttings and some recycled materials, you can expand your herb garden, share plants with friends, and enjoy a consistent supply of this aromatic herb year-round.
This simple yet effective method not only saves money but also promotes sustainable gardening habits—proof that growing your own food can be both eco-friendly and rewarding.


