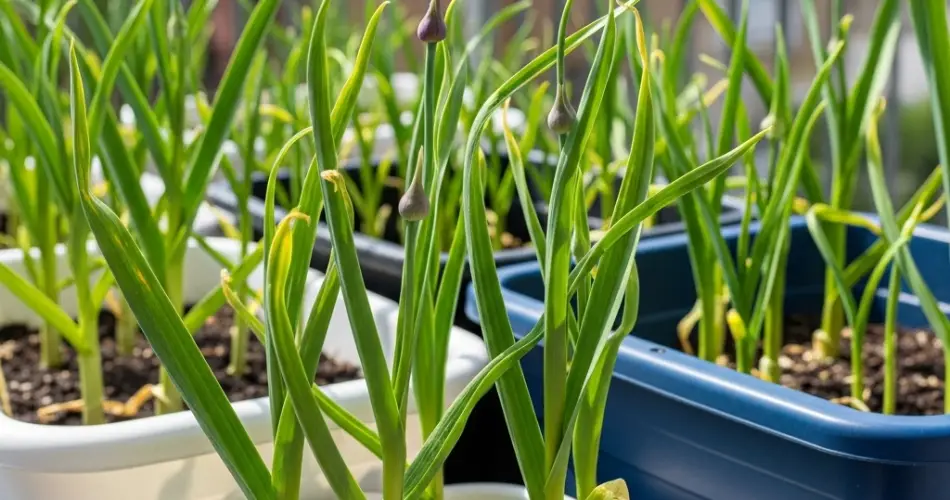
Growing garlic in containers is a fantastic way to enjoy homegrown flavor even if you don’t have garden space. Garlic is a low-maintenance crop that grows slowly but steadily, rewarding your patience with plump, aromatic bulbs and flavorful green shoots. With a simple setup and the right timing, even first-time gardeners can achieve great results on balconies, patios, or windowsills.
Whether you want to grow garlic for its cloves or its tender green tops (called garlic greens or scapes), this guide will walk you through everything you need to grow garlic successfully in containers.
Why Grow Garlic in Containers?
Container gardening offers several benefits, and garlic is one of the easiest vegetables to grow this way:
-
Space-saving: Ideal for apartments, balconies, and homes with no yard.
-
Pest control: Less vulnerable to soil-borne pests and diseases.
-
Portability: Easily move containers for better sun exposure or protection from harsh weather.
-
Clean and controlled: You can manage soil quality and drainage with ease.
-
Aromatic bonus: Garlic plants are not only useful, but their smell also helps repel some common pests in container gardens.
When to Plant Garlic in Containers
Timing is important for a successful garlic harvest. The best time to plant garlic depends on your climate:
-
In cooler climates: Plant garlic in fall (September to November), before the first frost. This allows roots to develop before winter dormancy.
-
In warmer climates: Garlic can also be planted in late winter or early spring, although fall planting generally yields larger bulbs.
Garlic needs a long growing period—usually 7 to 9 months—so the earlier you plant, the better.
Choosing the Right Garlic Type
There are two main types of garlic:
-
Hardneck garlic: Tolerates cold well, produces garlic scapes, and has a stronger flavor. Best for cooler climates.
-
Softneck garlic: Stores longer and typically grows larger bulbs. Ideal for warmer climates and container gardening.
Choose certified disease-free seed garlic from a nursery or garden center. Avoid planting supermarket garlic, as it may be treated to prevent sprouting.
Supplies You’ll Need
-
Large container (at least 10–12 inches deep with drainage holes)
-
High-quality potting mix or a blend of garden soil and compost
-
Garlic cloves (seed garlic)
-
Watering can
-
Sunny location (balcony, patio, or windowsill)
Step 1: Prepare the Container
Select a container that is at least 10 inches deep and wide enough to space your garlic cloves 4 to 6 inches apart. A window box, bucket, grow bag, or deep rectangular planter can all work well.
Ensure the container has good drainage. Garlic doesn’t like soggy soil.
Step 2: Prepare the Soil
Fill your container with a loose, well-draining potting mix. A good mix for garlic includes:
-
2 parts compost or aged manure
-
1 part garden soil or potting mix
-
1 part perlite or sand to improve drainage
Garlic prefers soil that is rich in organic matter and has a slightly acidic to neutral pH (6.0–7.0).
Step 3: Plant the Garlic
Break apart your garlic bulb into individual cloves. Do not remove the papery skin.
-
Plant each clove pointy end up, about 2 inches deep.
-
Space cloves 4 to 6 inches apart.
-
Cover with soil and gently pat down.
-
Water lightly to settle the soil.
Place the container in a sunny spot that gets at least 6 hours of light per day.
Step 4: Watering and Care
Keep the soil moist but not waterlogged. Water when the top inch of soil feels dry. Reduce watering during rainy periods and in winter (if planted in fall).
As the garlic grows, you’ll see green shoots appear from the soil. If growing hardneck garlic, garlic scapes (flower stalks) will emerge in late spring or early summer. Cut these off to encourage larger bulb formation and enjoy them in cooking.
Mulch the surface of the soil with straw, dried leaves, or coco husk to help retain moisture and regulate temperature.
Step 5: Feeding the Plants
Feed garlic every 3–4 weeks with a diluted organic liquid fertilizer or compost tea during active growth. Stop fertilizing once the leaves begin to yellow and the bulbs start to mature, usually in early summer.
Step 6: Harvesting Garlic
Garlic is ready to harvest when the lower leaves begin to turn yellow or brown but the upper leaves are still green. This usually occurs in mid to late summer, depending on your planting time.
To harvest:
-
Stop watering about a week before harvesting to allow bulbs to dry slightly.
-
Gently loosen the soil with your hands or a trowel and lift the bulbs.
-
Shake off excess soil but do not wash the bulbs.
Step 7: Curing and Storing Garlic
After harvesting, cure garlic by laying it in a dry, well-ventilated place out of direct sun for 2 to 3 weeks. Once the outer layers are dry and papery, trim the roots and cut the stalks.
Store garlic bulbs in a cool, dry place with good airflow. Properly cured garlic can last for several months.
Bonus: Harvesting Garlic Greens
If you don’t want to wait months for bulbs, you can plant a few extra cloves closer together and harvest the green tops when they reach 6–8 inches tall. These garlic greens are flavorful and perfect for garnishing dishes or tossing into salads.
Final Thoughts
Growing garlic in containers is easy, rewarding, and perfect for small spaces. With just a pot, a few cloves, and some sunlight, you can produce your own flavorful bulbs at home. Whether you’re growing a few plants for fun or creating a steady supply of garlic for cooking, container gardening makes it accessible to everyone—no garden required.


