For gardeners working with balconies, patios, or even just a sunny windowsill, chives are one of the most rewarding herbs to grow. Their fresh, mild onion-like taste adds flavor to countless dishes, while their compact growth makes them perfect for small-space gardening. Best of all, chives are hardy perennials, meaning once you establish them, they’ll return year after year with minimal effort.
This guide explores practical tips for growing chives in pots, ensuring you get a healthy, steady supply of this versatile herb no matter how limited your space may be.
Why Chives Are Ideal for Small-Space Gardens
Chives are naturally suited for container growing. Their clumping growth habit means they don’t need large garden beds to thrive, and they adapt well to confined spaces. Some reasons they shine in pots include:
-
Low maintenance: Once established, chives don’t require much attention beyond watering and occasional feeding.
-
Compact size: Their upright leaves grow in neat clusters, perfect for tight spots like balconies or kitchen shelves.
-
Continuous harvest: Regular trimming encourages new growth, giving you fresh leaves for months.
-
Versatility: Both the leaves and flowers are edible, bringing flavor and beauty to your meals.
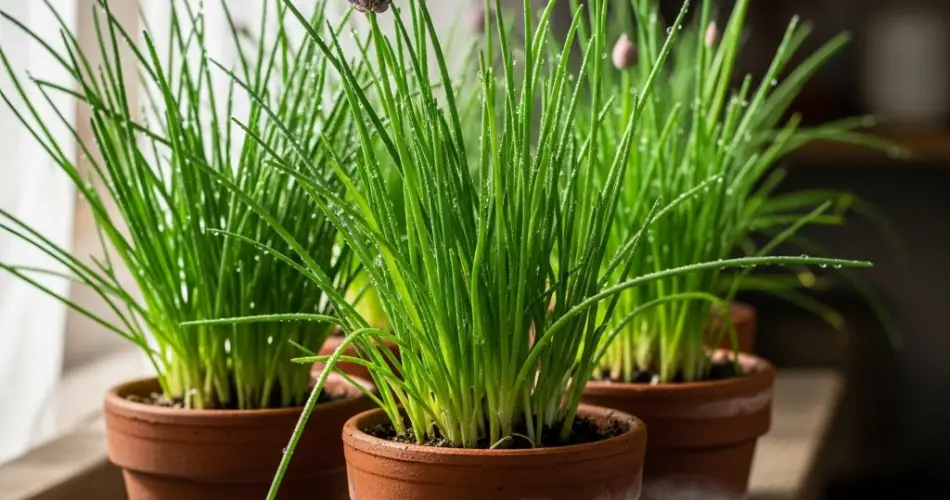
Choosing the Right Pot
The right container sets your chives up for success. Keep these points in mind:
-
Depth and width: Chives don’t need deep soil, but they do like room for their roots to spread. A pot about 6–8 inches deep and at least 8 inches across works well.
-
Drainage: Drainage holes are essential. Without them, water can collect and cause root rot.
-
Material: Terracotta pots breathe well but dry out quickly, while plastic and ceramic retain moisture longer. Choose based on your environment and watering habits.
If you want to grow multiple clumps, consider a rectangular balcony box that allows several clusters to grow side by side.
Soil and Planting Essentials
Chives prefer nutrient-rich but well-draining soil. A high-quality potting mix for herbs or vegetables is ideal. To enrich the soil further, mix in compost before planting.
Here are the steps to get started:
-
Prepare your pot: Fill it with potting mix, leaving about an inch of space at the rim.
-
Planting seeds: Scatter seeds over the soil surface and cover lightly with a thin layer of soil. Keep the soil consistently moist until germination, which usually takes 10–14 days.
-
Transplanting clumps: If starting with young plants or divisions, plant them in the center of your pot. In larger containers, space clumps a few inches apart.
-
Watering in: Gently water after planting to settle the soil.
Sunlight and Watering
Chives thrive in full sun, ideally getting at least 6 hours of light per day. If you’re growing them indoors, a bright south-facing windowsill or supplemental grow light works best.
Watering is equally important. Chives prefer soil that stays consistently moist but not waterlogged. Water when the top inch of soil feels dry to the touch. During hot weather, check more frequently since containers dry out faster than garden beds.
Fertilizing Your Chives
Chives are not heavy feeders, but a little nutrition helps keep them vigorous. Apply a diluted liquid fertilizer every 4–6 weeks during the growing season. Organic options such as compost tea or fish emulsion work well and ensure your herbs stay chemical-free.
Harvesting Tips for Continuous Growth
One of the joys of chives is harvesting them fresh whenever you need. Follow these guidelines:
-
Wait until the leaves reach about 6 inches before your first harvest.
-
Use scissors to snip leaves at the base, leaving about 2 inches so they can regrow.
-
Harvest evenly around the clump instead of cutting from one spot only.
-
Don’t remove more than one-third of the plant at a time, as this can weaken it.
Chives will continue to grow back throughout the season, giving you a steady supply.
Extra Care and Maintenance
Chives are generally hardy, but a few simple practices will keep your plants in top shape:
-
Divide every few years: Over time, chive clumps can become crowded. Every 2–3 years, divide them into smaller sections and replant to keep them healthy.
-
Deadhead flowers: The pretty purple blooms are edible, but allowing too many flowers can reduce leaf production. Snip them off if you prefer more greens.
-
Pest watch: Chives are relatively pest-resistant, but aphids can sometimes appear. If they do, wash them off with a spray of water or use a mild soap solution.
Benefits Beyond the Kitchen
Chives not only flavor your meals but also offer other benefits. Their purple blossoms attract bees and pollinators, which can support other plants if you grow more herbs or vegetables nearby. They also naturally repel certain garden pests, making them useful companion plants.
Final Thoughts
Even if you only have a windowsill or a small balcony, you can grow a thriving pot of chives. With the right container, good soil, regular watering, and a bit of sunlight, they will reward you with fresh leaves for culinary use almost year-round. Easy to grow, attractive, and practical, chives are a perfect choice for anyone looking to maximize flavor in small-space gardening.


