Chives are a popular culinary herb cherished for their mild onion flavor, adding zest and freshness to salads, soups, and garnishes. Growing chives at home is simple, but using recycled plastic bottles as planters takes the process to a creative and eco-friendly level. This approach not only maximizes limited space but also helps reduce plastic waste by repurposing bottles you already have. Whether you’re gardening in a small apartment or looking for a fun DIY project, these chive growing hacks using bottles make fresh herbs accessible, sustainable, and visually appealing. This article guides you through effective methods to grow chives using plastic bottles.
Why Grow Chives in Bottles?
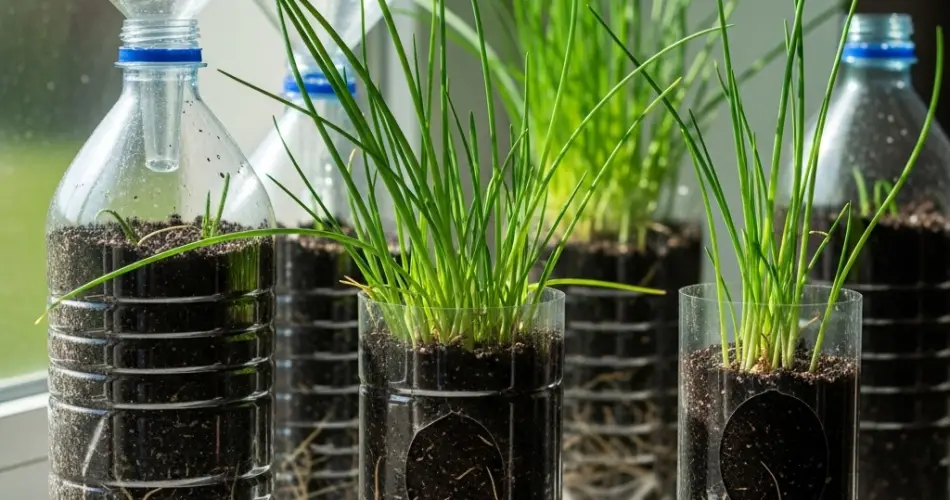
Chives are hardy perennials that thrive in well-draining soil and moderate sunlight. Growing chives in bottles offers several advantages:
-
Space-saving: Bottles can be hung or placed on windowsills, perfect for small living spaces or balconies.
-
Sustainability: Reusing plastic bottles helps reduce environmental impact.
-
Mobility: Lightweight and easy to move bottles let you position plants for optimal sunlight.
-
Controlled environment: Bottles help retain moisture around roots while allowing proper drainage.
-
Creative Gardening: Customizable bottle planters add a unique aesthetic to your indoor or outdoor garden.
What You’ll Need
-
Clear or opaque plastic bottles (1 to 2 liters)
-
Scissors or utility knife
-
Potting soil with good drainage
-
Chive seeds or small chive plants
-
String, twine, or wire for hanging (optional)
-
Spray bottle for watering
-
Pebbles or small rocks for drainage
Preparing Bottles for Chive Planting
-
Clean Your Bottles: Wash thoroughly to remove dirt and residues.
-
Cut the Bottle: Depending on your design, cut a side opening or remove the top third to create a planting area while maintaining structure.
-
Drainage: Poke several small holes in the bottom of the bottle for excess water drainage.
-
Add a Drainage Layer: Place a layer of small stones or pebbles at the bottom to further prevent waterlogging.
-
Attach Hanging Materials (Optional): Tie twine or wire around the neck or sides of the bottle if you want to hang your planter. Ensure it’s secure for safe hanging.
Planting Chives in Bottles
-
Fill your prepared bottle planter with moistened potting soil, leaving about an inch from the top.
-
If planting seeds, sprinkle them evenly on the soil surface and cover lightly with a thin layer of soil (about ¼ inch).
-
For transplants, gently plant young chive clusters, ensuring roots are well-covered and spaced to allow growth.
-
Mist the soil gently to settle seeds or plants without washing them away.
-
Position your bottles in a location with at least 4 to 6 hours of indirect sunlight each day—chives tolerate partial shade but thrive best with moderate light.
Caring for Bottle-Grown Chives
-
Watering: Keep the soil consistently moist but not saturated. Bottles drain quickly, so check moisture levels regularly and water as needed using a spray bottle or gentle watering can.
-
Light: Chives need sufficient light to grow strong and healthy. If indoors, supplement natural light with grow lights if necessary.
-
Fertilizing: Use a diluted, balanced liquid fertilizer once every 3 to 4 weeks to provide essential nutrients without overfeeding.
-
Harvesting: Snip chive leaves at the base once they reach 6 inches tall, encouraging fresh growth. Regular harvesting keeps plants productive and prevents overcrowding.
-
Pruning: Remove yellowing or dead leaves promptly to maintain plant health.
Creative Hacks to Enhance Your Chive Bottle Garden
-
Vertical Herb Garden: Hang multiple bottles at varying heights on a wall or fence to create a stunning vertical garden filled with chives and other herbs.
-
Multi-Herb Planters: Combine chives with parsley, thyme, or oregano in wider bottles for a compact, mixed herb garden.
-
Self-Watering System: Create a simple wick system by threading a cotton strip from a water reservoir into the soil, reducing watering frequency.
-
Decorate Your Bottles: Paint or wrap bottles with colorful fabrics, twine, or washi tape to personalize your garden and match your décor.
-
Kitchen Windowsill Garden: Keep bottle planters on sunny kitchen windows for fresh chives at your fingertips when cooking.
Troubleshooting Common Problems
-
Wilting: Often caused by underwatering or excessive heat. Keep soil moist and avoid placing bottles in direct afternoon sun in hot climates.
-
Yellow Leaves: May indicate overwatering or nutrient deficiency. Check drainage and adjust watering habits; consider feeding with a mild fertilizer.
-
Slow Growth: Insufficient light or overcrowding can stunt chive development. Move plants to a brighter spot and thin seedlings if needed.
-
Pests: Watch for aphids or fungal diseases. Use natural treatments like neem oil or insecticidal soap and maintain good airflow around plants.
Final Thoughts
Using recycled plastic bottles to grow chives is a practical and sustainable gardening hack that brings fresh herbs into your home without needing much space or expense. These DIY planters allow you to cultivate vibrant, flavorful chives in creative ways that also help reduce plastic waste. With minimal care and some creative flair, your bottle-grown chives will thrive, providing a continual harvest to enhance your dishes and your living environment. Whether you’re a seasoned gardener or just starting out, growing chives in bottles is an enjoyable project with tasty results.


