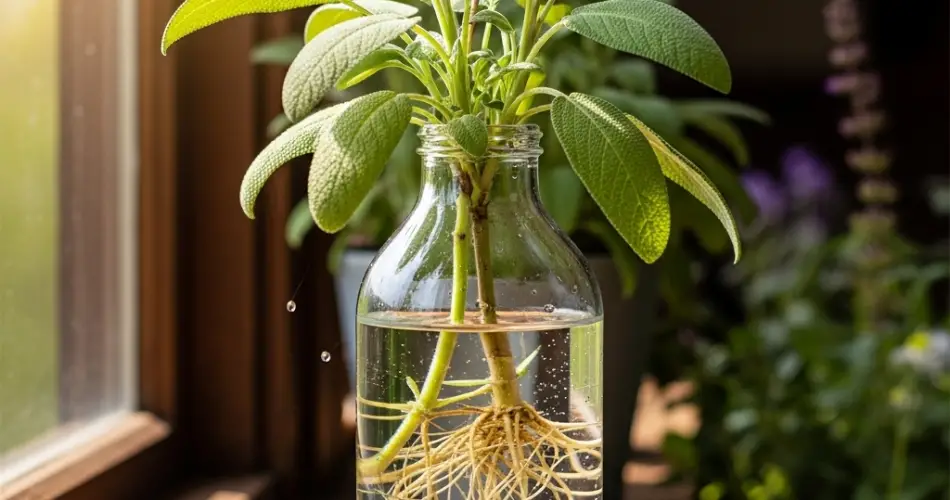
Sage is a fragrant, versatile herb cherished for cooking, teas, and ornamental gardening. While buying mature plants is convenient, propagating sage at home ensures a continuous supply and allows gardeners to expand their herb collection sustainably. One innovative method is building a sage propagation station using recycled bottles, which provides an eco-friendly, space-efficient solution for small-space gardening.
Using recycled bottles creates a controlled environment that encourages root growth while minimizing water loss. The setup also reduces exposure to pests and disease, giving young sage cuttings the best chance of thriving. This method is particularly suitable for balconies, patios, or indoor gardens, offering a year-round propagation solution.
Why Recycled Bottles Work for Sage
Recycled bottles are excellent containers for propagation for several reasons:
-
Mini-greenhouse effect: The enclosed environment retains humidity, promoting faster rooting.
-
Space-saving: Vertical bottle stations fit easily on windowsills, shelves, or balcony railings.
-
Drainage control: Properly prepared bottles allow excess water to escape, preventing root rot.
-
Cost-effective and sustainable: Repurposing household bottles reduces waste and gardening expenses.
This combination of benefits makes bottle propagation a practical and environmentally friendly method for multiplying sage naturally.
Materials Needed
To build a sage propagation station, gather the following:
-
Healthy sage stems from an established plant
-
Clean recycled plastic or glass bottles
-
Scissors or a sharp knife
-
Potting soil or a well-draining medium (sand, perlite, or a mix)
-
Water
-
Small pebbles or gravel for drainage (optional)
Clean tools and containers are essential to prevent disease and ensure healthy propagation.
Selecting and Preparing Sage Cuttings
Choosing the right cuttings is crucial for successful propagation:
-
Healthy stems: Select young, non-flowering stems that are strong and vibrant.
-
Length: Cuttings should be 3–5 inches long.
-
Leaf removal: Remove leaves from the bottom 2 inches of each cutting to reduce rot and provide space for roots to form.
Proper selection of cuttings increases the likelihood of successful rooting and produces stronger plants.
Preparing the Bottle Propagation Station
Setting up the bottles correctly is key to healthy growth:
-
Cut or open the bottle: Slice the bottle horizontally or remove the bottom to create an open planter. The top can act as a mini-greenhouse.
-
Add drainage: Place a thin layer of small pebbles or gravel at the bottom to prevent waterlogging.
-
Add soil or medium: Fill the bottle with a lightweight, well-draining mix, such as potting soil combined with perlite.
-
Moisture: Lightly water the medium until damp but not soggy.
This setup maintains the right balance of moisture, aeration, and drainage for developing sage cuttings.
Planting Sage Cuttings
Planting cuttings properly ensures faster and healthier rooting:
-
Insert cuttings: Place each cutting 1–2 inches deep in the medium.
-
Stabilize stems: Firm the soil gently around the base to keep stems upright.
-
Humidity cover: Use the top of the bottle to maintain humidity, removing it briefly each day to allow airflow and prevent mold.
Correct planting depth and stability encourage strong root systems and vigorous growth.
Caring for Bottle-Grown Sage
Maintaining the proper environment is essential:
-
Light: Place the propagation station in bright, indirect sunlight. Avoid strong direct sun that can overheat the bottles.
-
Temperature: Sage cuttings root best in moderate temperatures, ideally between 65–75°F (18–24°C).
-
Watering: Keep the medium slightly moist, misting occasionally. Avoid overwatering to prevent rot.
With consistent care, sage cuttings typically develop roots within 3–5 weeks.
Transplanting Rooted Sage
Once roots are well established, transfer the cuttings to permanent containers or garden beds:
-
Check roots: Gently lift the cutting to confirm a healthy root system.
-
Prepare containers: Use well-draining soil in pots or raised beds with adequate drainage.
-
Plant carefully: Place rooted cuttings in soil, firming gently at the base, and water lightly.
-
Acclimate gradually: If moving outdoors, gradually introduce plants to full sunlight and ambient conditions.
Proper transplantation ensures long-term growth, allowing your sage plants to thrive and produce aromatic leaves.
Common Challenges
-
Overwatering: Excess moisture can cause root rot; keep soil evenly damp but not saturated.
-
Poor airflow: Avoid fully sealing the bottle; brief daily ventilation prevents mold and fungal growth.
-
Weak cuttings: Use strong, non-flowering stems to maximize rooting success.
Careful monitoring and adjustment of care can prevent most common propagation issues.
Final Thoughts
Building a sage propagation station with recycled bottles is an easy, sustainable way to multiply your herb collection. By selecting healthy cuttings, preparing an appropriate bottle environment, and providing consistent care, gardeners can enjoy a steady supply of fresh, aromatic sage.
This method combines practicality, eco-conscious gardening, and space efficiency, making it perfect for small-space gardeners. With patience and attention, bottle-grown sage can thrive indoors or outdoors, providing fresh herbs for cooking, teas, and ornamental purposes throughout the year.


