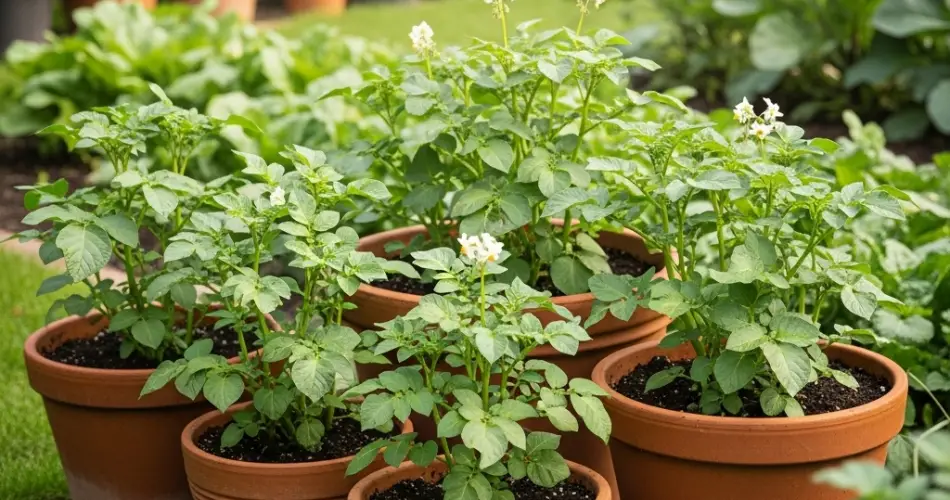
Growing potatoes in containers is a practical and rewarding method for harvesting this staple crop without needing a large garden plot. With just a bucket, some good-quality soil, and seed potatoes, you can grow your own fresh spuds right on a balcony, patio, or sunny backyard corner. Container-grown potatoes are easy to care for, take up minimal space, and are less prone to many soil-borne pests and diseases that commonly affect ground-grown crops.
Whether you’re growing to supplement your food supply or simply enjoy the process of home gardening, container potato growing offers great yields with very little hassle.
Why Grow Potatoes in Buckets?
Containers offer a range of advantages when it comes to growing potatoes:
-
Space-saving: Perfect for small spaces, especially for urban dwellers or balcony gardeners.
-
Cleaner harvesting: You won’t have to dig through hard soil—just tip the bucket over to harvest.
-
Pest control: Raised containers reduce the risk of wireworms, blight, and other soil-borne issues.
-
Portability: Move the bucket to follow the sun or shelter it during heavy rain or cold snaps.
-
Ease of maintenance: Less weeding and more control over watering and fertilization.
If you’re new to gardening or just want a simple way to grow your own food, this method makes the process easy and accessible.
Choosing the Right Potatoes
When growing potatoes in containers, use certified seed potatoes rather than grocery store potatoes, which may carry disease or be treated with sprout inhibitors.
There are three main types of potatoes:
-
Early varieties: Such as ‘Rocket’ or ‘Swift’, mature quickly (around 70–90 days) and are ideal for container growing.
-
Second earlies: Like ‘Charlotte’ or ‘Kestrel’, take 90–110 days to mature.
-
Maincrop varieties: Such as ‘Maris Piper’ or ‘King Edward’, produce larger harvests but need more space and 120–140 days to mature.
Early and second early types are typically best for buckets or smaller containers due to their compact growth and quicker yield.
What Kind of Bucket to Use
A standard 10–15 liter (2.5–4 gallon) bucket is ideal for one to two potato plants. Make sure the container:
-
Is at least 12 inches (30 cm) deep
-
Has drainage holes at the bottom to prevent waterlogging
-
Can be plastic, fabric grow bags, or upcycled containers—just ensure it’s clean and food-safe
Black containers absorb heat and can help accelerate early growth, especially in cooler climates. For hot regions, consider light-colored buckets to prevent overheating.
Soil Mix and Preparation
Potatoes need loose, well-draining, and nutrient-rich soil to develop properly. A heavy or compacted mix can restrict tuber formation.
A simple mix includes:
-
1 part potting soil
-
1 part compost or well-rotted manure
-
Optional: A handful of sand or perlite to improve drainage
Avoid using garden soil alone, which may be too dense and harbor pests. Mix in a slow-release organic fertilizer before planting to give your crop a strong start.
Planting the Potatoes
-
Chit the Seed Potatoes: Place seed potatoes in a cool, bright place for a week or two to encourage sprouting before planting.
-
Initial Planting: Fill the bottom 4–6 inches (10–15 cm) of the bucket with your soil mix. Place 1–2 seed potatoes, eyes facing upward, and cover with another 3–4 inches (7–10 cm) of soil.
-
Hilling as They Grow: As the plants grow and reach 6–8 inches tall, gently mound more soil or compost around the base, covering the stems halfway. Repeat this process every week or two until the container is nearly full. This encourages more tuber production along the buried stems.
Watering and Sunlight
Potatoes need:
-
Consistent moisture: Keep the soil moist but not soggy. Water when the top inch feels dry.
-
Sunlight: Provide 6–8 hours of full sun daily. Position buckets in the sunniest spot available.
Too much water can lead to rot, while too little can reduce yields. Mulching the top of the bucket with straw or dried leaves helps retain moisture and regulate temperature.
Feeding
Feed the plants with a balanced liquid fertilizer every 2–3 weeks, especially after they begin flowering. Choose fertilizers with balanced nitrogen, phosphorus, and potassium, or use one slightly higher in potassium to support tuber development.
Pest and Disease Management
Growing in containers reduces many pest risks, but keep an eye out for:
-
Aphids or spider mites: Treat with neem oil or insecticidal soap if needed.
-
Fungal issues: Prevent overwatering and ensure good air circulation.
-
Blight: Remove infected foliage and avoid overhead watering.
Rotate crops and avoid using the same container mix for multiple seasons to reduce disease build-up.
Harvesting Potatoes
Harvest depends on the variety:
-
Early potatoes: Ready to harvest when plants flower or 10–12 weeks after planting.
-
Maincrop potatoes: Ready when foliage dies back—usually 16–20 weeks after planting.
To harvest, tip the bucket on its side and sift through the soil by hand. Gently brush off any excess dirt and let the potatoes dry in a cool, shaded area before storing.
Final Thoughts
Growing potatoes in containers is an easy, fun, and space-efficient way to enjoy one of the most popular crops in the world. Whether you’re growing a single bucket or several, this method brings fresh, homegrown flavor right to your table. From planting to harvest, container-grown potatoes require little space but deliver big results—perfect for anyone looking to go from bucket to baked with their very own backyard bounty.


