Amazing Idea: Growing Turmeric at Home – Easy for Beginners
Turmeric, a golden spice known for its rich flavor and powerful health benefits, is a must-have in every kitchen. Beyond being a popular culinary ingredient, turmeric is also prized for its anti-inflammatory and antioxidant properties. The good news is that you don’t have to buy turmeric from the store—you can easily grow it at home, even if you’re a beginner.
With just a few pieces of turmeric root (called rhizomes), some soil, and a bit of patience, you can grow this versatile plant right in your backyard, on your balcony, or even indoors in containers. Here’s a simple, step-by-step guide to growing turmeric at home successfully.
Why Grow Turmeric at Home?
Growing your own turmeric has several advantages:
-
Organic and chemical-free: Control the growing process and avoid pesticides.
-
Fresh harvest: Homegrown turmeric is more aromatic and flavorful than store-bought versions.
-
Low maintenance: Turmeric is easy to care for and doesn’t require much attention.
-
Beautiful plant: Turmeric has large, lush green leaves that also make it an attractive addition to your garden.
What You Need to Get Started
-
Turmeric rhizomes (available from nurseries, garden centers, or organic food stores)
-
Large pots or containers (minimum 12 inches deep and wide) or garden space with loose soil
-
Rich, well-draining soil (mix of garden soil, compost, and cocopeat is ideal)
-
Watering can or spray bottle
-
A warm, humid environment (turmeric loves temperatures between 20–35°C or 68–95°F)
-
Partial sunlight or filtered light (too much direct sunlight can burn the leaves)
Step-by-Step Guide to Growing Turmeric at Home
Step 1: Select Healthy Rhizomes
Start with fresh, plump turmeric rhizomes. Look for pieces that have several buds or “eyes” (small bumps where shoots will emerge). If possible, choose organically grown turmeric to avoid treated roots that may not sprout.
Soak the rhizomes in water overnight before planting to encourage sprouting.
Step 2: Prepare the Planting Area or Container
If planting in containers, use large pots with good drainage. Fill them with a mixture of well-draining garden soil, compost, and a bit of sand or cocopeat. Turmeric grows horizontally, so give it plenty of space to spread underground.
For outdoor planting, select a shaded spot with fertile soil that doesn’t become waterlogged.
Step 3: Plant the Rhizomes
Plant each rhizome 2–3 inches deep with the buds facing upward. Space them about 4–5 inches apart. Cover them with soil and water gently to moisten the top layer.
Turmeric doesn’t like soggy soil, so be sure not to overwater.
Step 4: Provide Proper Care
Turmeric is a low-maintenance plant, but a little care goes a long way:
-
Watering: Keep the soil consistently moist but not soaked. Water more often during hot weather and less during rainy days.
-
Light: Turmeric prefers filtered sunlight or partial shade. If indoors, place it near a bright window but avoid intense direct sunlight.
-
Feeding: Fertilize every 3–4 weeks with organic compost or a balanced liquid fertilizer to support healthy growth.
As the plant grows, tall green leaves and sometimes delicate white or pink flowers will emerge. These are not only attractive but also a sign of healthy development underground.
How Long Does Turmeric Take to Grow?
Turmeric is a slow-growing plant. It typically takes 7 to 10 months from planting to harvest, depending on your climate. Patience is key, but the reward is worth it.
When the leaves start turning yellow and begin to dry out, it’s a sign that the rhizomes are mature and ready for harvest.
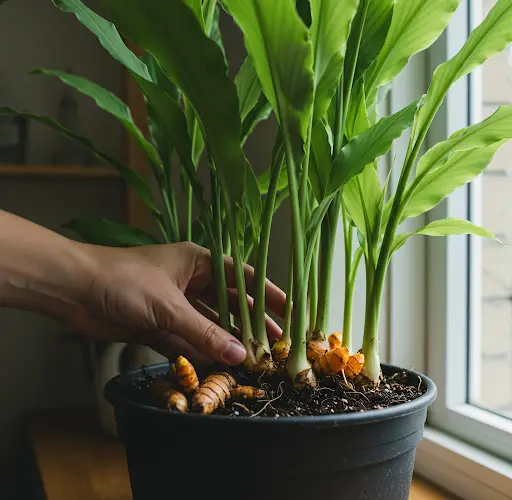
Harvesting and Storing Turmeric
Carefully dig up the rhizomes without damaging them. Brush off the excess soil and rinse them clean. If you’d like, set a few rhizomes aside to replant for your next cycle.
To store turmeric:
-
Fresh: Keep in a cool, dry place or refrigerate for up to 2 weeks.
-
Drying: Slice and dry the rhizomes under the sun or in a dehydrator, then grind into powder for long-term storage.
-
Freezing: Fresh turmeric can also be frozen whole or grated.
Bonus Tips for Success
-
Mulch the soil with dry leaves or straw to retain moisture and suppress weeds.
-
Rotate your planting spot each season to keep the soil fertile and avoid pests.
-
Watch for pests like aphids or mites—use neem oil spray as a natural remedy.
-
Don’t harvest too early—waiting until the plant fully matures will yield stronger, more flavorful rhizomes.
Final Thoughts
Growing turmeric at home is incredibly rewarding. Not only do you get a steady supply of fresh, organic turmeric, but the process also deepens your connection with the food you consume. It’s easy enough for beginners and requires minimal investment, making it perfect for anyone looking to start their own home garden.
With a little effort, a few rhizomes can turn into a vibrant and productive plant that supplies your kitchen for months to come. Give it a try—you might be amazed at how simple and satisfying it is to grow your own turmeric.


