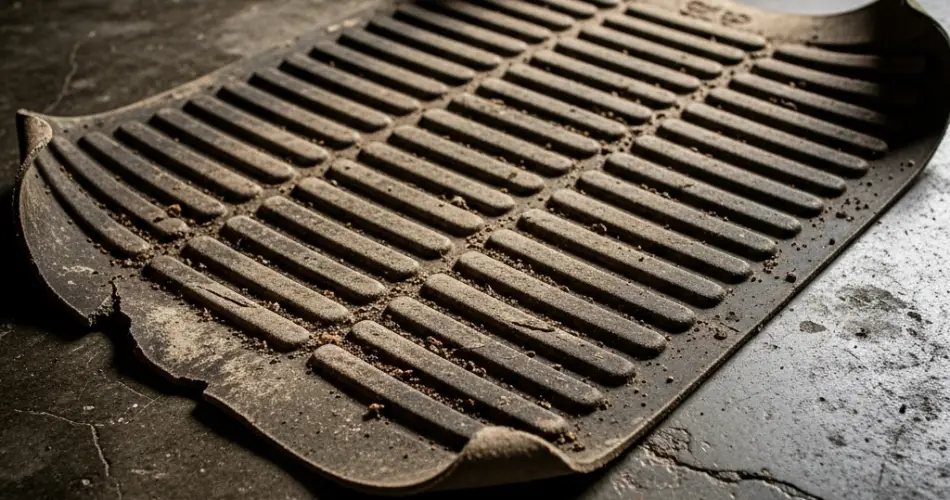
Many of us have old non-slip mats lying around the house, often forgotten in the back of a closet or garage. Combined with something as simple as cardboard, these items can be transformed into practical, creative, and surprisingly useful objects. Instead of tossing them into the trash, a little imagination can turn these everyday materials into projects that are both functional and decorative.
Recycling and repurposing household items not only helps reduce waste but also encourages creativity and problem-solving. With minimal effort, old materials can find a new life, saving money while providing a satisfying DIY experience.
Why Non-Slip Mats and Cardboard Are Perfect for DIY
Non-slip mats are typically made from rubber or foam, making them durable, flexible, and easy to cut or shape. They have the added benefit of providing grip and cushioning, which can be incorporated into various projects.
Cardboard, on the other hand, is lightweight, sturdy, and readily available. It can serve as the base or structural component of a project, offering support for non-slip mats and other materials. Together, these two items form a versatile combination for home DIY enthusiasts.
Step 1: Preparing the Materials
Before starting your project, gather your supplies:
-
An old non-slip mat
-
Cardboard sheets (recycled boxes work perfectly)
-
Scissors or a craft knife
-
Glue or a hot glue gun
-
Optional decorations like paint, fabric, or stickers
Clean the non-slip mat to remove dust or grime. If the mat is very thick or stiff, you may need to trim it into smaller pieces for easier handling. For cardboard, flatten any boxes and cut them to the desired size for your project.
Step 2: Ideas for Useful Creations
There are countless ways to combine non-slip mats and cardboard, depending on your needs and creativity. Here are a few inspiring ideas:
-
DIY Drawer Liners
Cut the non-slip mat and cardboard to fit inside drawers. The cardboard provides structure, while the non-slip mat keeps items in place. This simple combination prevents clutter and stops objects from sliding around in kitchen, bathroom, or office drawers. -
Custom Coasters
Cut small squares or circles from cardboard and cover them with pieces of non-slip mat. These coasters protect your surfaces from heat or moisture while adding a unique texture. You can decorate the cardboard with paint, fabric, or patterned paper for a personalized touch. -
Pet Feeding Station
Use cardboard to create a stable base for your pet’s bowls, and line it with non-slip mat pieces to prevent the bowls from sliding. This makes mealtime cleaner and quieter, especially for pets that tend to nudge their bowls around. -
Shelf and Cabinet Grips
Line your shelves with cardboard for support, then top them with non-slip mat strips to prevent items from shifting. This is ideal for kitchen cabinets, bathroom storage, or craft supply shelves. -
Organizational Trays
Create small trays for your desk or vanity. Cut cardboard to shape the base and cover the inside with a non-slip mat to hold pens, makeup, or small tools. These trays keep items tidy while preventing them from sliding off.
Step 3: Decorative and Creative Uses
Beyond practical applications, combining non-slip mats and cardboard can produce decorative or playful projects:
-
Wall Art: Cut interesting shapes from cardboard and add non-slip mat textures to create tactile wall pieces.
-
DIY Toys or Game Boards: Cardboard serves as the base for homemade games, while non-slip mat sections provide grip for pieces.
-
Plant Holders: Create small plant trays or coaster-like bases using cardboard for support and non-slip mats to keep pots steady.
Adding paint, stickers, or patterned fabric can further enhance these creations, making them visually appealing as well as functional.
Step 4: Tips for Successful Projects
-
Measure Twice, Cut Once: Accurate measurements help your pieces fit together neatly.
-
Use Strong Adhesive: Hot glue or strong craft glue works best to attach non-slip mats to cardboard securely.
-
Combine Multiple Layers: For heavier items, layering cardboard and non-slip mat adds stability and durability.
-
Experiment with Shapes: Don’t limit yourself to rectangles or squares—try circles, hexagons, or abstract forms for creative flair.
The Benefits of Repurposing
Repurposing old non-slip mats and cardboard offers multiple advantages:
-
Eco-Friendly: Reduces waste and gives a second life to materials that might otherwise end up in the trash.
-
Cost-Effective: Saves money on household items like coasters, liners, or trays.
-
Creative Outlet: Encourages hands-on problem-solving and artistic expression.
-
Functional: Produces practical items that enhance organization, safety, and convenience in the home.
Conclusion
Old non-slip mats and cardboard don’t need to go to waste. With a bit of creativity, scissors, and glue, you can transform these materials into practical, decorative, and even playful objects. From drawer liners and coasters to pet feeding stations and wall art, the possibilities are endless.
By repurposing household items, you not only help the environment but also enjoy the satisfaction of creating something useful and unique. Next time you spot an old mat or cardboard box, think twice before throwing it away—it could be the start of your next amazing DIY project.


