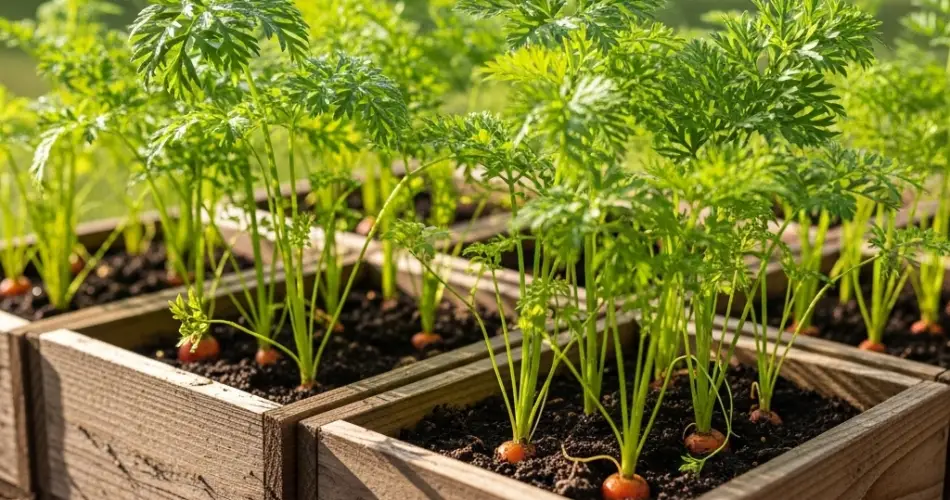
Carrots are one of the most rewarding vegetables to grow at home. Their crisp texture, natural sweetness, and versatility in cooking make them a kitchen favorite. While many people think carrots need wide garden beds to thrive, they actually grow beautifully in wooden containers. By using rustic wooden boxes, you can cultivate carrots in small spaces like balconies, patios, or compact backyards, and still enjoy a plentiful harvest.
Why Grow Carrots in Wooden Boxes?
Wooden containers create an excellent growing environment for carrots because they provide controlled conditions that minimize problems like soil compaction and pests. Unlike traditional garden beds, wooden boxes can be filled with loose, nutrient-rich soil—perfect for encouraging straight, well-formed roots.
Carrots are root vegetables, so the structure and depth of the soil play a major role in their development. Wooden boxes make it easier to achieve the ideal soil texture, preventing the hard or rocky soil issues often found in garden beds. Plus, their rustic charm adds a decorative touch to any outdoor space, blending practicality with beauty.
Another advantage of growing carrots in containers is flexibility. You can move the boxes to follow the sun, protect them from extreme weather, or even elevate them to make gardening more accessible.
Choosing the Right Wooden Box
The depth of the container is the most important factor when growing carrots. Most carrot varieties require at least 10–12 inches of soil depth, though some smaller varieties like “Paris Market” or “Thumbelina” need less. Standard wooden boxes that are 12–15 inches deep and wide enough to accommodate rows of carrots work perfectly.
Ensure the wooden box has proper drainage holes to prevent waterlogging, which can cause roots to rot. Cedar and pine are common wood choices for building or buying rustic planters since they are durable and resistant to decay. Avoid treated wood, as it may contain chemicals harmful to vegetables.
Preparing the Soil
Carrots thrive in loose, sandy, and well-draining soil. Heavy or compact soil can cause carrots to fork or grow misshapen. A good container mix includes potting soil blended with sand or perlite for improved drainage, along with compost for nutrients.
Aim for a soil pH of 6.0–6.8, which is slightly acidic to neutral. Before planting, make sure the soil is fine and free from clumps, rocks, or large organic matter, as these can interfere with root growth.
Planting Carrot Seeds
Carrots are best grown directly from seed, as they do not transplant well. To plant, scatter seeds evenly in rows about 2–3 inches apart, pressing them lightly into the soil at a depth of about ¼ inch. Cover with a thin layer of soil and mist with water.
Germination can be slow, often taking 10–20 days. Keep the soil consistently moist during this period, as drying out may prevent seeds from sprouting. To speed up germination, some gardeners cover the top of the soil with a thin board or burlap until the first seedlings appear, removing it immediately afterward.
Watering and Sunlight
Carrots need steady moisture to develop properly. Water your wooden container regularly to keep the soil evenly moist but not soggy. Uneven watering can lead to cracked roots or poor texture. Wooden boxes help regulate moisture by providing natural breathability, but they may also dry out more quickly in hot weather, so check soil conditions frequently.
Carrots thrive in full sunlight, requiring at least 6 hours of sun each day. Place your wooden box in the brightest spot available to encourage strong growth and sweet flavor. In very hot climates, light afternoon shade can help prevent the soil from drying out too quickly.
Thinning Seedlings
Once carrot seedlings reach about 2 inches tall, thin them to allow proper root development. Crowded plants compete for space, resulting in thin or deformed carrots. Leave at least 2 inches of space between each plant for standard varieties, and a little less for small, round varieties. Use scissors to snip extra seedlings at the soil line rather than pulling them out, which can disturb nearby roots.
Fertilizing Carrots
Carrots don’t need heavy fertilization but benefit from balanced nutrients. Too much nitrogen will encourage leafy tops rather than strong roots. Before planting, mix compost into the soil. During the growing season, you can apply a low-nitrogen organic fertilizer once or twice to encourage healthy development.
Harvesting Sweet Carrots
Carrots are usually ready for harvest 60–80 days after planting, though smaller varieties may mature faster. You’ll know they are ready when the tops of the roots peek slightly above the soil surface and reach about ½–1 inch in diameter.
To harvest, loosen the soil gently and pull the carrot upward by grasping the leafy tops close to the root. Rinse off the soil and enjoy them immediately for the best flavor and crunch. If left too long in the soil, carrots may become woody or lose sweetness.
Extending the Harvest
To enjoy carrots continuously, try succession planting. Sow new seeds every 2–3 weeks throughout the growing season. Wooden boxes make this method simple since you can rotate boxes with freshly sown seeds while harvesting mature ones from another container.
Carrots grow best in cool weather, so planting in spring and fall usually yields the sweetest harvests. In hot climates, choose heat-tolerant carrot varieties or place containers in partially shaded areas during summer.
Final Thoughts
Wooden box gardening makes it possible to grow sweet, crunchy carrots even in the smallest spaces. With proper soil preparation, consistent watering, and patience during germination, you’ll be rewarded with homegrown carrots full of flavor. Rustic wooden containers not only provide the perfect growing conditions but also bring natural charm to your balcony or patio garden.
By dedicating just a little time and care, you can transform even the tightest spaces into productive mini-gardens filled with fresh carrots that taste better than anything you’ll find in stores.


