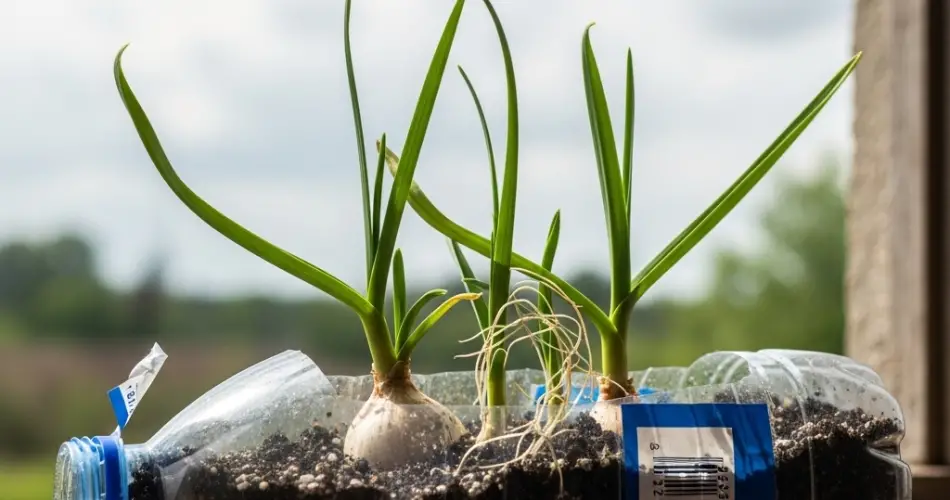
Garlic is one of the most popular and versatile kitchen ingredients, loved for its flavor and health benefits. While it’s often grown outdoors in garden beds, you can easily propagate garlic indoors—right on your windowsill—using something as simple as a recycled plastic bottle. This method is perfect for people with limited space, those living in apartments, or anyone who enjoys a bit of indoor gardening all year round.
Why Use Bottles for Garlic Propagation?
Plastic bottles make excellent mini growing chambers for garlic because they are:
-
Affordable and reusable – You can repurpose bottles you already have at home, reducing waste.
-
Space-efficient – Perfect for small apartments or homes with no outdoor space.
-
Customizable – Bottles can be cut, shaped, and arranged to fit your space.
-
Clean and contained – No messy soil spilling over, making them ideal for indoor use.
This simple setup creates a controlled environment for your garlic, allowing you to grow fresh greens and potentially even bulbs without a traditional garden.
Selecting Garlic for Indoor Propagation
Your success starts with choosing the right garlic cloves:
-
Healthy and firm – Avoid cloves that are shriveled, soft, or have visible mold.
-
Large cloves – These typically produce stronger shoots and roots.
-
Organic or untreated – Store-bought garlic is often treated to prevent sprouting, so organic cloves give you a better chance of success.
If possible, use locally grown garlic, as it is better adapted to your climate and growing conditions.
Preparing the Bottle
A 1.5- or 2-liter bottle works best for this project. Here’s how to turn it into a garlic propagation chamber:
-
Clean the bottle – Wash thoroughly and remove any labels.
-
Cut the bottle – Slice it in half or about one-third from the top, depending on the method you prefer.
-
Create drainage or a water reservoir –
-
Soil method: Poke holes in the bottom for drainage.
-
Hydroponic/wick method: Keep the bottom as a water reservoir and insert a wick (cotton strip or string) through the bottle neck to carry moisture up to the soil.
-
-
Add growing medium – Use loose, well-draining soil such as a mix of potting soil and compost, or coco peat for lighter texture.
Planting the Garlic
-
Separate the cloves – Break apart the garlic bulb gently, keeping the papery skin intact.
-
Plant upright – Place each clove with the pointed end facing up and the root base down.
-
Depth and spacing – Cover with about 1–2 inches of soil and leave at least an inch between cloves so the roots have room to spread.
-
Water lightly – Moisten the soil without overwatering. If using the wick system, make sure the reservoir has enough water to keep the soil damp.
Light and Temperature
Garlic needs a bright environment to grow well indoors.
-
Light – Place the bottle near a sunny window where it will get 6–8 hours of sunlight daily. If that’s not possible, use a small grow light.
-
Temperature – Keep the room between 15–21°C (59–70°F). Cooler nighttime temperatures encourage stronger growth.
Caring for Your Indoor Garlic
-
Water regularly – Keep the soil evenly moist, but avoid waterlogging to prevent rot.
-
Rotate the bottle – Turn it every few days so the shoots grow straight and evenly toward the light.
-
Fertilize occasionally – Once shoots appear, feed the plants every two to three weeks with diluted liquid fertilizer to encourage lush growth.
Harvesting Garlic Greens
You don’t have to wait months for a harvest—garlic greens can be ready in as little as one to two weeks. These tender shoots have a mild garlic flavor and are excellent for salads, stir-fries, omelets, and soups.
To harvest:
-
Use clean scissors to snip the greens, leaving about one-third of the shoot so it can regrow.
-
Continuous trimming over several weeks will encourage more shoots.
Growing Bulbs Indoors
While bottles are excellent for producing garlic greens, growing full bulbs indoors can be trickier since garlic naturally develops bulbs over a long growing period, often requiring cooler outdoor temperatures. Still, with patience and the right conditions, you can try:
-
Allowing at least four to six months for growth.
-
Avoiding frequent trimming of greens so the plant directs more energy to bulb formation.
-
Maintaining bright light and steady moisture without waterlogging.
Extra Tips for Success
-
Start fresh if needed – If cloves don’t sprout after two weeks, replace them with new ones.
-
Avoid overcrowding – Crowded cloves compete for light and nutrients.
-
Reuse bottles creatively – You can set up several bottles side by side for a mini indoor garlic garden.
Using recycled plastic bottles as garlic propagation chambers is an eco-friendly, cost-effective, and fun way to enjoy fresh garlic at home year-round. Whether you’re harvesting vibrant green shoots or experimenting with indoor bulb production, this method turns simple household waste into a productive indoor garden setup.


