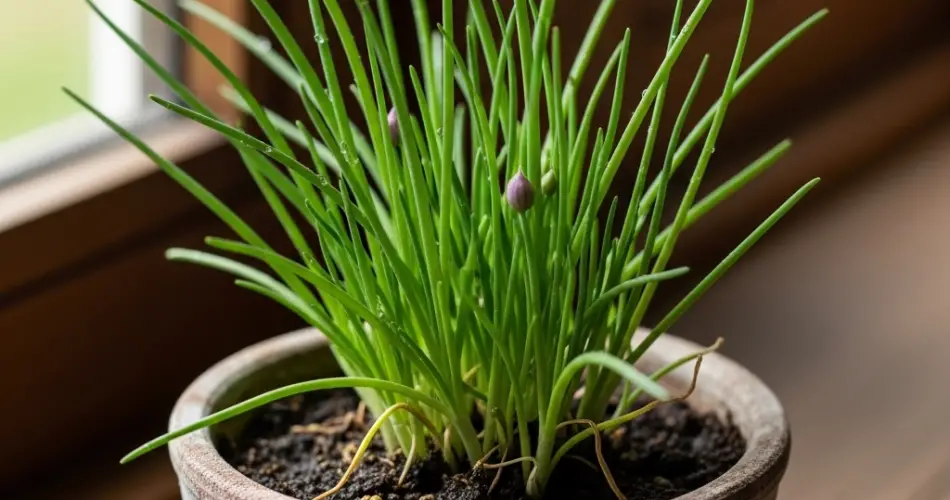
Chives are among the easiest and most rewarding herbs to grow in pots. Their delicate onion-like flavor makes them an essential addition to soups, salads, dips, and garnishes, while their slender green leaves add a fresh touch to any kitchen garden. Although chives are hardy and forgiving, the quality of the potting mix you use plays a crucial role in how lush and productive your plants will be. A well-prepared mix not only ensures healthy growth but also maximizes yield, giving you a continuous supply of fresh greens.
This guide explores the best potting mix for chives, along with tips for planting, maintaining, and harvesting this versatile herb in containers.
Why the Right Potting Mix Matters
Chives are shallow-rooted perennials that grow best in soil that retains enough moisture to support steady growth but drains well to avoid waterlogging. Unlike herbs that thrive in dry, sandy soil, chives prefer a balance: soil that is fertile, airy, and consistently moist. Choosing the correct mix creates an ideal environment where roots can expand freely, absorb nutrients, and resist common issues such as rot or stunted growth.
Building the Ideal Potting Mix for Chives
The best potting mix for chives is light, nutrient-rich, and well-draining. Here’s how to achieve the perfect blend:
-
Base Potting Soil
Start with a high-quality all-purpose potting soil as your base. Avoid using garden soil directly in pots, as it tends to compact and restrict airflow around the roots. -
Organic Matter
Mix in organic material such as compost or well-rotted manure. This improves fertility and provides the steady supply of nutrients that chives need for producing lush leaves. Organic matter also helps retain moisture without becoming soggy. -
Drainage Enhancers
To prevent water from pooling, add perlite, coarse sand, or vermiculite to the mix. About 20–30% of your blend should consist of these materials. This creates small air pockets that keep the roots healthy and oxygenated. -
Optional Additions
-
A small amount of coconut coir or peat moss can help regulate moisture levels.
-
A sprinkling of bone meal may boost root development in young plants.
-
A good ratio for potted chives is 2 parts potting soil, 1 part compost, and 1 part perlite or coarse sand. This combination provides fertility, drainage, and moisture balance all in one.
Choosing the Right Container
Even with the best potting mix, the wrong container can hold your plants back. Chives grow in dense clumps, so they benefit from a pot that is both wide and moderately deep. A container about 8–10 inches deep and 10–12 inches across works well.
Ensure that the pot has adequate drainage holes. Terracotta pots are an excellent choice since they allow excess moisture to evaporate, though plastic or ceramic containers work too as long as you monitor watering carefully.
Planting Chives in Pots
Chives can be started from seed, but the faster option is to divide an established clump or purchase young seedlings. Fill your pot with the prepared mix, leaving about an inch of space at the top. Plant seeds about a quarter-inch deep or place seedlings just deep enough to cover their roots.
Water thoroughly after planting to help the roots settle in. Keep the pot in a sunny spot where the plants can receive at least 6 hours of direct sunlight daily. Indoors, place them near a bright south-facing window or use a grow light if necessary.
Watering and Feeding Chives
Because of their shallow roots, chives prefer evenly moist soil. Water whenever the top inch of soil feels dry, but avoid letting the pot sit in standing water. During hot summer months, you may need to water more frequently, as containers dry out faster than ground soil.
For nutrients, chives do well with light feeding. Every four to six weeks, apply a diluted liquid fertilizer or compost tea to encourage lush growth. Avoid over-fertilizing, as this can lead to overly soft leaves that lack flavor.
Harvesting for Maximum Growth
The way you harvest chives affects how vigorously they regrow. Instead of snipping just the tips, use scissors to cut leaves about an inch above the soil line. This encourages the plant to send up new shoots quickly.
You can begin harvesting once plants are at least 6 inches tall, taking care not to cut more than one-third of the clump at once. With proper harvesting and a healthy potting mix, chives can be harvested continuously throughout the growing season.
Long-Term Care and Maintenance
Chives are perennial herbs, and with good care, they can thrive in the same pot for several years. However, the soil gradually loses nutrients and becomes compacted. Refresh the potting mix every 2–3 years by dividing the clump and replanting it into newly prepared soil. This revitalizes the plant and ensures continued productivity.
In cooler climates, chives may die back in winter, but they usually regrow in spring. If you want year-round harvests, keep one pot indoors where it can receive warmth and light.
Final Thoughts
The secret to lush, productive chives lies in the quality of the potting mix. A blend of fertile compost, well-draining materials like perlite, and a light base soil ensures that your plants thrive. Combined with proper watering, sunlight, and regular harvesting, this foundation will keep your potted chives healthy and abundant.
Whether you are growing them on a sunny balcony, patio, or kitchen windowsill, chives are an easy way to enjoy fresh herbs at your fingertips. With the right potting mix, you’ll have a steady supply of flavorful greens to enhance your cooking all season long.


