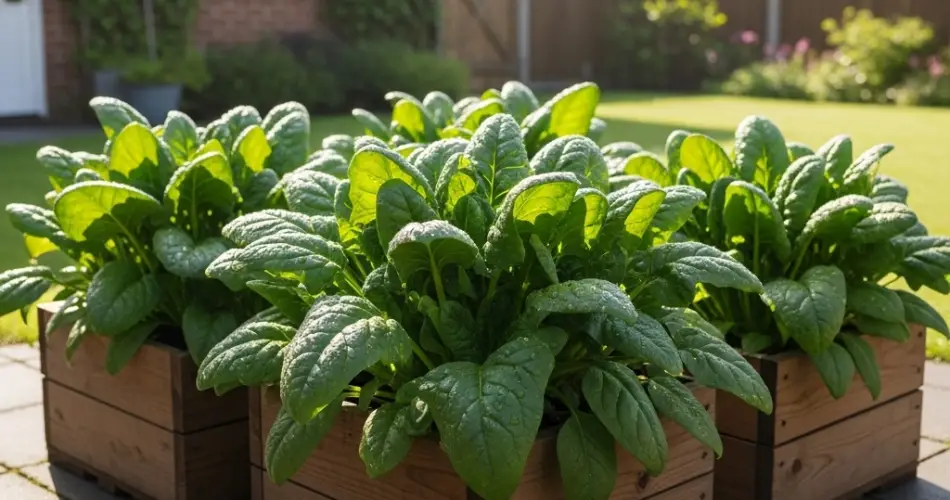
Spinach is a nutrient-packed leafy green that grows quickly and adapts beautifully to container gardening. If you live in an apartment, have a balcony, or simply want a neat, manageable garden, planting spinach in wooden boxes is one of the best ways to enjoy fresh greens right at your doorstep. Wooden boxes not only save space but also add rustic charm to your gardening area, making them both functional and decorative.
Here’s a complete step-by-step guide to planting spinach in wooden boxes, from preparing the container to harvesting your own homegrown leaves.
Step 1: Choosing the Right Wooden Box
Start with a sturdy wooden box that is at least 6–8 inches deep. Spinach has shallow roots, so it doesn’t require very deep soil, but a wider box allows you to grow more plants in rows. Repurposed crates, old drawers, or custom-built boxes from untreated wood all work well.
Make sure your box has drainage holes at the bottom. Without proper drainage, water can collect and cause root rot. If your container doesn’t already have holes, drill a few evenly across the base.
Step 2: Preparing the Soil
Spinach thrives in soil that is rich, loose, and well-draining. For best results, prepare a soil mix that includes:
-
High-quality potting soil for structure.
-
Compost or aged manure to boost nutrients.
-
A small amount of perlite or coarse sand to improve aeration.
Spinach grows best in soil with a slightly acidic to neutral pH (6.0–7.0). If you’re unsure about your soil pH, you can test it with a simple kit and adjust using lime (to reduce acidity) or sulfur (to reduce alkalinity).
Step 3: Selecting Spinach Seeds
Choose a variety that matches your growing conditions. Options include:
-
Savoy spinach: Crinkled leaves, hardy in cooler weather.
-
Semi-savoy spinach: Easier to clean, with slightly smoother leaves.
-
Flat-leaf spinach: Tender and fast-growing, perfect for salads.
-
Baby spinach: Harvested early for mild, sweet flavor.
For beginners, flat-leaf or baby spinach varieties are the most forgiving and productive in small containers.
Step 4: Planting the Seeds
Once your soil is ready, it’s time to sow the seeds.
-
Scatter spinach seeds evenly across the surface, leaving about 2 inches of space between each seed.
-
Cover lightly with ½ inch of soil or compost.
-
Water gently but thoroughly to settle the seeds.
Spinach seeds usually germinate in 7–10 days, depending on the temperature. For faster germination, soak the seeds in water for a few hours before planting.
Step 5: Providing the Right Growing Conditions
Spinach grows best in cooler weather, ideally between 50–70°F (10–21°C). Place your wooden box in a location that receives 4–6 hours of direct sunlight daily. If you live in a hot climate, provide partial shade during the afternoon to prevent the plants from bolting (going to seed too early).
Indoors, a sunny windowsill or a spot near a glass door works well. Outdoors, balconies, porches, or patios with morning sunlight are perfect.
Step 6: Watering and Feeding
Consistent moisture is key for tender spinach leaves. Wooden boxes can dry out more quickly than garden beds, so check the soil daily.
-
Water when the top inch feels dry.
-
Avoid overhead watering; instead, water at the base of the plants to prevent fungal issues.
-
Add a thin layer of mulch (like dry leaves or straw) to retain moisture.
Feed the plants every two weeks with a nitrogen-rich liquid fertilizer, such as compost tea or diluted fish emulsion. This encourages leafy growth and keeps your spinach producing for longer.
Step 7: Thinning Seedlings
When seedlings grow to about 2 inches tall, thin them out so each plant has 3–4 inches of space. Use scissors to snip excess seedlings at the soil line rather than pulling them, which could disturb nearby roots.
The thinned leaves can be eaten as microgreens, making the process both practical and delicious.
Step 8: Harvesting Your Spinach
Spinach grows quickly and is ready for baby-leaf harvest in 3–4 weeks or full-sized leaves in about 6 weeks.
Two main harvesting methods work well:
-
Cut-and-come-again: Snip the outer leaves with scissors while leaving the center intact. This allows the plant to continue producing.
-
Whole harvest: Cut the entire plant at soil level once it’s mature.
Harvest frequently to encourage new growth and prevent the plant from bolting.
Step 9: Extending Your Harvest
To enjoy a steady supply of spinach, practice succession planting. Sow a new batch of seeds every 2–3 weeks in the same box or in additional containers. This ensures a continuous harvest throughout the growing season.
If you live in a warm region, grow spinach primarily during cooler months. In colder climates, you can extend the season by bringing the wooden box indoors or using a light frost cover outdoors.
Step 10: Maintaining Healthy Plants
Keep an eye out for common spinach issues like aphids or leaf miners. You can manage pests naturally by removing affected leaves, spraying with neem oil, or introducing beneficial insects like ladybugs.
Prevent bolting by growing in cooler conditions and watering consistently. Regularly harvesting leaves also helps delay flowering and keeps plants producing longer.
Final Thoughts
Growing spinach in wooden boxes is one of the simplest ways to add fresh, homegrown greens to your meals. With the right soil, consistent watering, and proper harvesting, your box will yield crisp, nutritious leaves in just a few weeks.
This step-by-step method makes it possible to enjoy spinach even in small urban spaces, transforming your balcony, patio, or windowsill into a thriving mini-garden.


