Potatoes are one of the most versatile and widely consumed vegetables in the world. They are delicious, filling, and can be cooked in countless ways. While many people think of potatoes as a crop that requires large fields or garden plots, the truth is you can successfully grow them in buckets right at home. This method is especially useful for people living in apartments, houses with limited garden space, or anyone who wants an easy and manageable way to grow fresh food. With the right preparation and care, bucket gardening allows you to harvest a satisfying supply of potatoes without needing much land.
Why Grow Potatoes in Buckets?
Growing potatoes in buckets comes with several advantages:
-
Space-saving: Ideal for small patios, balconies, or compact backyards.
-
Mobility: Buckets can be moved to follow the sun or to protect plants from heavy rain.
-
Soil control: Buckets let you create the perfect soil mix, free from pests and diseases often found in garden soil.
-
Ease of harvesting: Instead of digging, you can simply dump the bucket to collect potatoes.
This method not only saves space but also makes the process less messy and more efficient.
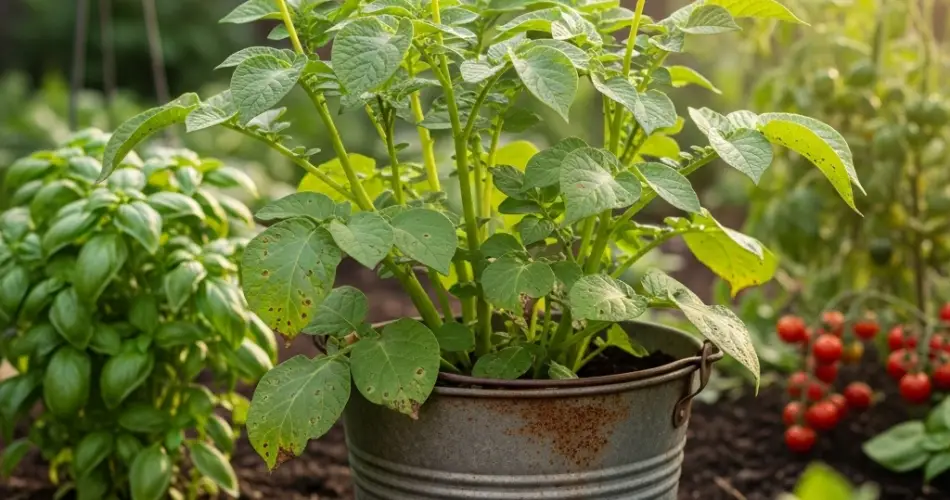
Choosing the Right Bucket
Not all containers are suitable for potato growing. You’ll want to ensure your bucket meets the crop’s needs.
-
Size: A 5-gallon bucket is perfect for most potato varieties, giving enough room for tubers to develop.
-
Drainage: Drill several holes at the bottom to prevent waterlogging, which can rot the potatoes.
-
Material: Plastic buckets retain moisture better, while fabric grow bags are another excellent option if you prefer breathable containers.
The key is providing enough space for both roots and tubers to grow freely.
Selecting Seed Potatoes
For best results, use certified seed potatoes rather than store-bought ones. Store-bought potatoes are often treated with chemicals to prevent sprouting and may carry diseases.
-
Varieties for containers: Choose compact or early-maturing types such as Yukon Gold, Red Pontiac, or fingerling potatoes.
-
Chitting (sprouting): Place seed potatoes in a cool, light-filled spot for 1–2 weeks until they develop short sprouts. This step jumpstarts growth and ensures faster development once planted.
Cut larger seed potatoes into chunks, making sure each piece has at least 2–3 healthy eyes. Let them dry for a day before planting to prevent rotting.
Preparing the Soil
Potatoes grow best in light, fluffy soil that encourages root expansion. Avoid heavy clay soil, which can restrict tuber development.
-
Soil mix: Combine equal parts of potting soil, compost, and coarse sand or perlite.
-
Nutrients: Potatoes benefit from potassium-rich soil. Mix in organic fertilizer or wood ash to boost tuber growth.
-
pH level: Aim for slightly acidic soil (5.8–6.5) to reduce the risk of scab disease.
This combination provides both aeration and nutrition, creating the perfect environment for healthy potatoes.
Step-by-Step Planting Guide
-
Fill the bucket partially: Add 4–5 inches of soil mix at the bottom.
-
Place the seed potatoes: Set 2–3 seed potatoes on top of the soil, eyes facing upward.
-
Cover with soil: Add another 3–4 inches of soil, covering the potatoes completely.
-
Water lightly: Keep the soil moist but not soaked.
-
Position the bucket: Place it in a sunny spot where it will get at least 6–8 hours of sunlight daily.
As the plants grow, you’ll need to add more soil to encourage the formation of additional tubers.
Hilling the Potatoes
One of the most important steps in bucket potato growing is “hilling.”
-
When the plants reach about 6–8 inches tall, add more soil around the stems until only the top leaves are visible.
-
Repeat this process every 1–2 weeks as the plants continue to grow.
-
Hilling ensures tubers are not exposed to sunlight, which can turn them green and inedible.
This step also increases yield by providing more room for potatoes to develop along the buried stems.
Care and Maintenance
-
Watering: Potatoes need consistent moisture. Water when the top inch of soil feels dry, but avoid overwatering.
-
Fertilizing: Apply a potassium-rich fertilizer halfway through the growth cycle to boost tuber development.
-
Pest control: Watch out for potato beetles and aphids. Handpick pests or use organic sprays if necessary.
Since bucket-grown potatoes are elevated, they are less likely to face soil-borne diseases compared to ground-grown crops.
Harvesting Potatoes
Potatoes are usually ready to harvest 10–12 weeks after planting, depending on the variety.
-
For baby potatoes: Gently dig into the soil 7–8 weeks after planting and pick a few small tubers, leaving the rest to mature.
-
For mature potatoes: Wait until the plants turn yellow and die back. Stop watering at this stage and let the tubers mature for about 1–2 weeks before harvesting.
To harvest, simply tip the bucket over and collect your fresh potatoes. Wash, dry, and store them in a cool, dark place.
Conclusion
Growing potatoes in buckets is an easy and rewarding way to produce fresh food at home, no matter how limited your space may be. By selecting the right container, preparing loose and nutritious soil, and following simple steps like hilling, you can enjoy a generous harvest of tasty potatoes. This method not only saves space but also makes planting, caring, and harvesting simpler. Whether you’re a beginner gardener or just want to try something new, bucket potato growing is a practical and enjoyable project that brings delicious results straight to your kitchen.


