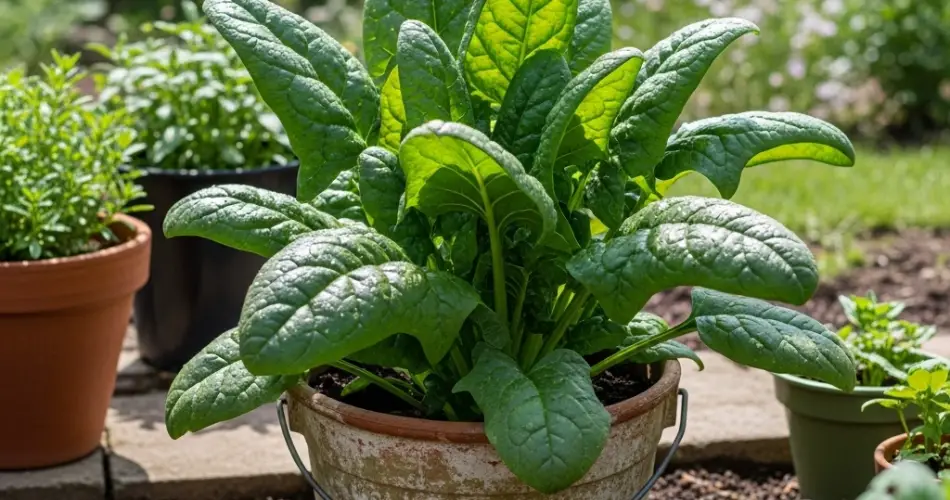
Swiss chard is a vibrant leafy green that’s both nutritious and easy to grow. Its colorful stems and broad leaves make it not only a kitchen staple but also a beautiful addition to your home garden. The great news is you don’t need a large space or a traditional garden bed to grow Swiss chard. With just a bucket, good soil, and some care, you can harvest fresh chard right from your balcony, patio, or backyard. This step-by-step guide will walk you through everything you need to know to successfully grow Swiss chard in buckets.
Step 1: Choose the Right Bucket
Start with a sturdy 5-gallon bucket, as it provides enough room for chard roots to spread. The bucket must have drainage holes at the bottom to prevent waterlogging, which can cause root rot. If your bucket doesn’t come with holes, drill 5–6 evenly spaced ones at the base. For even better drainage, raise the bucket slightly with bricks or wooden blocks.
If you prefer, you can paint or decorate the buckets to add charm to your growing space. Just make sure to use non-toxic paints so they don’t leach harmful chemicals into the soil.
Step 2: Prepare the Soil Mix
Swiss chard grows best in nutrient-rich, well-draining soil. A good mix is:
-
2 parts high-quality potting soil
-
1 part compost
-
1 part perlite or coarse sand for drainage
Avoid using heavy garden soil alone, as it compacts easily in buckets and can suffocate the roots. Compost enriches the mix with organic matter, while perlite or sand ensures the soil remains light and airy. Aim for a soil pH between 6.0 and 7.0.
Step 3: Plant Your Seeds or Seedlings
You can grow Swiss chard from seeds or transplants.
-
From seeds: Sow them directly into the bucket about ½ inch deep. Plant seeds 2–3 inches apart, then thin the seedlings later to give each plant about 6–8 inches of space.
-
From seedlings: If starting with young plants, set them into the soil at the same depth as in their nursery pots. Firm the soil gently around the base and water well.
To ensure continuous harvests, sow a new batch every 2–3 weeks in another bucket. This staggered planting gives you a steady supply of fresh leaves.
Step 4: Place Buckets in the Right Location
Swiss chard prefers full sun but also grows in partial shade, especially during hot weather. Ideally, give your plants 5–6 hours of direct sunlight daily. In cooler months, position buckets where they get maximum sun exposure. In summer, providing light shade in the afternoon can keep the leaves tender and prevent wilting.
Step 5: Watering Consistently
Buckets dry out faster than ground soil, so consistent watering is key. Water when the top inch of soil feels dry, making sure the water drains out the bottom. Avoid leaving buckets sitting in saucers of water, as soggy soil can lead to root disease.
Mulching the soil surface with shredded leaves, straw, or coconut husk helps retain moisture and regulate temperature. This step is especially helpful during hot days.
Step 6: Fertilize for Steady Growth
Because you’ll be harvesting chard leaves regularly, the plants need steady nutrition. Feed your chard every 2–3 weeks with a balanced liquid fertilizer, or use organic options such as compost tea or fish emulsion. Fertilizers higher in nitrogen encourage leafy growth, which is ideal for this crop.
If you prefer slow-release fertilizers, mix them into the soil before planting. This provides long-lasting nutrition with less frequent feeding.
Step 7: Monitor for Pests and Diseases
Swiss chard is hardy, but pests like aphids, slugs, and leaf miners can appear. Inspect your plants often, and remove pests by hand or wash them off with water. Natural sprays such as neem oil or insecticidal soap can control infestations without harming the plants.
For disease prevention, ensure good air circulation by not overcrowding plants, water at the base rather than from above, and promptly remove yellowing or damaged leaves. Rotating the soil or refreshing it between plantings also reduces pest buildup.
Step 8: Harvesting Swiss Chard
Swiss chard is a cut-and-come-again vegetable, meaning you can harvest it multiple times. Start picking when leaves reach 6–8 inches tall. Cut the outer leaves near the base and leave the center intact so the plant continues producing new growth.
Younger leaves are tender and excellent for salads, while mature leaves are perfect for stir-fries, soups, and stews. Frequent harvesting encourages the plant to keep growing, extending your harvest window for weeks or even months.
Final Tips for Success
-
Choose compact or colorful rainbow varieties for added beauty.
-
Stagger your planting to enjoy fresh greens throughout the season.
-
Provide afternoon shade in very hot climates to keep plants healthy.
-
Fertilize regularly, as bucket-grown plants rely entirely on your feeding.
-
Keep the soil fresh by adding compost before replanting new batches.
Conclusion
Swiss chard is one of the easiest and most rewarding leafy greens to grow in buckets. Its adaptability, resilience, and beauty make it a perfect choice for small-space gardeners. By following these simple steps, you’ll enjoy a consistent supply of nutrient-rich greens at your fingertips. Whether you live in an apartment with a balcony or a home with limited outdoor space, bucket planting makes it possible to grow fresh Swiss chard almost anywhere.


