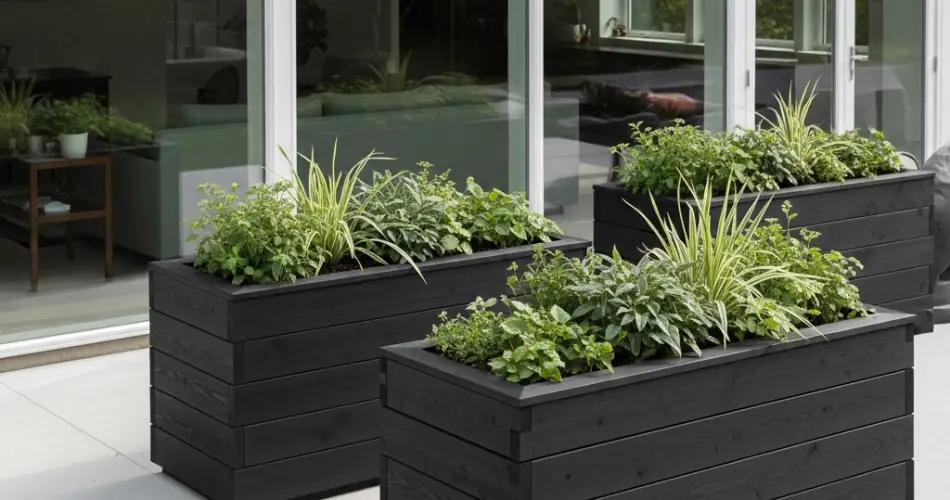
Wooden plant boxes are a beautiful and practical addition to any garden, patio, or balcony. They help you grow vegetables, herbs, or flowers in a defined space and can be tailored to fit your outdoor area perfectly. Building your own wooden plant boxes is a satisfying DIY project that’s both cost-effective and customizable.
Here’s a step-by-step guide to making sturdy, long-lasting wooden plant boxes that are ideal for backyard or container gardening.
Materials You’ll Need
Before getting started, gather the following materials:
-
Untreated wood (cedar or redwood are ideal for outdoor use)
-
Galvanized screws or wood nails
-
Wood glue (optional for added strength)
-
Power drill or screwdriver
-
Measuring tape
-
Saw (hand saw or circular saw)
-
Sandpaper
-
Landscape fabric or plastic liner (optional)
-
Safety goggles and gloves
Recommended wood size for a basic box:
-
2 pieces – 36 inches long (for the front and back)
-
2 pieces – 24 inches long (for the sides)
-
1 piece – 36 x 24 inches (for the bottom)
This gives you a rectangular box that’s 36 inches long, 24 inches wide, and 12 inches tall—perfect for most vegetables and herbs.
Step 1: Choose the Right Wood
Select a type of wood that resists rot and holds up well outdoors. Cedar and redwood are naturally weather-resistant and safe for growing edibles. Avoid pressure-treated lumber, especially for food gardens, since it may contain harmful chemicals that can leach into the soil.
Make sure your wood pieces are smooth and free of splits. If you’re recycling old wood, sand and clean it thoroughly before use.
Step 2: Cut the Wood to Size
Use a saw to cut the wooden boards to your desired dimensions. A basic box includes:
-
Two long boards for the front and back
-
Two shorter boards for the sides
-
One base piece (or slats if you want a slatted bottom for drainage)
Measure carefully and double-check each cut for accuracy. If the boards have rough edges, smooth them out with sandpaper to prevent splinters and ensure a clean finish.
Step 3: Assemble the Frame
Start by attaching the side boards to the ends of the front and back boards to create a rectangle.
-
Position the boards so that the short pieces fit between the long pieces.
-
Pre-drill holes to prevent the wood from splitting.
-
Use galvanized screws or wood nails to fasten the pieces together.
-
For extra durability, apply wood glue along the edges before screwing them in place.
Once all sides are connected, you should have a sturdy rectangular frame.
Step 4: Attach the Bottom
Place the base board on a flat surface and center the frame on top. Secure the base to the frame by drilling screws through the bottom into the sides. Space the screws evenly for balanced support.
If you prefer better drainage, use several slats instead of a single board for the bottom, leaving small gaps (1/2 inch) between them.
Step 5: Add Drainage and Lining
Drill a few holes in the base for excess water to escape if the bottom is solid. If you’re placing the box on a balcony or deck and want to prevent soil from falling through, consider lining the inside with landscape fabric or a plastic liner with drainage holes cut into it.
The liner helps retain soil while allowing moisture to escape, protecting the wood from rotting too quickly.
Step 6: Sand and Finish
Sand all exterior edges and corners to smooth out the surface and prevent injury. If desired, you can apply a non-toxic, water-based sealant to extend the life of the wood. Make sure any finish used is safe for growing edibles.
Leave the plant box to dry completely before adding soil.
Step 7: Fill with Soil and Plant
Now your wooden plant box is ready to use. Fill it with a rich potting mix appropriate for your chosen plants. For vegetables and herbs, use a mix of compost, peat moss or coconut coir, and perlite for drainage.
Once the box is filled, plant your favorite crops such as lettuce, tomatoes, herbs, or flowers. Water thoroughly and place the box in a sunny location.
Customization Ideas
-
Add handles for easy lifting.
-
Paint or decorate the exterior to match your garden theme.
-
Attach wheels to the bottom if you want a mobile garden box.
-
Stack multiple boxes for a tiered garden display or vertical gardening.
Final Thoughts
Building your own wooden plant boxes allows you to create a personalized, functional growing space that suits your gardening needs. With just a few tools and basic materials, you can make attractive and durable planters for your backyard, balcony, or patio. Whether you’re growing vegetables, herbs, or flowers, wooden plant boxes are a stylish and sustainable way to garden in any space.


