Garlic is one of the most rewarding crops to grow at home. It requires little space, minimal effort, and provides both flavor and health benefits in abundance. While garlic is traditionally planted in garden beds, it adapts surprisingly well to containers—especially buckets. Growing garlic in buckets allows urban gardeners and those with limited outdoor space to enjoy fresh, homegrown bulbs. With the right setup and care, you can produce a bountiful garlic harvest in just a few months.
This step-by-step guide will show you how to grow garlic successfully in buckets from planting to harvest.
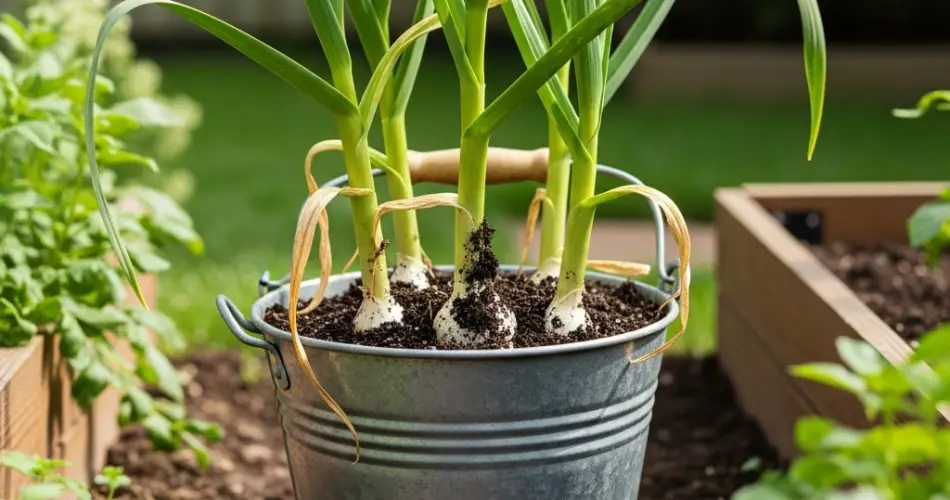
Step 1: Choose the Right Bucket
Garlic doesn’t need an extremely deep container, but it does require adequate space for root growth and bulb development. A standard 5-gallon bucket works perfectly. Make sure your bucket has several drainage holes at the bottom. Without proper drainage, garlic roots may sit in water, leading to rot.
If you’re planting multiple cloves, ensure your bucket’s surface area provides enough spacing. A 5-gallon bucket comfortably accommodates 6–8 garlic cloves.
Step 2: Select Quality Garlic Cloves
The quality of your garlic harvest begins with the cloves you plant. Avoid using garlic from grocery stores, as it may be treated with chemicals to prevent sprouting. Instead, purchase seed garlic from a nursery or trusted supplier.
There are two main types of garlic to choose from:
-
Hardneck garlic: Produces large, flavorful cloves and grows well in colder climates.
-
Softneck garlic: Has more but smaller cloves, stores longer, and thrives in warmer regions.
Select plump, healthy cloves and avoid any that are soft, shriveled, or moldy. Remember: each clove planted grows into a full bulb.
Step 3: Prepare the Soil Mix
Garlic prefers well-draining, fertile soil. A good bucket mix includes:
-
2 parts high-quality potting soil
-
1 part compost for nutrients
-
1 part sand or perlite for drainage
Mix thoroughly and fill the bucket, leaving about 2 inches from the top rim. Aim for a slightly acidic to neutral soil pH between 6.0 and 7.0. Adding a handful of organic fertilizer or bone meal before planting provides garlic with the phosphorus it needs for strong root development.
Step 4: Planting the Garlic
Plant garlic cloves in the fall in cooler climates, or during the cooler season in warmer regions. To plant:
-
Separate the garlic bulb into individual cloves, keeping the papery skin intact.
-
Push each clove into the soil with the pointed end facing up and the flat root end down.
-
Space cloves about 4–5 inches apart.
-
Cover them with 2 inches of soil.
After planting, water thoroughly to settle the soil around the cloves.
Step 5: Provide the Right Growing Conditions
Garlic grows best in full sun, so place the bucket in a location that receives at least 6–8 hours of direct sunlight daily. Garlic is hardy and can withstand cool temperatures, but in very cold regions, insulate your bucket with straw, leaves, or burlap to protect against freezing.
Step 6: Watering and Feeding
Garlic needs consistent moisture, especially during its early growth stages. Water whenever the top inch of soil feels dry, but avoid overwatering. Buckets dry out more quickly than garden beds, so check frequently.
Fertilize every 3–4 weeks with a nitrogen-rich liquid fertilizer, such as fish emulsion or compost tea, to promote healthy leaf growth. Healthy leaves are essential for large, well-formed bulbs, as they help the plant photosynthesize and store energy underground.
Step 7: Monitor for Pests and Problems
Garlic is naturally resistant to many pests due to its strong aroma, but it can still face challenges. Watch for:
-
Aphids on leaves, which can be controlled with neem oil or insecticidal soap.
-
Fungal diseases caused by overly wet soil. Ensure proper drainage and water at the base of plants.
-
Nutrient deficiencies, which may cause yellowing leaves. Supplement with compost or a balanced fertilizer as needed.
Step 8: Harvesting Garlic
Garlic is ready to harvest when the leaves start to yellow and dry, usually 7–9 months after planting. To harvest:
-
Stop watering for about a week before pulling the bulbs.
-
Loosen the soil gently with a hand tool, then lift the bulbs out.
-
Avoid tugging by the leaves, as this can damage the bulbs.
After harvesting, brush off excess soil but do not wash the bulbs. Lay them out in a dry, well-ventilated area to cure for 2–3 weeks. Once cured, trim the roots and leaves. Properly cured garlic can store for months.
Step 9: Save Cloves for the Next Season
One of the joys of garlic gardening is sustainability. From your harvest, set aside the largest and healthiest cloves for planting next season. This ensures you maintain a cycle of fresh, homegrown garlic without needing to buy new seed garlic every time.
Conclusion
Growing garlic in buckets is a practical and rewarding way to enjoy this flavorful crop, even in small spaces. With the right soil mix, proper spacing, consistent care, and patience, you’ll be harvesting your own fresh garlic bulbs in less than a year. Whether you’re gardening on a balcony, patio, or backyard, bucket-grown garlic is a simple solution that provides fresh flavor and valuable health benefits right from home.


