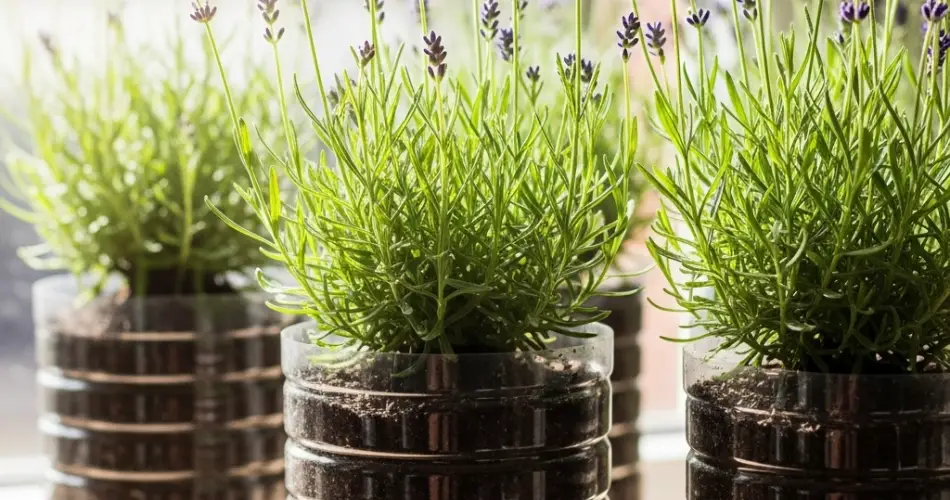
Lavender is well known for its calming fragrance, beautiful purple blooms, and wide range of uses—from natural air fresheners to culinary and skincare applications. Fortunately, you don’t need a sprawling garden to enjoy lavender at home. With a little creativity and some upcycled plastic bottles, you can grow this beloved herb in even the smallest of spaces—whether it’s a sunny balcony, a windowsill, or a patio corner.
Growing lavender in plastic bottle pots is a sustainable, budget-friendly approach to urban gardening. Not only does it give a second life to waste materials, but it also provides you with a thriving plant that adds beauty, fragrance, and tranquility to your home.
Why Lavender Is Perfect for Bottle Gardening
Lavender is a hardy, drought-tolerant plant that thrives in containers, especially when drainage and sunlight are adequate. Its root system is compact enough for bottle planters, and its preference for dry conditions makes it less demanding than many other herbs.
Upcycled plastic bottles are ideal for growing lavender in tight spaces. They’re lightweight, easy to modify, and allow for vertical, horizontal, or hanging arrangements—perfect for maximizing growing area in small urban environments.
What You’ll Need
To grow lavender in plastic bottle pots, gather the following materials:
-
1.5–2-liter clear plastic bottles
-
Sharp scissors or a craft knife
-
A heated nail or pin for drainage holes
-
Potting mix suitable for Mediterranean herbs (well-draining)
-
Coarse sand or perlite (to improve drainage)
-
Small stones or pebbles (for base layer)
-
Lavender seeds or cuttings
-
Twine or wire (if hanging)
-
A sunny location with at least 6 hours of light per day
Preparing the Bottle Planter
-
Clean the Bottle
Rinse thoroughly to remove any residue, and peel off the label for a neat appearance. -
Cut the Bottle
Cut the bottle horizontally, about one-third from the top. The bottom portion will serve as your planter. You can discard or repurpose the top for another project. -
Make Drainage Holes
Use a hot nail or sharp tool to poke several small holes in the bottom to ensure proper water drainage and prevent root rot. -
Add a Drainage Layer
Place small pebbles, crushed stone, or charcoal at the bottom of the container to enhance drainage. -
Prepare the Soil
Lavender needs well-draining soil. Mix regular potting soil with coarse sand or perlite in a 2:1 ratio to replicate its native Mediterranean conditions. Fill the bottle with this mix, leaving about an inch of space from the rim.
Planting Lavender
You can grow lavender from seeds, but using cuttings is faster and more reliable.
From Seeds:
-
Sprinkle seeds over the soil and cover with a very thin layer of soil or sand.
-
Mist the soil to moisten it without soaking.
-
Place the bottle in a warm, bright spot with good airflow.
-
Seeds typically germinate in 2–3 weeks.
From Cuttings:
-
Take a 4–6 inch cutting from a healthy lavender plant.
-
Remove the lower leaves and dip the stem in rooting hormone (optional).
-
Plant the cutting directly into the soil in your bottle pot.
-
Keep the soil lightly moist until roots form in 2–3 weeks.
Ideal Growing Conditions
-
Sunlight:
Lavender thrives in full sun. Ensure your bottle planter receives at least 6–8 hours of direct sunlight daily. A south-facing window, balcony, or sunny terrace is perfect. -
Watering:
Lavender prefers dry conditions. Water only when the top 1–2 inches of soil feel dry. Avoid overwatering, especially in a bottle without perfect drainage. -
Air Circulation:
Good airflow helps prevent mildew and fungal issues. Avoid crowding the plant among others, especially in humid conditions. -
Feeding:
Lavender doesn’t require frequent fertilizing. Add compost or a mild organic fertilizer once during the growing season if the soil quality is poor.
Pruning and Maintenance
Pruning is essential to keep lavender bushy and productive. Once your plant is a few months old, begin trimming back the top inch of growth to encourage branching. After blooming, prune lightly to shape the plant, and remove dead or woody stems annually to promote new growth.
Harvesting Lavender
When the flowers bloom and begin to open, they’re ready to harvest. Cut the stems early in the day after the dew has dried for the best fragrance retention.
Bundle the cuttings and hang them upside down in a dry, dark area for about two weeks. Once dried, lavender can be used in sachets, teas, bath salts, and DIY beauty recipes.
Sustainability Tips
-
Reuse multiple bottles to create a vertical lavender wall or garden.
-
Pair lavender with other drought-tolerant herbs like thyme or rosemary in grouped bottle containers.
-
Repurpose garden trimmings into dried sachets or mulch to reduce waste.
-
Collect rainwater in a container to use for watering and minimize tap water use.
Final Thoughts
With just a plastic bottle and some basic gardening tools, you can bring the calming beauty and aroma of lavender into your home. This method is ideal for those with limited space or a desire to practice sustainable gardening habits.
By growing lavender in bottle pots, you create a relaxing environment while reducing waste—turning everyday materials into something green, fragrant, and healing. Give this DIY garden idea a try and transform your space into a miniature lavender haven.