Growing garlic in small containers is a rewarding and space-saving way to enjoy one of the kitchen’s most essential ingredients. Even if you don’t have a traditional garden, you can successfully grow flavorful garlic on a balcony, windowsill, or patio using small pots. This method not only saves space but also lets you control soil conditions, drainage, and sunlight exposure, leading to healthy bulbs and tasty green shoots.
Here’s a practical guide to garlic container gardening, perfect for beginners and urban gardeners alike.
Why Grow Garlic in Containers?
Garlic is low-maintenance, pest-resistant, and doesn’t need a lot of space to thrive. It’s ideal for container gardening because:
-
It doesn’t require deep soil.
-
It grows well in confined spaces.
-
You can grow it indoors or outdoors.
-
You can harvest both bulbs and green garlic shoots.
-
Containers help prevent soil-borne diseases and overcrowding.
Whether you’re limited by space or just want a cleaner and more convenient way to grow garlic, small pots offer the perfect solution.
Choosing the Right Garlic
Start with garlic bulbs from a reliable source. While grocery store garlic can sometimes work, it’s best to use organic or seed garlic to ensure it’s disease-free and suited for planting. Softneck varieties are ideal for milder climates and often perform better in containers. Hardneck types prefer colder environments and typically produce larger cloves.
Once you have your garlic bulb, separate it into individual cloves. Be sure to leave the papery skin intact, and choose only the largest, healthiest cloves for planting.
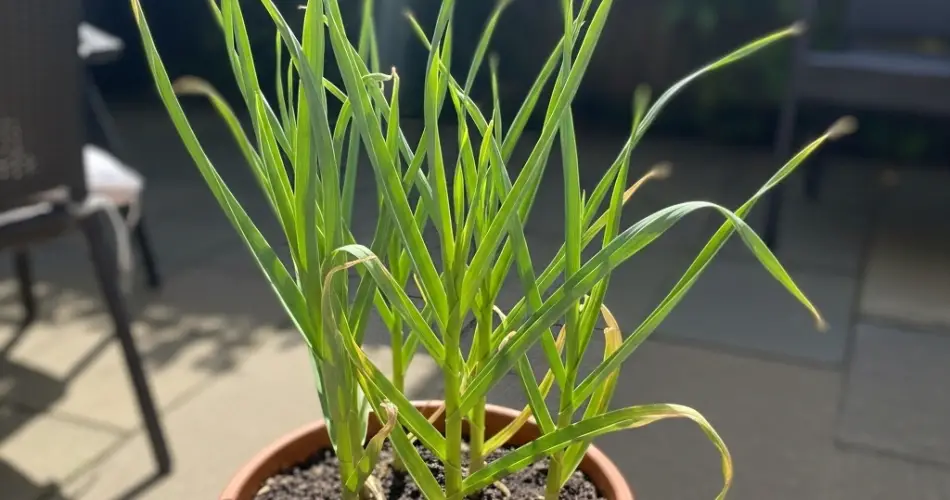
Best Container Size and Type
Garlic doesn’t need a deep container, but it does need space for root development. A pot that’s at least 6–8 inches deep and 8–10 inches in diameter is suitable for planting 3–4 cloves. If you’re growing more, opt for a wider container or use multiple pots.
Make sure your container has proper drainage holes to prevent water buildup, which can lead to rotting. Terracotta pots are breathable and excellent for garlic, but any material will work as long as excess water can drain freely.
Soil Preparation
Use a well-draining potting mix enriched with organic compost. Avoid heavy or compacted garden soil. Garlic prefers loose, fertile soil with good aeration. The ideal pH level for garlic is between 6.0 and 7.0.
You can prepare a mix using equal parts of potting soil, compost, and perlite or coarse sand for drainage. Add a slow-release organic fertilizer, especially one that’s rich in phosphorus and potassium, to encourage strong root and bulb development.
Planting Garlic in Pots
Plant each clove with the pointed end facing up and the flat root end facing down. Push it about 2 inches deep into the soil and space each clove 3–4 inches apart. Cover lightly with soil and water well after planting.
The best time to plant garlic is in the fall for a summer harvest, but it can also be grown in early spring depending on your local climate. Fall planting allows cloves to establish roots before winter dormancy and produce bigger bulbs the following season.
Sunlight and Watering Needs
Garlic loves sunlight. Place your pot in a spot that receives at least 6 hours of direct sunlight daily. South-facing balconies, windowsills, or patios are ideal. If growing indoors, consider using grow lights to supplement natural light.
Keep the soil consistently moist but not waterlogged. Water when the top inch of soil feels dry, and reduce watering slightly during the cooler months. Overwatering can lead to fungal issues or rotting, so ensure good drainage at all times.
Fertilizing and Maintenance
Apply a diluted liquid fertilizer such as fish emulsion or compost tea every 3–4 weeks to keep your garlic well-fed. Once the shoots begin to grow tall and green, you can also harvest some of the greens occasionally to use as garlic scallions, which are flavorful and tender.
As the growing season progresses, remove any yellowing leaves and check for signs of pests. Garlic is naturally resistant to most garden pests, but watch out for fungal diseases in overly wet conditions.
Harvesting Garlic
Garlic is ready for harvest when the lower leaves start to dry out and turn brown, typically 7–9 months after planting. To harvest, gently loosen the soil and pull out the bulbs. Do not wait until all the leaves are dry, as that could mean the cloves are separating underground.
After harvesting, allow the garlic to cure in a dry, well-ventilated area for 2–3 weeks. Once dried, trim the roots and stalks and store the bulbs in a cool, dark place with good air circulation.
Bonus: Green Garlic Harvest
If you can’t wait several months for a bulb harvest, you can grow green garlic. This is simply young garlic harvested before the bulb fully forms. You can begin cutting green shoots when they reach about 6–8 inches tall. They taste like a mild version of garlic and are excellent in stir-fries, soups, and salads.
Final Thoughts
Growing garlic in small pots proves that you don’t need a garden to enjoy fresh, homegrown flavor. With a little care, sunlight, and patience, you can produce delicious garlic bulbs and greens right on your balcony or windowsill. This method is simple, eco-friendly, and perfect for anyone wanting to take the first step toward self-sufficient, container-based gardening.


