Kale is one of the most versatile and nutritious leafy greens you can grow in your garden, and the best part is that it’s incredibly easy to care for. With the right conditions, you can plant kale once and enjoy a continuous harvest of crispy, fresh, and delicious leaves all year round. Whether you want to add kale to your salads, soups, smoothies, or sautéed dishes, this green will provide a steady supply of healthy and vibrant leaves for months.
Here’s everything you need to know about growing and caring for kale so you can enjoy a year-round harvest without much effort.
Step 1: Choose the Right Kale Variety
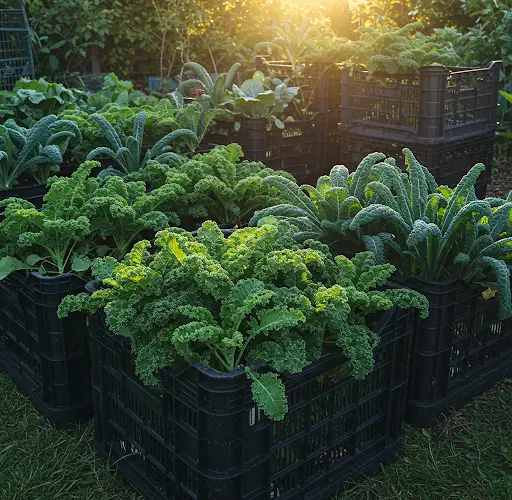
There are several varieties of kale, but the two most popular ones are curly kale and lacinato (or dinosaur) kale. Both types have their own distinct texture and flavor:
-
Curly Kale (e.g., Winterbor): This variety has frilly, ruffled leaves and a robust, slightly bitter flavor. It’s perfect for salads, smoothies, and cooking.
-
Lacinato Kale (also called Dinosaur Kale): This variety has long, dark green leaves with a smooth texture and a milder, sweeter flavor. It’s ideal for soups and sautés.
For beginners, curly kale is often easier to grow because it’s more resilient to pests and weather changes, but both varieties can be successfully grown at home.
Step 2: Find the Perfect Growing Location
Kale loves cool weather, making it an ideal plant for spring and fall, but it can also tolerate mild winters, especially if grown in a protected area like a balcony, patio, or raised bed. Choose a location where your kale will receive at least 6 hours of direct sunlight each day, although it can tolerate partial shade.
If you live in a warmer climate, plant kale during the cooler months of the year (fall or early spring), as it thrives in temperatures between 55-75°F (13-24°C). Kale is quite frost-hardy, so it can survive through a light frost, and the cool temperatures actually improve its flavor, making it sweeter.
Step 3: Prepare the Soil
Kale grows best in rich, well-draining soil that is slightly acidic to neutral (pH 6.0-7.0). Before planting, it’s a good idea to amend your soil with organic matter, such as compost, to improve soil structure and fertility. If planting in a raised bed or container, use a high-quality potting mix enriched with compost.
Kale has deep taproots, so make sure the soil is loose and deep enough to allow the roots to grow freely. If your soil is heavy clay or compacted, consider adding sand or perlite to improve drainage.
Step 4: Planting Kale
Kale can be grown from seeds or transplants, but for beginners, starting with young plants from a nursery can simplify the process. If you’re planting from seed, you can start them indoors about 4-6 weeks before your last expected frost. When the seedlings are a few inches tall, transplant them into the garden or containers, spacing them about 12-18 inches apart.
If planting directly outdoors from seed, sow the seeds about 1/2 inch deep and 6-8 inches apart. Kale plants need space to grow, so don’t crowd them.
Step 5: Watering and Maintenance
Kale thrives on consistent moisture, but it doesn’t like to sit in soggy soil. Water your kale deeply to encourage strong root growth, ensuring the soil stays moist but not waterlogged. During hot weather, you may need to water more frequently, especially if your plants are growing in containers.
Mulching around your plants can help retain moisture, keep the roots cool, and suppress weeds. Use organic mulch, such as straw or wood chips, to cover the soil around your kale.
Step 6: Fertilizing Kale
Kale is a heavy feeder, so it benefits from regular fertilization. You can fertilize your kale with an organic nitrogen-rich fertilizer or compost tea once a month during the growing season. Kale will especially benefit from a balanced fertilizer that contains nitrogen, phosphorus, and potassium to support both leaf growth and overall health.
If you’re growing kale in containers, be sure to fertilize more frequently, as container soil tends to lose nutrients faster.
Step 7: Protecting Kale from Pests
Kale can be susceptible to pests like aphids, cabbage worms, and slugs. To keep your plants healthy, inspect them regularly for signs of infestation. If you spot any pests, you can wash the leaves with a mild soap solution or use organic insecticides such as neem oil or diatomaceous earth.
To prevent pests from damaging your plants, consider using row covers or netting around the kale plants, especially during the early stages of growth.
Step 8: Harvesting Kale
One of the best parts about kale is that you can harvest leaves throughout the growing season. Once your plants are about 6-8 inches tall, you can start picking the outer leaves. Always leave the center leaves (the growing tip) intact so that the plant can continue producing new leaves. By harvesting regularly, you’ll encourage more growth and ensure a continuous supply of fresh kale.
To harvest, simply snip the mature leaves at the base of the stem using clean scissors or pruning shears. Younger leaves tend to be more tender, while older leaves may have a stronger, more bitter flavor.
Step 9: Winter Care and Continuous Harvest
Kale can grow year-round if the weather remains cool, and it even becomes sweeter after a frost. If you live in a colder climate, consider using a cold frame or hoop house to protect your kale from extreme winter conditions. Alternatively, you can grow kale in containers and bring them indoors during particularly cold spells.
In mild climates, kale will continue producing fresh leaves even in the winter, so you can have a continuous harvest of crispy, nutritious greens.
Final Thoughts
Growing kale is a simple and rewarding experience, and once established, your plants will keep producing fresh greens all year long. Whether you have a garden, balcony, or even a small windowsill, kale is a perfect plant for beginners and experienced gardeners alike. By following these easy steps—selecting the right variety, providing the right conditions, and harvesting regularly—you can enjoy crispy, delicious kale all year without much effort.
Kale is packed with vitamins and antioxidants, making it a healthy addition to any meal. With minimal care and attention, you’ll never have to buy kale again!


