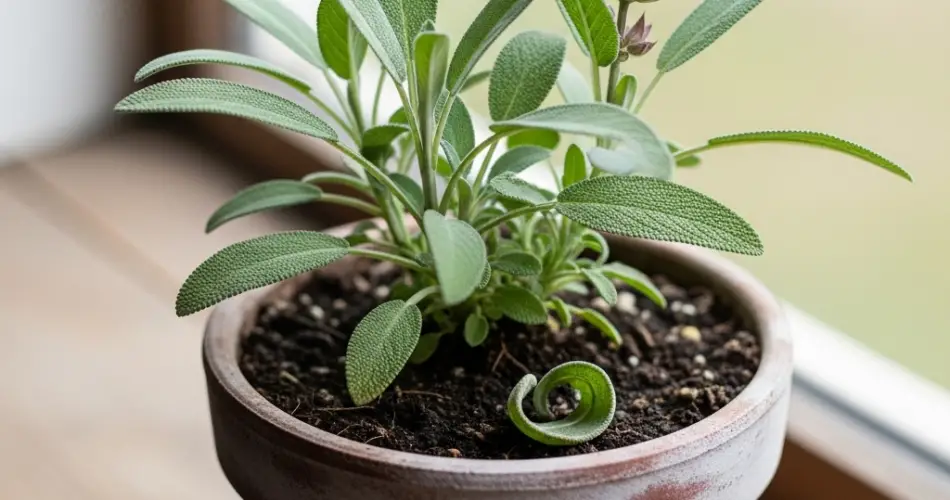
Sage is one of the most beloved culinary herbs, prized for its earthy aroma and rich flavor. Growing it in pots is a convenient way to keep this versatile herb within reach, especially for home cooks who want fresh sprigs right outside their kitchen door. While sage is hardy and relatively low-maintenance, it does require the right approach to pruning, harvesting, and overall care to stay healthy and productive in a container environment.
This guide will walk you through the essential steps for maintaining potted sage, ensuring you get the most out of your plant throughout the growing season and beyond.
Why Pruning Matters for Potted Sage
When grown in pots, sage can quickly become woody and leggy if left unattended. Pruning is not only about shaping the plant but also about stimulating new, tender growth that has the best flavor. Regular trimming prevents the plant from expending too much energy on old, woody stems and instead channels it into producing fresh leaves.
In addition, consistent pruning improves airflow within the foliage, reducing the chances of fungal diseases that can occur in container-grown herbs. A well-pruned sage plant is fuller, healthier, and far more productive.
How to Prune Potted Sage
Start pruning once your sage plant has become established, usually when it reaches about 6 to 8 inches tall. Use sharp, clean scissors or garden shears to snip stems just above a set of leaves. This encourages the plant to branch out at that point, creating a bushier shape.
Avoid cutting into the woody part of the stems, as this may damage the plant. Instead, focus on green, flexible growth. During the growing season, light pruning every few weeks will keep the plant compact and prevent it from becoming too unruly.
At the end of the season, especially in late summer or early fall, give the plant a more substantial trim. Cutting back one-third of the growth helps prepare it for overwintering and encourages vigorous new shoots in spring.
Harvesting Sage Leaves
Harvesting sage is simple, but doing it properly ensures that the plant continues to thrive. Always pick from the outer stems first, leaving the central growth intact. This allows the plant to keep growing while still providing you with a steady supply of leaves.
The best time to harvest sage is in the morning after the dew has dried but before the sun gets too intense. At this point, the essential oils are most concentrated, giving you the richest flavor.
For culinary use, fresh leaves are best when added to roasted vegetables, poultry, or savory dishes. If you want to preserve sage, consider drying or freezing the leaves. Air-drying is the traditional method, but using a dehydrator or oven on a low setting also works well.
Ongoing Maintenance for Healthy Sage in Pots
Besides pruning and harvesting, sage needs a bit of routine care to remain productive in a container. Here are the main aspects of maintenance:
1. Watering Wisely
Sage prefers slightly dry conditions and does not like to sit in soggy soil. Allow the top inch of soil to dry out before watering again. When you do water, soak the soil thoroughly so the roots can take in enough moisture, but always let excess water drain away.
2. Feeding the Plant
Sage is not a heavy feeder, but container-grown herbs benefit from occasional nutrition. Apply a diluted, balanced fertilizer once a month during the growing season. Organic options like liquid compost tea or seaweed extract work well and provide gentle nourishment.
3. Providing Adequate Sunlight
For strong, aromatic growth, sage needs at least 6 hours of direct sunlight daily. Place your pot in a sunny spot on a patio, balcony, or windowsill. Indoors, supplement with a grow light if natural light is limited.
4. Managing Flowers
Sage produces small, attractive flowers, but allowing the plant to bloom can reduce the quality of the leaves. If your goal is culinary use, pinch off flower buds as they appear. However, if you’d like to enjoy the flowers for their beauty or to attract pollinators, you can leave a few blooms while continuing to harvest leaves from the rest of the plant.
5. Overwintering Potted Sage
In colder regions, bring your sage pot indoors before the first frost or place it in a sheltered location like a greenhouse. Reduce watering during the winter months when the plant’s growth slows. In mild climates, sage may survive outdoors year-round, but protecting the pot with mulch around the base can help insulate roots.
Refreshing Your Potted Sage Plant
Over time, potted sage plants can become woody and less productive. After two to three years, it’s often best to start a new plant from cuttings or seeds. Taking a few stem cuttings in late spring or summer ensures you always have young, vigorous plants ready to replace older ones.
This renewal cycle keeps your herb garden thriving and ensures a constant supply of flavorful leaves.
Conclusion
Sage is a hardy, rewarding herb that flourishes in pots with the right care. By pruning regularly, harvesting thoughtfully, and maintaining the ideal conditions for growth, you can enjoy a steady supply of fragrant, flavorful leaves for cooking and herbal use.
With just a few simple practices, potted sage can remain bushy, productive, and beautiful, adding both culinary value and ornamental charm to your garden, balcony, or windowsill. Whether you’re an experienced gardener or just starting out, sage is one herb that will reward your attention many times over.


