The rubber plant (Ficus elastica) is a popular houseplant known for its broad, glossy leaves and upright growth. Its bold appearance adds a touch of modern elegance to any room, and with proper potting and care, it can thrive for years indoors. A well-potted rubber plant not only grows stronger but also produces those vibrant, shiny leaves that make it such a standout in home décor.
If you’re looking to keep your rubber plant lush and healthy, it all starts with the right potting techniques. Here’s a complete guide to help you get started.
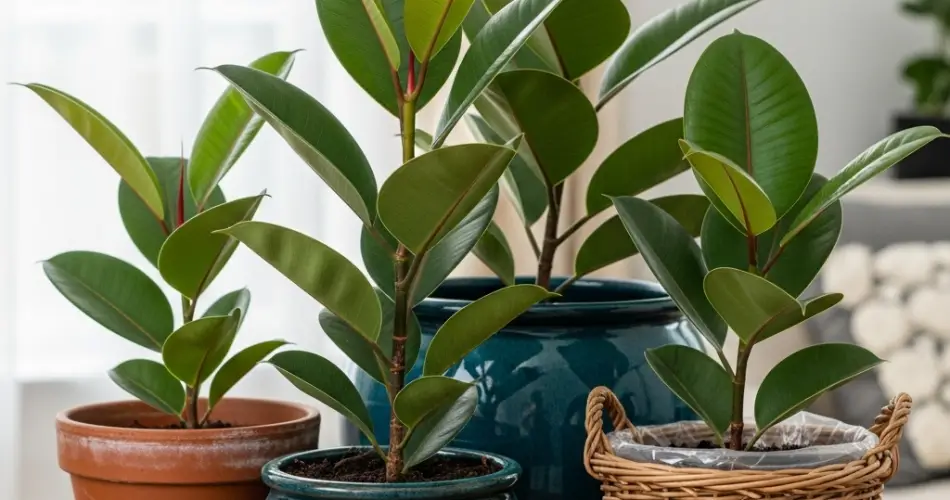
Choosing the Right Container
The container you choose plays a vital role in the overall health of your rubber plant. A pot that’s too large can hold excess water, while one that’s too small may restrict root growth. Choose a container that’s 2 to 3 inches wider than the root ball if you’re repotting a mature plant. If planting a younger one, start with a modest-sized pot and size up as it grows.
Drainage is key. Rubber plants dislike soggy soil, which can lead to root rot. Always select a container with drainage holes at the bottom. If you’re using a decorative cachepot without holes, make sure the plant is in a plastic nursery pot that can be lifted out for watering.
Terracotta, ceramic, or heavy-duty plastic pots work well. Terracotta helps wick away excess moisture, which is beneficial for those who tend to overwater.
The Best Soil for Rubber Plants
A healthy rubber plant starts with a well-draining potting mix. These plants prefer soil that retains some moisture but also drains quickly to prevent waterlogging.
A good rubber plant mix includes:
-
2 parts all-purpose indoor potting soil
-
1 part perlite or coarse sand
-
1 part coco coir or peat moss
This blend ensures proper aeration while maintaining the slight moisture rubber plants enjoy. Avoid dense, clay-heavy soils that compact easily and restrict oxygen flow to the roots.
Potting or Repotting Steps
Whether you’re planting a new rubber plant or repotting a mature one, follow these steps for best results:
-
Prepare the Pot: Add a layer of soil mix to the bottom of your new container.
-
Remove the Plant: Gently slide the rubber plant out of its current pot. Loosen compacted roots if necessary.
-
Position the Plant: Place it in the center of the pot so the top of the root ball sits about an inch below the pot’s rim.
-
Add Soil: Fill in the sides with your prepared soil mix, firming it lightly as you go to remove air pockets.
-
Water Well: After potting, give it a deep watering until excess water drains from the bottom. Then let the soil dry out slightly before watering again.
Repotting is typically needed every 1 to 2 years. If the plant becomes root-bound or the soil starts breaking down, it’s time to refresh both the soil and the container.
Light and Placement
Rubber plants thrive in bright, indirect sunlight. A spot near a window with filtered light is ideal. Direct sunlight, especially during the hottest part of the day, can scorch the leaves. On the other hand, low-light conditions can cause leggy growth and dull foliage.
Rotate the pot every couple of weeks to ensure balanced growth on all sides, and clean the leaves occasionally to help them absorb more light.
Watering and Humidity
Rubber plants like their soil to dry out slightly between waterings. Stick your finger into the soil—if the top 1 to 2 inches are dry, it’s time to water. During spring and summer, this might be once a week. In fall and winter, reduce watering to every two to three weeks.
Avoid overwatering, which is the most common problem with rubber plants. Always allow excess water to drain fully, and never let the plant sit in water.
While rubber plants can adapt to normal indoor humidity levels, they do appreciate a bit of extra moisture in the air. Mist the leaves occasionally, especially in dry indoor environments.
Feeding for Glossy Growth
To promote strong stems and shiny leaves, feed your rubber plant with a balanced, water-soluble fertilizer once a month during the growing season (spring through early fall). Avoid fertilizing in winter when growth slows down.
For added shine, gently wipe the leaves with a damp cloth to remove dust. Avoid commercial leaf shine sprays, which can clog leaf pores.
Pruning and Shaping
Pruning helps maintain a tidy shape and encourages bushier growth. Use clean scissors or pruning shears to cut just above a leaf node. If your rubber plant becomes too tall, don’t hesitate to trim the top—new branches will grow from below the cut.
Remove any yellowing, dead, or damaged leaves regularly to keep the plant healthy and attractive.
Conclusion
With the right pot, soil mix, and care routine, your rubber plant can thrive as a bold and glossy feature in your indoor space. Proper potting techniques not only support healthy root growth but also contribute to stronger stems and shinier leaves. Whether you’re new to indoor gardening or simply want to give your rubber plant a fresh start, these potting tips will help you grow a plant that’s as resilient as it is beautiful.


