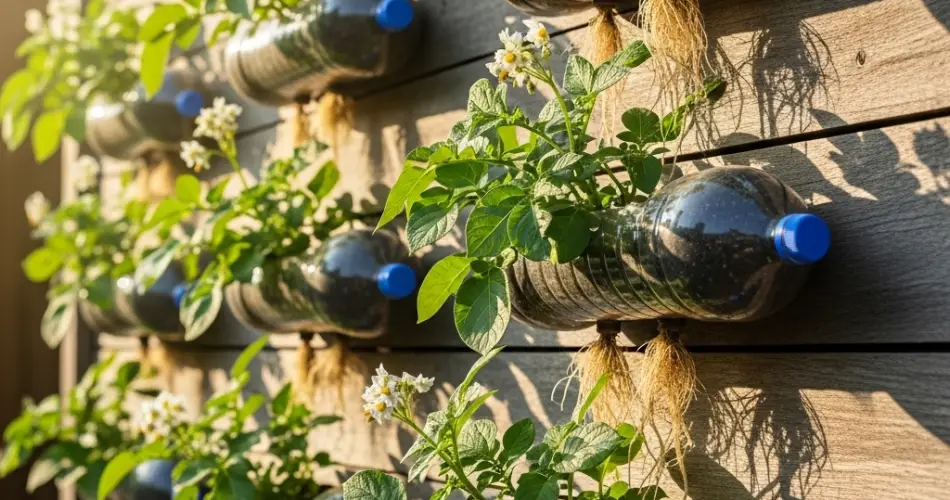
Growing potatoes doesn’t have to be limited to large garden beds or traditional pots. With a creative vertical bottle garden setup, you can cultivate healthy potato plants even in tight spaces like balconies, patios, or small yards. This method uses recycled plastic bottles to grow potatoes up a wall or frame, making it an eco-friendly and space-saving solution for urban gardeners. Here’s a step-by-step guide to creating your own potato wall garden using bottles.
Why Grow Potatoes in Bottles?
Potatoes thrive when given loose, well-aerated soil that allows their tubers to expand. The bottle garden method provides excellent drainage, prevents waterlogging, and keeps pests like ground-dwelling insects at bay. Additionally, vertical growing helps maximize small spaces, keeps plants off the ground, and can double as a green decorative wall.
Another benefit is the ability to observe growth. With transparent or semi-transparent bottles, you can monitor root development and spot potential problems early, making it an excellent educational activity for children or beginners.
Materials You’ll Need
-
Large plastic bottles (1.5–2 liters work best)
-
Sharp cutter or scissors for cutting bottle openings
-
Potato seed tubers (small potatoes with visible eyes)
-
Potting mix rich in organic matter
-
Compost or well-rotted manure for nutrition
-
Small trowel for planting
-
String, wire, or a wooden frame for vertical arrangement
-
Watering can with a fine spout
Step 1: Preparing the Bottles
Select clean bottles and remove any labels. Using a sharp cutter, make a large hole on one side of each bottle—this will be the planting pocket. Keep the hole size large enough to insert soil and plant the potato, but leave enough plastic for structural support.
Puncture a few small drainage holes at the bottom to prevent water accumulation. This is essential, as potatoes are prone to rotting in waterlogged conditions.
Step 2: Preparing the Seed Potatoes
Choose healthy, certified seed potatoes or use small kitchen potatoes that have sprouted. Each tuber should have at least two to three “eyes” (growth buds). If the potatoes are large, cut them into pieces, ensuring each piece has at least one eye. Let the cut pieces dry for a day before planting to prevent rot.
Step 3: Filling the Bottles
Add a layer of compost-enriched potting mix at the bottom of each bottle. This provides immediate nutrition for the developing roots. The mix should be loose and crumbly to allow tubers to expand without resistance.
Place one seed potato piece in the center of the bottle pocket, with the eye facing upward. Cover it with 8–10 cm of soil, leaving space at the top for adding more soil as the plant grows.
Step 4: Arranging the Vertical Garden
Decide on your vertical structure. You can:
-
Attach bottles to a wall using screws or hooks.
-
Hang bottles with strong string or wire in a staggered pattern.
-
Fix bottles on a wooden or metal frame for mobility.
Ensure the bottles receive at least six hours of sunlight daily, as potatoes require ample light to produce healthy tubers.
Step 5: Watering and Care
Water regularly but avoid overwatering. The soil should remain moist but never soggy. Since bottles have smaller soil volumes, they dry out faster than garden beds, so check moisture daily.
As the potato plants grow taller, add more soil into the bottle to cover the lower stems. This process, known as “hilling,” encourages the plant to produce more tubers along the buried stem sections.
Step 6: Fertilizing for Maximum Yield
Feed the plants every two weeks with a balanced liquid fertilizer or compost tea. Potatoes appreciate extra potassium, so adding banana peel compost or wood ash in moderation can help boost tuber formation.
Step 7: Harvesting Your Potatoes
Potatoes are ready to harvest when the foliage turns yellow and begins to wilt—usually three to four months after planting. To harvest from a bottle garden, simply remove the bottle from its position, cut it open, and gently collect the potatoes. This method is cleaner and faster than digging in the ground.
Extra Tips for Success
-
Avoid placing the vertical garden in overly windy areas to prevent bottle sway.
-
Choose early or mid-season potato varieties for better results in bottle gardens.
-
Reuse the soil by enriching it with fresh compost before planting a new crop.
Growing potatoes in bottles is not only practical but also an enjoyable gardening experiment. It’s a clever way to turn unused wall space into a productive food source while recycling plastic and minimizing waste. With the right care, your “potatoes in the air” will reward you with fresh, homegrown harvests right outside your door.


