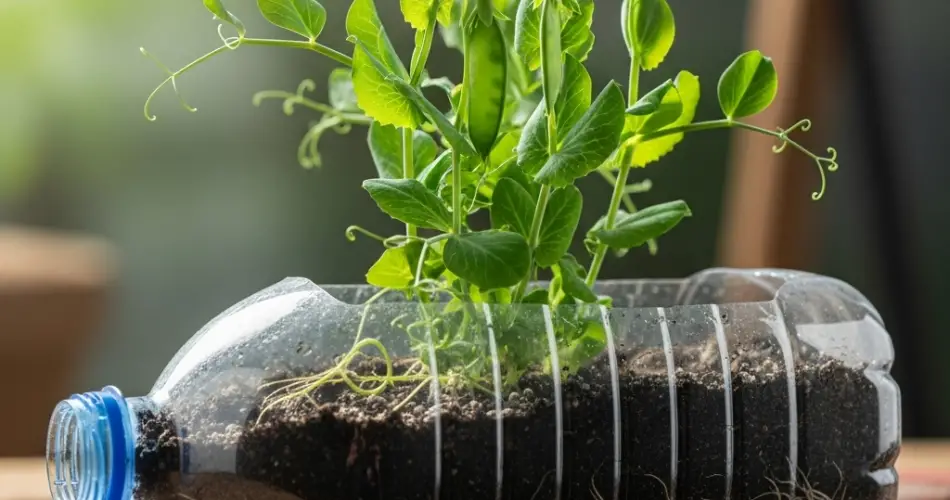
Starting pea seedlings in recycled bottles is an easy, cost-effective, and eco-friendly way to give your plants a strong head start before they’re moved to the garden or larger containers. This method creates a mini greenhouse environment that keeps the seedlings warm, protected, and well-hydrated—perfect for encouraging fast, healthy growth. Whether you have a small balcony or a full backyard, bottle starters can help you grow vigorous pea plants with minimal equipment.
Why Start Peas in Bottle Greenhouses?
Peas can be sown directly into the ground, but starting them in bottles offers several advantages:
-
Protection from Pests – Young sprouts are often a target for birds, slugs, and insects. The bottle cover acts as a shield.
-
Controlled Conditions – Inside a bottle, moisture and warmth remain consistent, which speeds up germination.
-
Portability – Bottle starters can be moved to sunnier spots or sheltered areas depending on the weather.
-
Waste Reduction – Reusing bottles helps reduce plastic waste while providing an inexpensive gardening tool.
-
Extended Growing Season – By starting indoors or in sheltered spaces, you can get an earlier harvest.
Materials You’ll Need
-
Clear plastic bottles (1.5–2 liters are ideal)
-
Pea seeds (choose varieties suited to your climate)
-
Quality seed-starting mix or potting soil
-
Clean water
-
Scissors or a utility knife
-
Spray bottle for gentle watering
-
A small stick or pencil for making planting holes
Step-by-Step Guide
Step 1: Prepare the Bottles
Wash each bottle thoroughly to remove any dirt or residue. Cut the bottle horizontally about two-thirds of the way up from the base. The lower portion will hold the soil and seeds, while the top half will serve as the greenhouse lid. Keep the bottle cap on during the early germination phase to trap humidity, but remove or loosen it later for ventilation.
Step 2: Add Soil
Fill the bottom section with 8–10 cm of seed-starting mix or potting soil. Gently press down the soil to remove large air pockets but avoid packing it too tightly—roots grow better in loose, well-aerated soil.
Step 3: Sow the Seeds
Make small holes about 3 cm deep using a pencil or stick. Drop one pea seed into each hole, spacing them evenly to give each seedling enough room to grow. Lightly cover with soil and water gently until the soil is evenly moist.
Step 4: Assemble the Greenhouse
Place the top part of the bottle back over the base. This creates a closed environment that traps moisture and warmth, encouraging rapid germination. If the weather is warm, you can slightly open the cap or lift the cover during the day to allow airflow and prevent overheating.
Step 5: Position for Optimal Growth
Place the bottles in a bright, warm location. Peas prefer cool but sunny conditions, so choose a spot with indirect light if temperatures are high. Check daily to ensure the soil stays lightly moist—use a spray bottle to avoid disturbing the seeds.
Step 6: Monitor and Ventilate
Pea seeds usually germinate within 7–10 days. Once you see seedlings emerging, start ventilating by opening the bottle cap or propping the cover slightly. This helps prevent fungal diseases caused by excessive moisture.
Step 7: Prepare for Transplanting
When seedlings reach 10–12 cm in height and have developed at least two sets of true leaves, they’re ready to move to a larger container or outdoor garden bed. Harden them off by placing them outside for a few hours each day, gradually increasing exposure to sunlight and outdoor temperatures over 4–5 days.
Step 8: Transplant Carefully
To transplant, separate seedlings gently, taking care not to damage their delicate roots. Plant them in well-prepared soil with good drainage and water thoroughly after planting.
Tips for Success
-
Drainage Holes – Make small holes in the bottom of each bottle to prevent water from pooling at the roots.
-
Avoid Overcrowding – Limit to 2–3 seeds per bottle to ensure each plant has enough space.
-
Rotate the Bottles – Turn the bottles daily so seedlings grow straight rather than leaning toward the light.
-
Support Early – If transplanting into containers, add a small trellis or support structure early to prevent root disturbance later.
Why This Method Works
The bottle greenhouse works so well because it creates a stable, humid environment that speeds up germination while protecting the seeds from external stress. The transparent walls allow sunlight in while maintaining warmth, making it an ideal microclimate for peas.
This method is especially helpful in unpredictable weather conditions, where outdoor sowing might be delayed or seedlings might be damaged by frost, pests, or sudden temperature swings. By starting your peas in bottles, you’re giving them a protected, nutrient-rich environment in which to develop strong roots and sturdy stems before they face outdoor challenges.
With just a few recycled bottles and some basic gardening supplies, you can easily grow healthy pea seedlings that are ready to thrive in the garden. This simple yet effective technique is a great example of how creative, sustainable gardening can produce excellent results without the need for expensive equipment.


