Kale is a nutrient-packed leafy green that’s become a favorite among health-conscious eaters and home gardeners alike. Known for its rich content of vitamins A, C, and K, as well as calcium and antioxidants, kale is a true superfood. Fortunately, you don’t need a large garden to enjoy its benefits—growing kale in containers is an easy, space-efficient solution perfect for urban living.
Whether you’re working with a balcony, patio, or sunny kitchen corner, you can grow your own kale with just a pot, some soil, and a little care. Container gardening not only allows people with limited space to grow fresh produce but also makes plant maintenance more convenient and manageable.
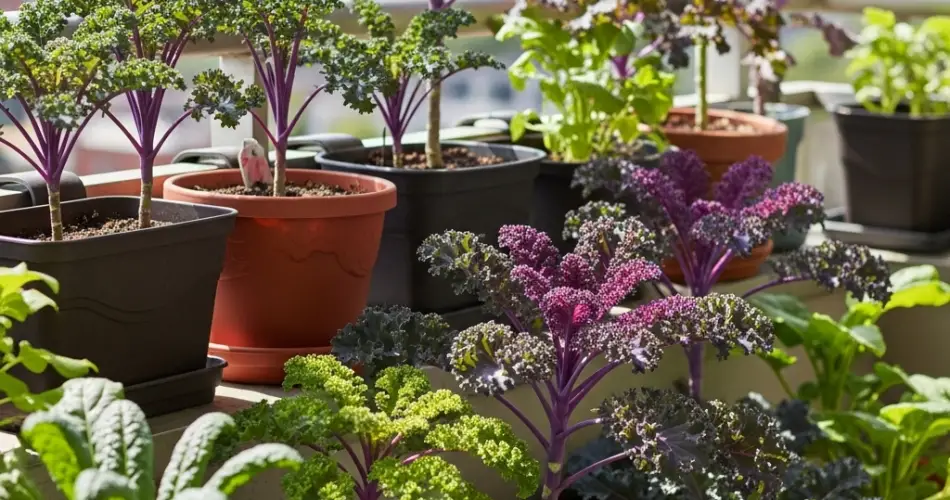
Why Grow Kale in Containers?
Container gardening offers a host of benefits, especially for urban dwellers. It allows you to:
-
Grow fresh food in tight spaces
-
Control soil quality and drainage
-
Move plants for optimal sunlight or to protect from harsh weather
-
Reduce weed and pest problems
Kale, in particular, is an excellent candidate for containers. It’s hardy, resilient, and thrives in cooler temperatures—making it suitable for most growing seasons, including fall and winter in many climates.
Choosing the Right Kale Variety
Several kale varieties are well-suited for container growing. Here are a few top choices:
-
Curly Kale (Scots Kale): Known for its ruffled leaves and vibrant green color. It’s cold-hardy and great for salads and smoothies.
-
Lacinato Kale (Dinosaur or Tuscan Kale): Features dark green, blistered leaves. It’s slightly sweeter and less bitter than curly kale.
-
Red Russian Kale: Has flat, tender leaves with purple stems—ideal for stir-fries and sautéed dishes.
All of these varieties grow well in pots and can be harvested continuously, providing weeks of nutritious greens.
What You’ll Need
Before you get started, gather the following materials:
-
A container that’s at least 12 inches deep and wide
-
High-quality potting mix (preferably organic and well-draining)
-
Kale seeds or starter plants
-
Compost or slow-release fertilizer
-
Watering can or spray bottle
-
A sunny spot (balcony, patio, or windowsill)
How to Plant Kale in Containers
-
Choose the Container: Select a container with good drainage holes. Larger containers are better since kale has a relatively wide root system. A 5-gallon pot can comfortably support one to two kale plants.
-
Prepare the Soil: Fill the pot with a rich potting mix. Kale prefers slightly acidic to neutral soil (pH 6.0–7.0). You can mix in compost or organic fertilizer to boost nutrients.
-
Plant the Seeds or Seedlings:
-
From seeds: Sow them ¼ to ½ inch deep. Space them about 8–12 inches apart if using a large container.
-
From transplants: Gently loosen the root ball and plant at the same depth it was growing in its nursery pot.
-
-
Water Thoroughly: After planting, water the soil gently until it’s evenly moist. Keep the soil damp but not soggy throughout the growing season.
Sunlight and Temperature Needs
Kale grows best in cool weather and prefers 4–6 hours of sunlight daily. In warm or tropical climates, offer partial shade during the hottest part of the day to prevent the leaves from becoming tough or bitter.
During colder months, kale thrives and becomes even sweeter after exposure to a light frost. In hot weather, it may bolt or stop growing, so consider using shade cloths or moving pots to a cooler location.
Ongoing Care and Maintenance
-
Watering: Regular watering is key. Kale doesn’t like to dry out completely. Check the soil frequently and water when the top inch feels dry.
-
Feeding: Fertilize with compost tea or a balanced organic fertilizer every 3–4 weeks to encourage lush growth.
-
Pest Control: Watch for aphids, cabbage worms, and flea beetles. Use neem oil, insecticidal soap, or hand-pick pests as needed.
-
Pruning: Remove any yellow or damaged leaves to keep the plant healthy and prevent disease spread.
Harvesting Kale
You can begin harvesting kale about 30–45 days after planting or once the leaves are about the size of your hand. Use scissors or garden shears to snip the outer, older leaves, leaving the inner ones to continue growing. This “cut-and-come-again” method allows for continuous harvests over several weeks or even months.
For the most tender and flavorful leaves, pick kale in the morning when it’s cool and before the sun has a chance to wilt the leaves.
Tips for Success
-
Succession Planting: Sow a new batch of seeds every few weeks for a continuous harvest.
-
Rotate Pots: If sunlight is uneven, rotate containers every few days to ensure even growth.
-
Winter Growing: In cooler climates, kale can often survive light frost. In colder zones, move pots indoors near a sunny window or into a cold frame.
-
Use Mulch: Mulching helps retain moisture, regulate temperature, and suppress weeds even in pots.
Final Thoughts
Kale is a resilient and nutritious crop that’s perfect for container gardening. With minimal space and effort, you can grow your own supply of leafy greens right on your balcony, patio, or windowsill. Whether you’re adding it to smoothies, soups, or salads, kale from your own pots will be fresher and more flavorful than anything from the store. It’s the ultimate urban gardening solution for those looking to eat healthy and grow sustainably—even in the heart of the city.


